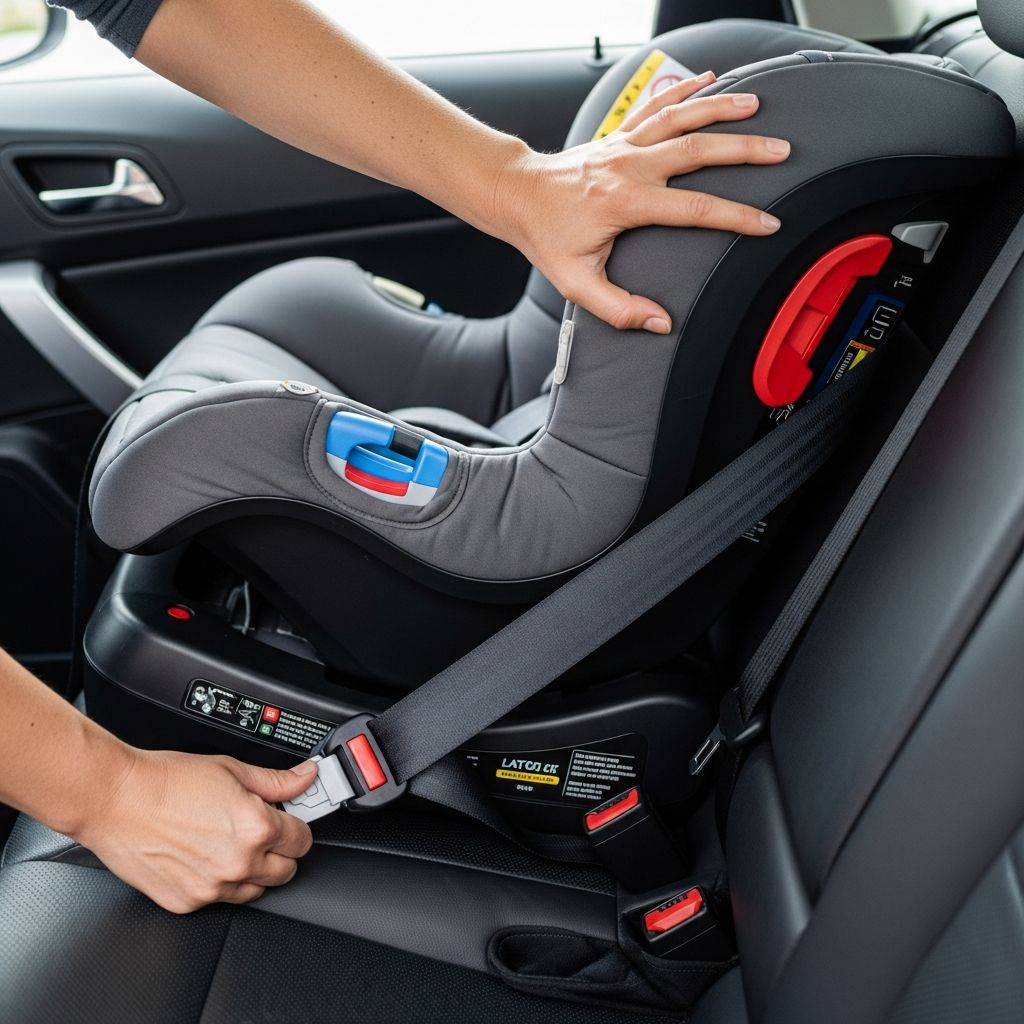
Properly installing and buckling a baby into a car seat is critical for their safety during vehicle travel. According to the National Highway Traffic Safety Administration (NHTSA), correct installation reduces injury risk significantly in crashes. This guide provides detailed steps, best practices, and checks to ensure your setup meets federal standards.
Understanding Car Seat Basics and Types
Car seats are designed for specific age, weight, and height ranges, starting with rear-facing infant seats from birth. Rear-facing positions best protect a baby’s head, neck, and spine in frontal collisions. Transition to forward-facing seats around age 2, then boosters, always following manufacturer limits.
- Rear-Facing Infant Seats: For newborns to about 30-35 pounds; cradle the body at a 30-45 degree angle.
- Convertible Seats: Rear-facing then forward-facing; versatile for growing children.
- All-in-One Seats: Cover rear-facing, forward-facing, and booster stages.
Always register your car seat with the manufacturer for recall alerts, as recommended by NHTSA.
Choosing the Right Installation Location
The rear middle seat offers optimal protection if LATCH anchors are available and the seat fits well. Avoid front seats with active airbags for rear-facing installations, as they pose deployment risks. Check your vehicle’s manual for compatible positions and any center hump issues that might affect stability.
| Seat Position | Pros | Cons |
|---|---|---|
| Rear Middle | Best crash protection from all sides | May lack LATCH; narrower fit |
| Rear Outboard | Easier LATCH access | Side impact exposure |
| Front Passenger | Convenient monitoring | Never for rear-facing; airbag danger |
Installation Methods: LATCH vs. Seat Belt
Use either the LATCH system (Lower Anchors and Tethers for Children) or vehicle seat belt, but never both simultaneously, as this can compromise stability. LATCH is ideal for lighter children up to 40-65 pounds total weight (child plus seat), per manuals. For forward-facing seats, always attach the top tether to an anchor point.
Step-by-Step LATCH Installation
- Locate lower anchors in your vehicle, typically between seat cushions.
- Extend LATCH connectors from the car seat base; ensure rigid or flexible straps are untwisted.
- Thread connectors into vehicle anchors with a clicking sound; pull firmly to confirm attachment.
- Tighten straps until no slack remains; use the inch test (see below).
- For forward-facing, hook the top tether to the rear anchor and tighten.
Seat Belt Installation Process
- Route the lap/shoulder belt through the car’s seat belt path, as indicated by the blue label on the seat.
- Buckle it, then lock the belt using your vehicle’s method (e.g., pull slowly then jerk for locking retractor).
- Remove slack by pushing down on the seat while pulling the shoulder belt tight.
- Perform the inch test for security.
The Centers for Disease Control and Prevention (CDC) emphasizes checking both car seat and vehicle manuals for compatibility.
Performing the Critical Inch Test
After installation, grasp the car seat at the belt path or LATCH strap location. Shake side-to-side and front-to-back; movement should not exceed 1 inch total. If it does, reinstall. Many seats have built-in angle indicators—ensure the bubble stays within marked lines for proper recline.
Securing Your Baby in the Harness
Once installed, buckling the baby correctly is equally vital. Straps must be snug; loose fits double injury risk.
Harness Adjustment Steps
- Shoulder Straps: Rear-facing: at or below shoulders; forward-facing: at or above. No twists or bubbles—flatten by pinching at collarbone.
- Chest Clip: Align at armpit level to prevent shoulder slip in crashes.
- Crotch Buckle: Ensure baby sits all the way down against the seat bottom.
- Tighten Harness: Pinch test at shoulders—if you can grab fabric, tighten more. Only one flat layer of clothing allowed; skip puffy coats.
Buckle bottom first, then straps, snap chest clip, and pull adjustment strap to cinch.
Common Mistakes and How to Avoid Them
Avoid these pitfalls for maximum protection:
- Using both LATCH and seat belt—pick one.
- Aftermarket accessories like pads or mirrors—they can become projectiles.
- Bulky clothing compressing under straps—dress baby after buckling thin layers.
- Improper recline angle—use indicators to prevent head flop.
- Skipping manuals—keep car seat and vehicle guides accessible.
Age-Appropriate Transitions and Checks
Monitor growth monthly. Rear-facing until at least age 2 or max limits; forward-facing harness to 40-65 pounds; boosters until seat belt fits adult-like (5’9″, 13+ years). Get free inspections at certified stations via NHTSA locator.
Frequently Asked Questions (FAQs)
What if my car seat moves more than an inch after installation?
Reinstall using the other method (LATCH or belt) or try a different position. Consult manuals and seek a professional inspection.
Can I use LATCH for heavier children?
No, switch to seat belt when child + seat exceeds LATCH limit (often 40-65 lbs total)—check labels.
How tight should the harness be on my baby?
Snug enough for pinch test failure at shoulders; chest clip at armpits; no more than one finger under straps at chest.
Is the center seat safest?
Yes, if installable securely; otherwise, rear outboard with LATCH.
When should I use the top tether?
Always for forward-facing seats with LATCH or belt, if available.
Advanced Safety Tips for Long-Term Use
Winterize safely with thin layers and blankets over harness post-buckling. Clean spills promptly without harsh chemicals. Replace seats after crashes or if over 6-10 years old (per expiration). NHTSA stresses understanding all parts: lower anchors, tethers, harness slots.
Vehicle variations matter—test installs in every car used. Chicco advises angle checks via bubble levels for stability. Safety 1st warns against twisted straps or loose clips.
Empower yourself with practice: Dry-run installs without baby. Videos from certified sources reinforce techniques.
References
- Car Seat Installation DOs and DON’Ts — Safety 1st. Accessed 2026. https://safety1st.com/blogs/safety-1st-blog/car-seat-installation-dos-and-don-ts
- Infant Car Seat Installation — YouTube (transcript). Accessed 2026. https://www.youtube.com/watch?v=ozd0f-167h8
- Car Seat Installation: Step-by-Step Guide — Chicco USA. Accessed 2026. https://www.chiccousa.com/child-safety/installing-a-car-seat/
- Car Seat & Booster Seat Safety, Ratings, Guidelines — NHTSA. 2025-01-16. https://www.nhtsa.gov/equipment/car-seats-and-booster-seats
- Resources | Child Passenger Safety — CDC. Accessed 2026. https://www.cdc.gov/child-passenger-safety/resources/index.html
- Car Seat Safety and Installation Tips — Advocate Aurora Health. Accessed 2026. https://www.aahealth.org/family-health/infant-children-and-adolescent-services/car-seat-safety-and-installation-tips