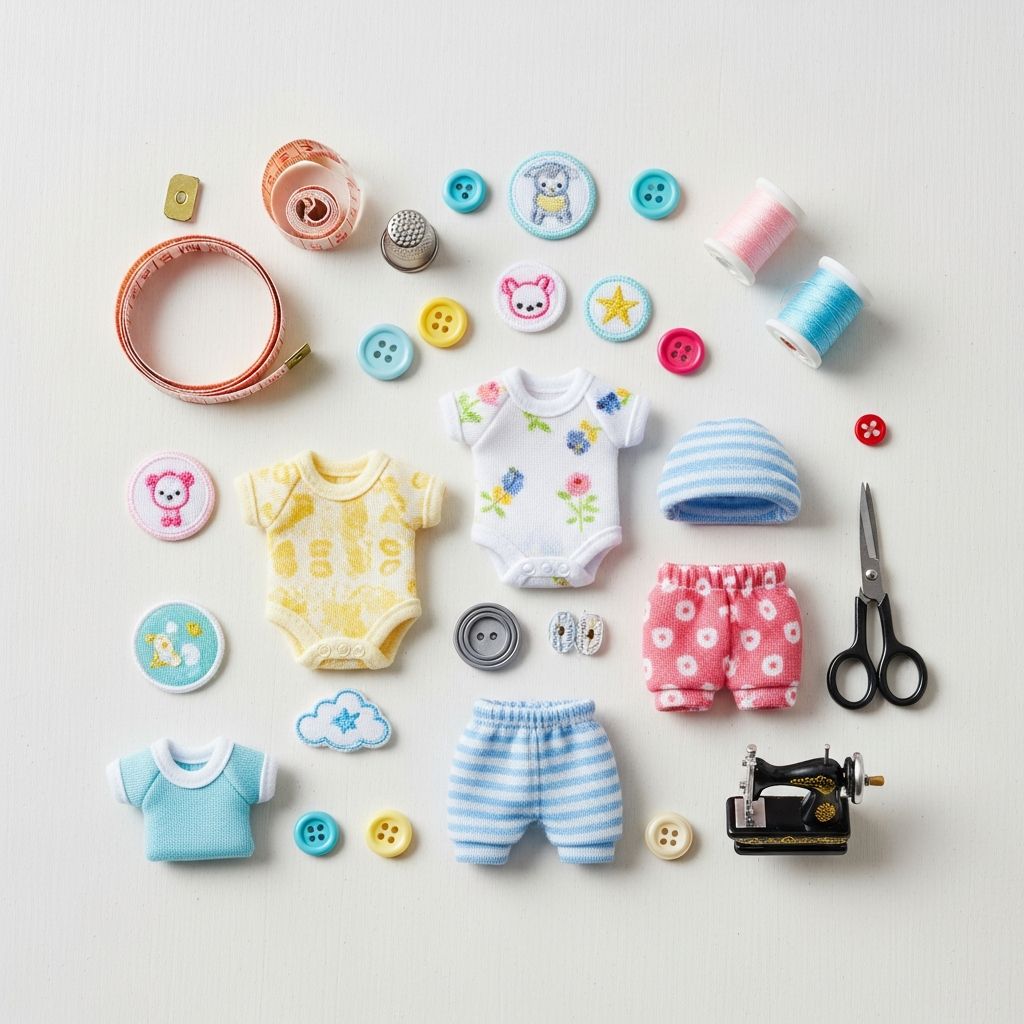
Designing your own baby clothes is a fun way to celebrate your little one’s personality, create memorable gifts, and stretch your budget with unique, handmade pieces. With a few basic supplies and simple techniques, anyone can transform plain bodysuits, T-shirts, and leggings into custom outfits that feel special and personal.
This guide walks through planning your designs, choosing safe materials, decorating with several different methods, and caring for your creations so they last through plenty of washing and wearing.
Why Personalize Baby Clothes?
There are many reasons parents, relatives, and friends fall in love with DIY baby clothes. Beyond the cute factor, customizing outfits can be practical, meaningful, and surprisingly budget-friendly.
- Celebrate milestones: Mark first holidays, monthly photos, and new achievements with outfits that highlight the occasion.
- Create keepsakes: Handmade pieces can be saved in memory boxes and passed down to siblings or future generations.
- Stay on budget: Simple basics are often cheap; design work lets you make them look boutique-worthy without the price tag.
- Give thoughtful gifts: Personalized clothes stand out at baby showers and are more likely to be cherished and remembered.
- Enjoy the process: Crafting offers a relaxing, creative outlet during a season of life that can feel hectic.
Planning Your Baby Outfit Designs
A little planning helps you make clothes that are adorable, comfortable, and easy to use in everyday life. Before you open the paints or plug in a cutting machine, think through a few key questions.
Choose the Right Garments
Start with pieces that are simple and soft. Flat, smooth surfaces are much easier to decorate than ruffles, pleats, or heavily textured fabrics.
- Cotton bodysuits/onesies in white or light colors
- Plain knit hats and beanies
- Footed pajamas with minimal seams across the chest
- Soft leggings or pull-on pants
- Simple bibs and burp cloths
Buying multipacks of basics in neutral tones gives you freedom to experiment without worrying too much about mistakes.
Pick a Theme or Style
Deciding on a general style makes it easier to create outfits that feel cohesive. You can always mix and match, but having a direction keeps you from feeling overwhelmed by choices.
- Minimalist: Simple shapes, small icons, and neutral colors
- Playful: Bold colors, cartoon animals, and speech bubbles
- Nature-inspired: Leaves, mountains, clouds, and stars
- Vintage: Script fonts, muted color palettes, and classic motifs
- Family-focused: Names, initials, and references to siblings or grandparents
Decide What Goes Where
Placement matters both for looks and for comfort. A clever phrase across the chest might be adorable, but bulky applications can feel stiff or scratchy if they cross seams and snaps.
| Area | Best For | What to Avoid |
|---|---|---|
| Center chest | Short phrases, simple illustrations, monograms | Very thick patches or multi-layer vinyl on tiny sizes |
| Upper back | Names, jersey-style numbers, large motifs | Designs that extend onto neck seams |
| Sleeves | Small icons, simple stripes, tiny words | Long phrases that wrap completely around the sleeve |
| Legs | Knees-up patterns, vertical designs, small animals | Heavy embellishments over knees that might rub |
| Bottom/bum area | Cute graphics and fun messages visible over diapers | Anything bulky that could interfere with diaper fit |
Safety First: Materials and Design Choices
Because babies put everything in their mouths and have sensitive skin, safety must guide every design decision. Cute is important, but comfort and health always come first.
Safe Fabrics and Base Layers
Whenever possible, choose breathable, soft fabrics as your base—especially for pieces worn directly against the skin.
- Prefer 100% cotton or cotton-rich blends for bodysuits and T-shirts.
- Avoid scratchy or stiff fabrics on the inside of garments.
- Check tags for “flame resistant” on sleepwear, and do not alter that fabric with flammable coatings.
What to Avoid on Baby Clothes
Certain decorations that work for adult clothes are not suitable for babies. Avoid any embellishment that can detach, irritate the skin, or pose a choking hazard.
- Loose buttons, rhinestones, beads, or sequins
- Metallic charms and dangling decorations
- Rough appliqués on the inside of the garment
- Strong glues or solvent-based products with strong fumes
- Drawstrings or long ribbons around the neck or hood area
Decoration Methods: From No-Sew to Advanced
There are many ways to customize baby clothes, whether you prefer fast, no-sew options or more advanced sewing and embroidery projects. You can even mix techniques for a layered, textured look.
No-Sew: Fabric Markers and Paints
Fabric markers and paints are ideal for beginners. They allow for freehand designs, hand-lettering, and stamping without special equipment.
- Look for non-toxic, washable fabric markers labeled “child safe.”
- Place a piece of cardboard inside the garment to prevent ink from bleeding through.
- Sketch your design lightly in pencil on paper first, then transfer to fabric.
For fabric paints, use small brushes or foam stamps to keep lines clean. Let each color dry before adding another to prevent smudging.
Iron-On Transfers and Heat-Applied Vinyl
Iron-on transfers and heat-transfer vinyl (HTV) are perfect for crisp shapes, logos, and text. Many craft stores sell pre-cut designs, while cutting machines let you create fully custom graphics.
- Wash new garments first to remove finishes that can prevent proper adhesion.
- Follow time and temperature instructions exactly for a secure bond.
- Always cover the vinyl or transfer paper with a thin pressing cloth to protect it.
Keep vinyl layers thin and flexible, especially on tiny sizes, so the garment remains soft for sleeping and snuggling.
Appliqué and Simple Sewing
Appliqué adds color and pattern with small pieces of fabric sewn onto a base garment. This method is ideal for hearts, stars, initials, and animal silhouettes.
- Use soft fabrics such as cotton knit or flannel for appliqués.
- Secure edges with a tight zigzag or blanket stitch to prevent fraying.
- Trim any loose threads on the inside so nothing tickles or irritates baby’s skin.
If sewing skills are basic, start with large, simple shapes and practice on scrap fabric before stitching onto a garment.
Embroidery and Hand-Stitch Details
Hand embroidery is slower but adds a charming, heirloom touch. A small stitched heart or a line of decorative stitching can transform an otherwise plain outfit.
- Keep stitches small and secure, knotting thread ends firmly.
- Use soft embroidery floss and avoid bulky knots directly against the skin.
- Limit embroidery to small areas so the fabric stays flexible and comfortable.
Step-by-Step: Designing a Simple Custom Onesie
To bring everything together, here is a basic process you can adapt to nearly any baby garment. Adjust the details depending on your chosen decoration method.
1. Prepare the Garment
- Wash and dry the onesie or shirt without fabric softener so paint or vinyl adheres well.
- Iron it flat to remove wrinkles that might distort the design.
- Slide a piece of cardboard or thick paper inside to protect the back layer.
2. Plan and Position the Design
- Lightly mark the center front using a removable fabric pen or tailor’s chalk.
- Use masking tape to create straight guidelines for text or stripes.
- Lay out stencils, appliqué pieces, or vinyl elements before attaching anything permanently.
3. Apply Your Chosen Technique
The exact steps will vary, but the overall flow is similar regardless of method.
- For markers/paint: Work from light colors to dark, letting each section dry thoroughly.
- For iron-ons/HTV: Press firmly for the recommended time, then let the garment cool before peeling backing.
- For appliqué/embroidery: Pin pieces in place, then sew slowly, keeping stitches even.
4. Set and Test the Design
- Heat-set fabric paints and markers if recommended by the manufacturer (usually by ironing on the reverse side).
- Stretch the fabric gently in several directions to make sure nothing cracks or lifts.
- Check the inside of the garment for any rough spots and cover them with a soft backing if needed.
Ideas and Inspiration for Themes
Once you learn a few basic techniques, you can create collections of outfits around a theme. This is especially useful for photo shoots, baby shower gifts, or siblings who like to match.
Monthly Milestone Outfits
Instead of buying a new printed onesie every month, design a set that grows with your baby or reuse the same garment with removable props.
- Create 12 circular patches with numbers and cute graphics that fasten to a single plain onesie using snaps or hook-and-loop dots on the outer layer only.
- Alternatively, decorate a series of bibs with months or milestones so the same basic outfit can work for many photos.
Seasonal and Holiday Collections
Simple iconography goes a long way for holidays. Focus on two or three main colors and a small set of shapes that can be reused in different combinations.
- Snowflakes, mittens, and stars for winter
- Flowers, raindrops, and umbrellas for spring
- Sun motifs, fruit, and ice-cream cones for summer
- Leaves, acorns, and cozy mugs for autumn
Pair a themed top with plain leggings for everyday wear, then add a coordinated hat or bib to dress it up for photos.
Family and Name-Based Designs
Family references always feel personal. They can also help when taking group photos where you want each person’s role visible.
- Use initials on hats or chest pockets.
- Create matching “team” outfits for siblings with numbers or title words.
- Design coordinating sets such as “mini” for baby and “mama” or “dad” for parents.
Making Designs Last: Washing and Care Tips
Baby clothes endure frequent washing, so designing with durability in mind is essential. The right care routine will keep colors bright and graphics intact.
Washing and Drying Best Practices
- Turn decorated garments inside out before washing.
- Use mild, baby-safe detergent and cool or warm water.
- Avoid bleach, harsh stain removers directly on the design, and very high dryer heat.
- Line dry when possible, or use a low-heat setting to protect vinyl and paint.
Repairs and Touch-Ups
Over time, designs may crack or fade slightly. Some minor issues can be fixed so the garment can keep living as a play outfit or hand-me-down.
- For peeling vinyl, cover with a pressing cloth and reapply heat and firm pressure.
- For small paint chips, lightly touch up with matching fabric paint and heat-set again.
- For loose appliqué edges, resew with tight stitches and trim any frayed threads.
Organizing and Storing Handmade Pieces
As you create more custom pieces, it becomes helpful to keep them organized. This prevents outgrowing outfits before they are worn and makes it easier to grab the right size quickly.
- Sort outfits by size in labeled bins or drawers.
- Keep “special occasion” clothes together so they are easy to find for holidays and photos.
- When a favorite piece is outgrown, decide whether to save it in a keepsake box, pass it on to a friend, or repurpose the design into a quilt or wall art.
Frequently Asked Questions (FAQs)
1. Do I need crafting experience to design baby clothes?
No. Many techniques, such as using fabric markers or pre-cut iron-on designs, are beginner-friendly and require no sewing background. Start simple, and your skills will grow as you experiment.
2. Which sizes are best to decorate?
Newborn pieces are adorable but sometimes worn only a few times. Decorating sizes 3–6 months and 6–12 months ensures that your creations will fit long enough to be enjoyed in daily life and photos.
3. How can I be sure the materials are safe for babies?
Read product labels carefully and look for non-toxic, water-based, and child-safe descriptions. Test new inks or paints on a small fabric scrap, wash it, and check for changes before using them on garments that will be worn.
4. Can I customize second-hand or hand-me-down clothes?
Yes. Pre-loved items are excellent bases for new designs as long as the fabric is still in good condition. Adding a fresh graphic or appliqué can cover small stains and give the garment a new life.
5. What makes a personalized baby outfit a good gift?
Thoughtful details make all the difference. Using the baby’s name, family jokes, favorite colors, or nursery themes shows that the outfit was made with that particular child in mind, turning an ordinary item into a meaningful keepsake.
With a few simple tools and a bit of creativity, anyone can design baby clothes that are comfortable, safe, and full of personality. Whether you are crafting for your own child or making gifts for someone else, each handmade outfit tells a story that store-bought clothes simply cannot match.