Keeping your baby’s feeding gear truly clean can feel like a full-time job, especially in the first months when bottles, pump parts, and pacifiers seem to multiply in the sink. Sterilizing is an extra layer of protection on top of washing, designed to reduce germs more thoroughly than hot soapy water alone. Choosing the right bottle sterilizer can save you time, offer peace of mind, and fit smoothly into your already-busy routine.
Why Sterilizing Baby Bottles Matters
Newborns and young babies have developing immune systems, which makes them more vulnerable to bacteria, mold, and viruses that may linger on feeding equipment. While routine washing removes most visible residue, sterilizing aims to drastically reduce the number of microorganisms on the surfaces that touch your baby’s milk or formula. This can be especially helpful for premature babies, infants with medical conditions, or families using well water.
For many families, regular sterilizing is most important in the early months and during or after illness in the household. As babies begin to crawl, explore, and put everything in their mouths, the environment becomes less sterile by nature, and many pediatric providers suggest that constant sterilizing becomes less critical. Still, having a convenient method available allows you to step up hygiene when you feel it is needed.
How Sterilizers Actually Work
Bottle sterilizers rely on either high temperature or specific wavelengths of light to damage or destroy microorganisms. Steam-based devices raise water to near-boiling, surrounding bottles and parts with hot vapor. UV sterilizers expose items to ultraviolet light within an enclosed chamber, disrupting the DNA or RNA of many germs so that they can no longer multiply.
Most modern units aim to eliminate the vast majority of common household bacteria and some viruses when used correctly and for the full cycle time. However, effectiveness always depends on using clean, disassembled items and following manufacturer instructions closely. No sterilizer replaces thorough washing; instead, it is a final step intended to reduce risk further.
Main Types of Baby Bottle Sterilizers
Different households will gravitate toward different styles, depending on kitchen layout, budget, travel habits, and how many bottles are in daily rotation. Understanding the main categories will help narrow your options before comparing specific models.
Electric Steam Countertop Sterilizers
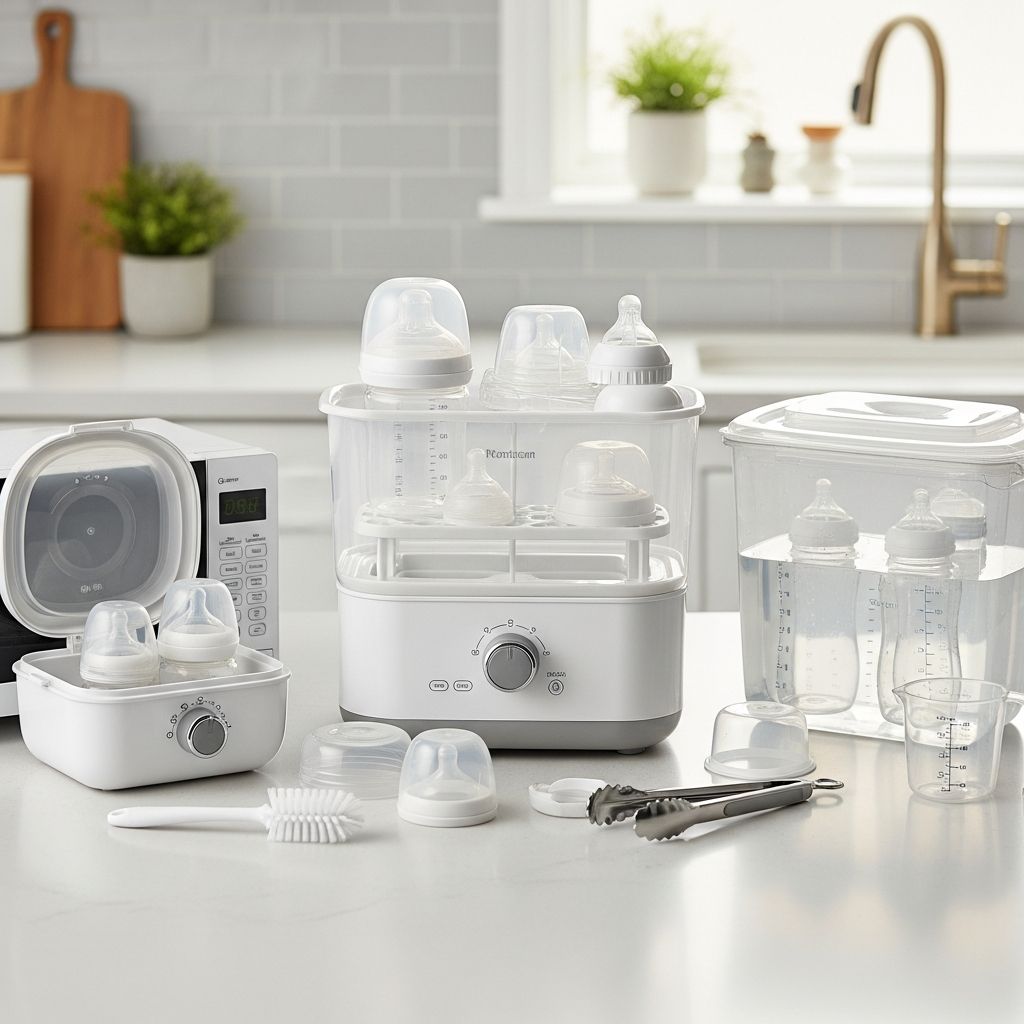
Electric steam sterilizers sit on the counter and plug into a wall outlet. You add a measured amount of water, place cleaned bottles and accessories inside, and press a button to run an automated cycle. Many include racks, trays, or posts to keep small items separated and exposed to the steam.
- Advantages: Fast cycles compared with some other methods; often large capacity; hands-off operation.
- Considerations: Takes up permanent counter space; heating plate may need regular descaling; requires access to an outlet and flat surface.
Microwave Steam Sterilizers
Microwave sterilizers are usually plastic containers with a fitted lid that you partially fill with water and then place into your microwave. The microwave energy boils the water inside the container, generating steam that sterilizes the contents. These units are typically lighter and more compact than electric models.
- Advantages: Budget-friendly; lightweight; easy to store when not in use; no additional appliance to plug in.
- Considerations: Dependent on microwave size and power; you must handle hot containers carefully; capacity may be limited in smaller models.
UV Light Sterilizers
UV sterilizers use internal lamps or LEDs that emit ultraviolet light inside a reflective chamber. Bottles and small accessories are arranged on racks or trays while a timed cycle runs. Some models double as storage cabinets, keeping items inside to reduce recontamination between uses.
- Advantages: No water required; no mineral buildup on a heating plate; often includes a drying or low-heat function to prevent moisture.
- Considerations: Generally higher upfront cost; cycles can be longer than some steam options; replacement of UV bulbs or internal components may be needed over time.
Cold-Water Sterilizing Systems
Cold-water systems rely on a specially formulated sterilizing solution mixed with tap water in a lidded container. Items are fully submerged for a specified amount of time, and can often remain in the solution for several hours while staying sterile.
- Advantages: No electricity required; helpful during travel or power outages; can be very cost-effective.
- Considerations: Requires regular replacement of solution; some parents dislike chemical smells; waiting times can be longer; careful handling is needed to avoid skin irritation.
Portable and Travel Sterilizers
Portable solutions include compact steam units, microwave bags, UV wands, or small UV cases designed for pacifiers and bottle nipples. These are aimed at families who are frequently on the go or who need a minimal solution for daycare, road trips, or flights.
- Advantages: Lightweight; space-saving; often very quick for single items like pacifiers.
- Considerations: Limited capacity; may be best as a supplement rather than your only sterilizing method.
Key Features to Compare Before You Buy
Once you know which general style fits your lifestyle, it helps to look closely at how specific models handle capacity, runtime, ease of maintenance, and extra conveniences. The right combination can make daily bottle prep far less stressful.
Capacity and Layout
Think about how many bottles you use in a typical day and whether you also need to sterilize pump parts, teethers, or utensils. Some sterilizers advertise large capacity but require careful stacking, which can be frustrating if you are in a hurry. Internal racks, posts, and baskets that keep items from touching can improve steam or light coverage and make loading more intuitive.
Parents who exclusively pump or who feed multiples may prefer larger towers or modular units that can be used in different configurations. If your kitchen is small, a more compact footprint may be worth sacrificing a bottle or two in capacity, especially if you can run frequent, shorter cycles during the day.
Cycle Length and Functions
Cycle duration can vary widely. Some fast steam models promise complete cycles in under 10 minutes, while others take longer but include extended drying or storage modes. UV designs may run longer cycles at lower heat, which can be gentler on certain plastics and silicone components.
Extra functions to look for include:
- Separate sterilize-only and sterilize-plus-dry modes.
- Programmable timers or delayed start.
- Automatic shut-off at the end of the cycle.
- Storage modes that keep items sterile for a set period as long as the lid remains closed.
Drying and Storage Options
Moisture left on surfaces can encourage new germ growth, especially if bottles are left assembled while still damp. Some premium electric and UV units offer forced-air drying and low-heat circulation so that everything comes out ready to use or store. Others rely on you to air-dry items on a separate rack after sterilizing.
If counter space is limited, a sterilizer that also functions as a storage container can be particularly helpful. These designs keep surfaces enclosed and often maintain a sterile environment for many hours, as long as you do not open the lid or door. This can simplify bedtime routines, since night feed supplies can be prepared in advance.
Ease of Cleaning and Maintenance
Sterilizers that are hard to clean quickly become another chore. Look for models with removable trays and racks that can be washed in warm, soapy water, and designs that allow you to see and reach the entire interior. A smooth heating plate that can be descaled with a simple vinegar or manufacturer-recommended solution can extend the life of steam units.
UV devices avoid mineral buildup but require that the inner surfaces and sensors remain clear of residue to avoid blocking light. Check how easy it is to access the bulb or LEDs if they ever need replacement, and whether the manufacturer offers simple maintenance instructions and available spare parts.
Safety Features and Materials
Hot steam and electricity near water always call for strong safety design. Key protections can include automatic shut-off when the water runs out, secure locking lids that prevent opening mid-cycle, and non-slip feet that keep the unit stable on the counter. Microwave-compatible units should be clearly labeled as such and able to withstand repeated heating.
Materials should be heat-resistant and free of unwanted compounds in food-contact areas. If you are concerned about plastic, consider where bottles and nipples rest during sterilizing and whether they will be exposed to very high heat or direct light over long periods. Always check your specific bottles for compatibility with the method you choose, especially if they contain specialized liners or vents.
Quick Comparison of Sterilizer Categories
The table below summarizes the main pros and cons of each common category to make side-by-side evaluation easier. Use it as a starting point to match your household’s needs to the right approach.
| Sterilizer Type | Typical Strengths | Typical Trade-offs | Best For |
|---|---|---|---|
| Electric steam countertop | Fast cycles; large capacity; often includes drying and storage features. | Higher cost than basic methods; occupies counter space; needs descaling. | Families using multiple bottles daily, exclusive pumpers, and households with a dedicated feeding station. |
| Microwave steam | Affordable; compact; simple design with few parts to maintain. | Depends on microwave size; handling hot container can be awkward; limited long-term storage. | Small kitchens, apartment living, and occasional sterilizing of a few bottles at a time. |
| UV sterilizer | No water or descaling; often gentle on components; can double as odor-free storage. | Higher initial price; cycles may be longer; bulbs or LEDs can require replacement. | Parents who prefer low-maintenance devices and want a combined sterilize, dry, and store solution. |
| Cold-water system | No power needed; flexible sizing; contents can remain immersed and sterile for hours. | Ongoing cost of solution; some dislike chemical smell; cycles usually slower. | Travel, houses with frequent power cuts, and parents who want a low-tech backup method. |
| Portable / travel | Lightweight; designed for single items; ideal for outings or daycare. | Very limited capacity; may not meet all daily sterilizing needs at home. | On-the-go families who want a supplemental option for pacifiers and occasional bottles. |
Practical Tips for Using a Sterilizer Safely
Whichever style you choose, safe and effective use starts before you turn the device on. Sterilizers are not a shortcut around washing; they work best on items that are already clean and free of visible milk residue. Taking a few extra seconds at each step can improve results and extend the life of your bottles as well as the appliance.
- Disassemble bottles fully, including nipples, collars, valves, and any internal vents, so all surfaces are exposed.
- Wash everything in warm, soapy water or a dishwasher cycle that is compatible with infant feeding equipment.
- Rinse thoroughly to remove detergent residue that might interfere with sterilizing or cause build-up.
- Follow the manufacturer’s recommended amount of water or solution; do not guess or overfill.
- Avoid stacking or nesting items so tightly that steam or light cannot reach in-between surfaces.
- Allow items to cool before handling to prevent burns, especially with steam-based methods.
How Often Should You Sterilize?
There is no single schedule that works for every family, but there are common patterns that many parents find practical. Some choose to sterilize all bottles and parts once a day, often in the evening, so that everything is reset for the next day. Others sterilize only new items and then again after illness or travel, relying on careful washing in between.
Your baby’s age, medical history, and feeding method may influence how often you feel comfortable sterilizing. If your pediatric provider has specific recommendations—especially for premature infants or babies with chronic health issues—those should always take priority over general advice. Above all, find a rhythm that you can maintain without added stress, since consistency is more important than aiming for perfection.
Budgeting and Long-Term Value
It is tempting to focus only on purchase price, but long-term value includes replacement parts, cleaning supplies, and how long the unit remains useful as your child grows. A more expensive model that combines sterilizing, drying, and storage may replace the need for several smaller accessories and save time every day. On the other hand, if you rarely bottle-feed, a simple microwave or cold-water system may be all you need.
Think ahead to future children or potential pumping needs, as well as whether the device can handle larger sippy cups, utensils, or small toys later on. Versatility can stretch the useful life of a sterilizer beyond the first year, making an initially higher investment more worthwhile in the long run.
Frequently Asked Questions About Bottle Sterilizers
Do I have to sterilize bottles after every single use?
Most healthy, full-term babies do not require that every bottle be sterilized after each feeding once basic newborn weeks have passed, as long as items are thoroughly washed and dried. Many parents choose a middle ground, sterilizing once a day or a few times per week, and stepping up frequency during illness or when water quality is uncertain.
Is boiling bottles on the stove as effective as a sterilizer?
Boiling is a traditional and effective way to reduce germs on heat-safe items, but it requires constant supervision, careful timing, and a large pot dedicated to baby gear. Some materials may degrade more quickly in rolling boiling water, and it can be challenging to prevent items from touching the bottom of the pot, where direct heat is strongest.
Are UV sterilizers safe for bottles and nipples?
Quality UV units are designed to keep light contained within the chamber and operate at intensities appropriate for common baby items. Over very long periods, any sterilization method has the potential to contribute to wear, so it is wise to inspect nipples and parts regularly for cracks, thinning, or stickiness and replace them as needed.
Can I sterilize breast pump parts in the same device?
Many sterilizers are compatible with pump parts, but always check both the pump manufacturer’s and the sterilizer manufacturer’s instructions before combining them. Small silicone valves, membranes, and tubing may require different treatment, and overexposure to heat or moisture can change how well they work.
What if I live in a small space with no counter to spare?
If counter space is at a premium, a microwave sterilizer, foldable drying rack, or UV unit that can be tucked into a cabinet may be more practical than a large countertop appliance. Cold-water systems that can be stored under the sink between uses are another flexible option for compact kitchens.
How long do items stay sterile after a cycle ends?
Many manufacturers state that items remain sterile for a limited time—often several hours—if the lid or door is not opened and the contents remain sealed. Once you open the container or handle items, regular household exposure begins again, so consider preparing and storing bottles soon after the cycle completes.
Bringing It All Together
Selecting a bottle sterilizer is less about chasing a single “best” product and more about choosing the method that fits your home, your baby, and your routine. By understanding the basic technologies, comparing capacity and features, and thinking realistically about how often you will use the device, you can invest in a solution that makes daily feeding safer and simpler. The goal is not sterile perfection, but a manageable, consistent approach that supports your baby’s health and your own peace of mind.