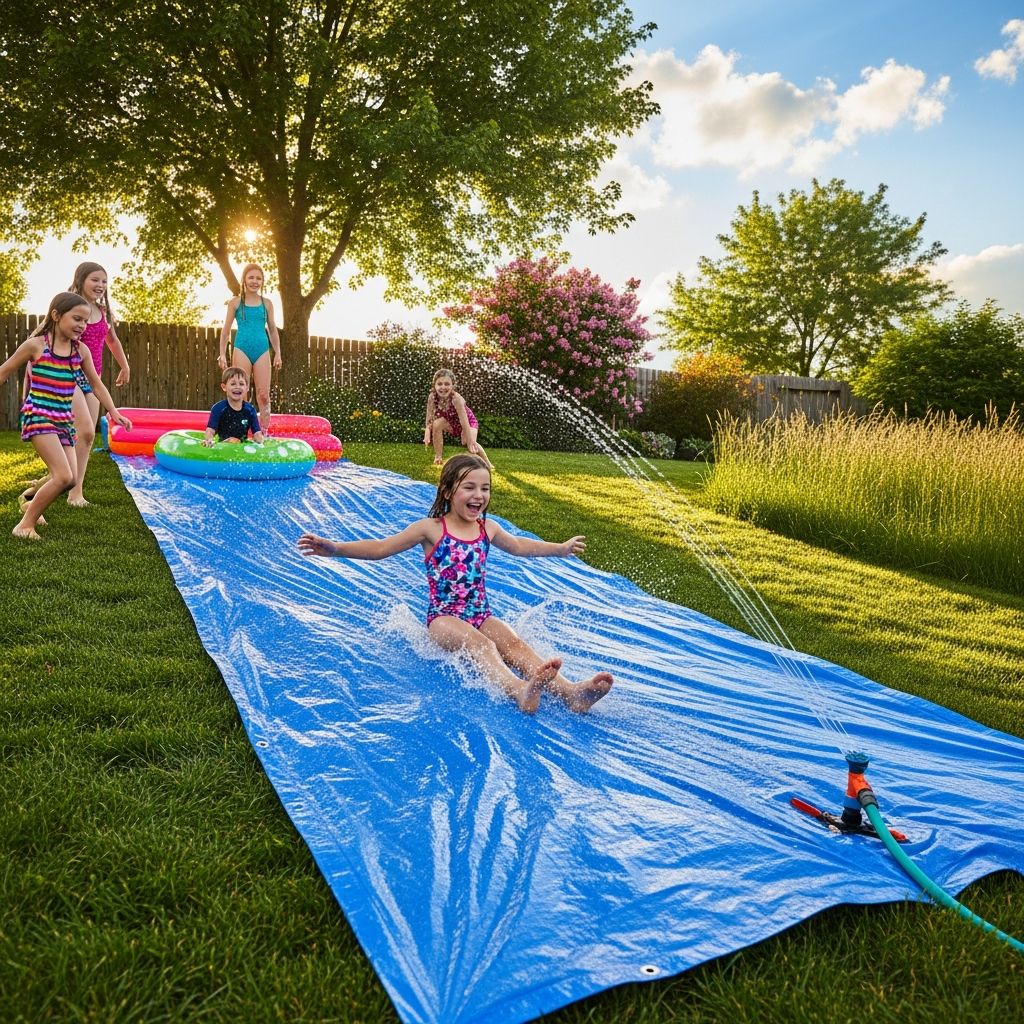
Transforming an ordinary yard into a mini water park is easier than it looks. With a little planning and a few basic supplies, you can build a DIY slip-and-slide that keeps kids and adults laughing, splashing, and racing all summer long.
This guide walks you through every step of the process—from choosing the right spot and materials to setting up water, adding extra thrills, and keeping everyone safe.
Why Make Your Own Slip-and-Slide?
Store-bought slides work for small spaces and younger kids, but they are usually short, narrow, and wear out quickly. A homemade version lets you:
- Customize the length and width for your yard and age group.
- Use tougher materials that resist tearing and last longer than single-use plastic toys.
- Add features like side rails, splash pools, or gentle ramps.
- Control the safety level with padding, rules, and careful placement.
- Turn setup into a project that kids help design and build.
Planning Your Backyard Water Runway
Before you buy anything, spend a few minutes planning. Smart planning reduces injuries and frustration, and it also helps you buy only what you need.
1. Pick the Safest Location
The ideal spot is a soft, grassy area with a gentle slope and lots of open space.
- Avoid hard surfaces such as concrete, gravel, or compacted dirt. Falls on grass reduce impact forces and abrasions compared with hard ground.
- Check for hidden hazards—rocks, roots, sprinkler heads, sticks, or uneven patches. Walk the whole path barefoot to feel for anything sharp.
- Use a gentle slope rather than a steep hill. Excessive speed increases the risk of collisions and neck or spinal injuries.
- Leave a long stopping zone at the bottom with no trees, fences, sheds, or lawn furniture in the way.
2. Decide on Size and Layout
Your layout depends on your yard and who will be sliding:
- Length: 25–50 feet is plenty for younger kids; older kids and adults may enjoy 75–100 feet if you have the space.
- Width: 6–10 feet allows two kids to slide side by side and gives more margin for drifting sideways.
- Shape: Most people build a straight slide, but you can angle the end slightly if your yard naturally slopes to one side.
- Water source placement: The hose connection needs to reach the top comfortably, ideally without extension hoses crossing the sliding path.
3. Estimate Your Water Use
Slip-and-slides do not need fire-hose levels of water. A low, steady flow is enough once the surface is wet. Using moderate flow also reduces water waste and lawn damage.
| Hose Setting | Approximate Flow (liters/min) | Best Use |
|---|---|---|
| Light spray | 5–8 | Maintaining a wet surface once the slide is soaked |
| Medium shower | 8–12 | Initial soak and for longer slides |
| High flow | 12+ (not recommended) | Can cause puddles, mud, and wasted water |
Materials and Tools Checklist
You can build a basic slip-and-slide with just plastic sheeting, water, and a soft lawn. Adding a few extras boosts safety and fun.
Core Materials
- Plastic sheeting or tarp (heavy-duty, 4–6 mil or thicker; at least as long and wide as your planned slide).
- Garden hose and outdoor spigot.
- Hose nozzle or sprinkler to spread water across the top.
- Stakes or landscape pins to hold edges in place (blunt-tipped if possible).
Optional Upgrades
- Pool noodles or foam tubing to create raised, cushioned sides.
- Small inflatable pool at the end as a splash zone.
- Non-toxic, biodegradable soap to reduce friction while minimizing environmental impact.
- Thick picnic blankets or foam pads under the starting area for softer takeoffs.
- Rubber mallet to drive stakes without damaging them.
Safety and Comfort Items
- Swim goggles to protect eyes from splashes and soap.
- Rash guards or swim shirts to prevent scraped elbows and bellies.
- Plastic-free sunscreen that is water-resistant, applied 15–30 minutes before sliding.
- Drinking water and shaded rest area to prevent heat exhaustion.
Step-by-Step: Building Your Slide
Once your materials are ready, set aside an hour or two for setup. It goes fastest with two adults working together while kids handle lighter jobs like collecting rocks or testing the hose settings.
Step 1: Prepare the Ground
- Mow the grass short but not down to dirt; a short, even surface helps the plastic lie flat while keeping some cushioning.
- Walk the full length and width of the planned slide, removing rocks, sticks, toys, and anything that could puncture the plastic or scrape skin.
- Fill small holes or low spots with soil to avoid sudden dips that can collect water.
- If your ground is very dry and hard, lightly water the area before laying the plastic so the soil softens slightly.
Step 2: Roll Out the Plastic
- Position the rolled plastic at the top of your slope.
- Unroll it downhill, gently pulling it tight to avoid big wrinkles.
- If you need more width or length, overlap two sheets by at least 12–18 inches, with the upper sheet overlapping the lower so water flows down instead of under the seam.
- Smooth the surface with your hands or feet, pushing out trapped air and making sure there are no sharp folds.
Step 3: Create Soft Side Rails (Optional but Recommended)
Side rails help keep sliders centered and prevent them from sliding off into dry grass. Foam also provides a soft barrier.
- Lay pool noodles or foam tubes along each side, end to end.
- Fold 6–12 inches of plastic over each noodle so it is wrapped inside the edge.
- Secure through the plastic in the gap between noodles using landscape pins or stakes, pushing them fully into the ground.
- At the very top, use an extra noodle to form a small bumper that prevents riders from sliding under the rail.
Step 4: Anchor the Slide
Anchoring is critical. Loose plastic causes abrupt stops and tripping hazards, but exposed stakes can be dangerous. Place them carefully.
- Place stakes at the outermost edges or just beyond the plastic, never in the center of the sliding path.
- Space stakes every 3–5 feet along each side and at the bottom.
- Push or tap them until they are flush with or below the plastic surface so feet and knees cannot catch on them.
- Recheck anchoring once the plastic is wet; water can reveal hidden slack.
Step 5: Add a Splash Zone or Stopper
Riders need a safe place to slow down and stop.
- Place a small inflatable pool, heavy foam pads, or thick blankets at the end, overlapping slightly with the plastic.
- Make sure there are no hard edges (such as metal pool frames) where riders will arrive at speed.
- If the slide is long or steeper, extend the end zone farther and add extra padding.
Step 6: Turn on the Water
- Attach your hose to a spray nozzle or a sprinkler placed at the top of the slide.
- Start with a medium shower setting to thoroughly soak the slide from top to bottom.
- Once it is fully wet, reduce the flow to the lowest setting that keeps the surface slick.
- Check for dry spots and adjust the nozzle angle or add a second sprinkler for very long slides.
Step 7: Add Slipperiness (Optional)
If the water alone is not slippery enough, a small amount of gentle soap can help. Choose products carefully to protect skin and your yard.
- Use a tear-free, biodegradable soap or baby shampoo in very small amounts and dilute it with water before spreading it.
- Pour the diluted mixture lightly along the top third of the slide, then let water carry it down.
- Avoid harsh detergents, which can irritate skin, eyes, and the environment.
- Rinse kids off with clean water during breaks to reduce irritation.
Safety First: Rules and Best Practices
Slip-and-slides can be safe and enjoyable when used appropriately. Many serious injuries reported in older teens and adults involved head-first sliding or hard ground surfaces. Setting clear rules and supervising continuously are the most important safety steps.
Key Safety Guidelines
- No head-first sliding for children. Feet-first, on the belly or sitting, is safer for the neck and spine.
- Age-appropriate use: Very young children should slide slowly with an adult holding their hands at the start.
- One rider at a time unless your slide is wide enough and you set clear lanes to avoid collisions.
- No running starts on steep hills. Kneeling and pushing off is usually enough to gain speed.
- Stop for thunder or lightning and bring everyone indoors.
- Apply sunscreen regularly, especially because water and plastic reflect UV light.
Supervision and Health Considerations
- Ensure a responsible adult is present and attentive whenever kids are sliding.
- Encourage regular water breaks to prevent dehydration and overheating.
- Watch for signs of fatigue—tired kids are more likely to fall awkwardly.
- Keep small children away from the hose connection and stake installation area.
Fun Variations and Add-Ons
Once you have a basic slide working smoothly, you can add simple features to keep kids engaged all summer.
Obstacle and Game Ideas
- Sliding targets: Place foam rings or pool noodles at the side and challenge kids to slide through or reach specific markers.
- Relay races: Form teams; each slider must go down, tag the next person, then run around and get back in line.
- Colored water: Use food coloring in small side buckets, not on the main slide, so kids can splash color on themselves or on props.
- Night glow slide: At dusk, line the sides with battery-powered LED string lights (kept safely away from water) and use glow sticks for bracelets and necklaces.
Adapting for Different Ages
| Age Group | Recommended Adjustments |
|---|---|
| Toddlers (2–4) | Very short, gentle slope; adult-assisted starts; shallow splash zone; no soap; constant hand-on supervision. |
| Young kids (5–8) | Moderate length; feet-first only; soft side rails; basic games; low soap levels if any. |
| Older kids (9–12) | Longer slide; clearly defined rules; organized races; helmets optional for steeper hills. |
| Teens & Adults | Thicker plastic; extra padding at the end; avoid high-speed head-first sliding to reduce spinal injury risk. |
Setup, Use, and Storage Tips
A bit of care before and after sliding can extend the life of your setup and protect your lawn.
Protecting Your Grass
- Limit slide sessions in one spot to a few hours at a time; long constant soaking can stress turf grasses.
- Move the slide a few feet to one side on different days if you plan frequent use.
- Let the lawn dry thoroughly after each use before mowing or heavy foot traffic.
Drying and Storing the Slide
- After turning off the water, let riders take a few final dry runs to help push off excess water.
- Lift each side of the plastic to drain puddles downhill.
- Spread the sheet out in the sun for a short time to air dry, then roll (not fold) it to prevent creases that weaken plastic.
- Store indoors or in a dry garage away from sharp tools or direct sunlight, which can degrade plastic over time.
Frequently Asked Questions (FAQs)
Q: What thickness of plastic works best for a DIY slip-and-slide?
A: For most yards, 4–6 mil plastic is a good balance between flexibility and durability. Thinner sheets tear more easily under adult weight, while much thicker sheets may be harder to roll and store.
Q: Is using soap necessary for a slip-and-slide?
A: No. Many slides work well with water alone, especially on a gentle slope. If you do use soap, choose a mild, biodegradable, tear-free product, and use it sparingly to reduce skin irritation and environmental impact.
Q: How steep can the hill be?
A: A slight to moderate slope is ideal. Very steep hills create excessive speed, increasing the risk of collisions and injuries, especially for kids. If riders are reaching the end too fast, reduce running starts or shift to a gentler area.
Q: Can adults safely use a DIY slip-and-slide?
A: Adults can enjoy a well-built slide, but they should slide feet-first and be especially cautious about neck and back position. Older safety advisories have linked adult head-first sliding on hard ground with serious spinal injuries, so design and rules matter.
Q: How long will a homemade slip-and-slide last?
A: With careful use, removal of sharp objects, and proper storage, a heavy-duty plastic slide can last several summers. Avoid dragging it over rocks, folding it sharply, or leaving it exposed to sun and weather for long periods.
References
- Playground Injuries: Fact Sheet — U.S. Consumer Product Safety Commission. 2015-10-01. https://www.cpsc.gov/s3fs-public/324_2015.pdf
- Submersible Water Slides: Safety Alert — U.S. Consumer Product Safety Commission. 1993-07-21. https://www.cpsc.gov/Recalls/1993/cpsc-issues-warning-on-slip-and-slide-type-toys
- Outdoor Water Use in the United States — U.S. Environmental Protection Agency. 2017-06-01. https://www.epa.gov/watersense/outdoor-water-use
- Sun Safety — U.S. Centers for Disease Control and Prevention. 2023-05-11. https://www.cdc.gov/cancer/skin/basic_info/sun-safety.htm
- Choosing Products for Children — American Academy of Pediatrics. 2022-04-18. https://www.healthychildren.org/English/ages-stages/baby/bathing-skin-care/Pages/Choosing-Skin-Care-Products.aspx