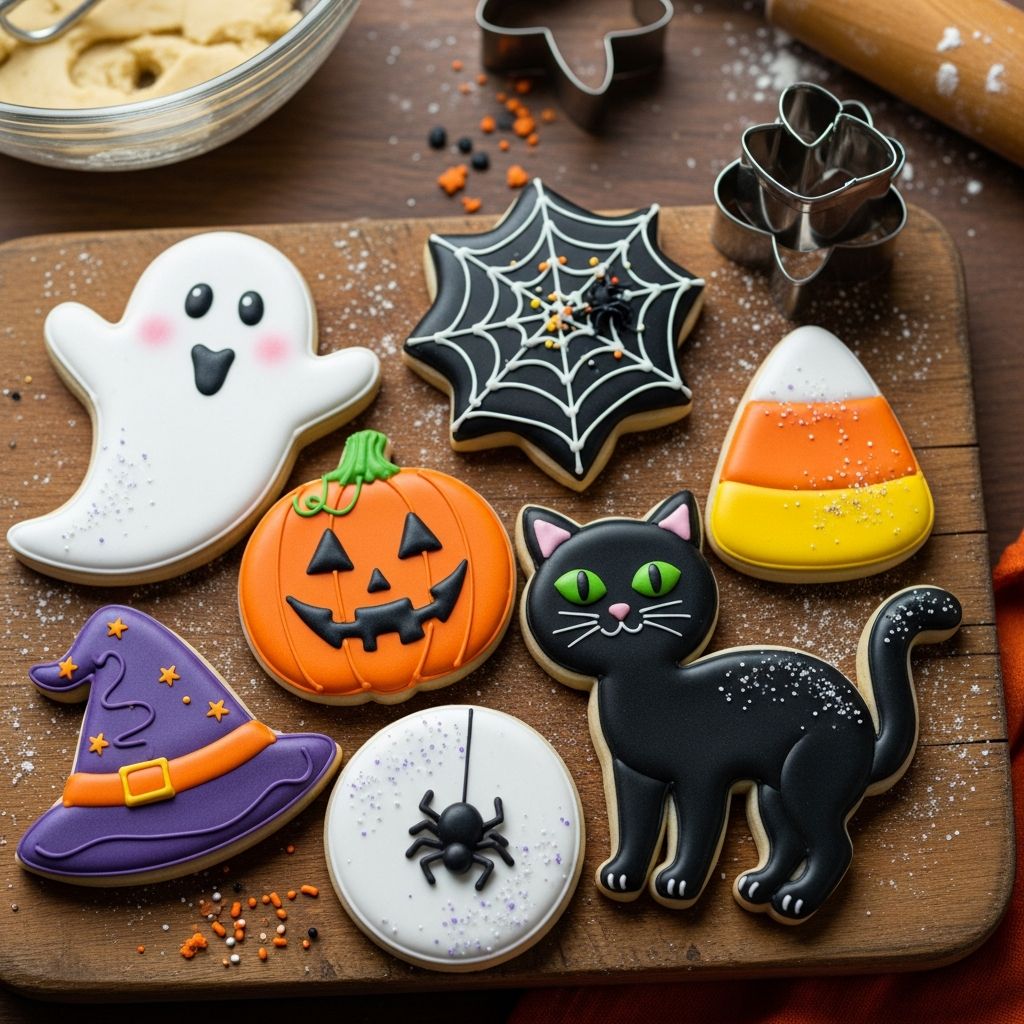
Halloween is the perfect excuse to turn your kitchen into a tiny haunted bakery, complete with trays of skulls, monsters, and ghoulishly good sugar cookies. Instead of buying themed treats, this guide shows you how to start with a simple sugar cookie base and transform it into an edible Halloween gallery using easy icing, colorful designs, and a few clever shortcuts.
Why Halloween Sugar Cookies Are the Ultimate Party Treat
Decorated sugar cookies work for almost any Halloween gathering: school parties, office potlucks, movie nights, or just a fun afternoon with kids. They last well, travel easily, and can be customized for cute, creepy, elegant, or downright silly themes.
- They double as dessert and decor when displayed on a platter or tiered stand.
- Shapes like skulls, coffins, ghosts, and eyeballs are easy to cut or carve from a basic cookie shape.
- Even imperfect designs look charming and homemade, which suits Halloween’s playful, messy spirit.
Essential Components: Dough, Icing, and Color
Before planning elaborate designs, focus on three core elements: a no-spread sugar cookie dough, a decorating-friendly icing, and a restrained but bold color palette. Getting these basics right makes the decorating step almost foolproof.
Choosing a Reliable Sugar Cookie Base
A good Halloween cookie starts with a sturdy, buttery dough that holds crisp edges when baked. Look for or use a recipe that keeps its shape, isn’t too soft, and offers a mild flavor to balance sweet icing.
- Chill the dough thoroughly before cutting shapes to keep details sharp.
- Roll the dough evenly (about 0.6–0.8 cm thick) so cookies bake uniformly.
- A touch of vanilla or almond extract adds aroma without overpowering the decorations.
Picking the Right Icing Style
Most Halloween cookie decorating falls into two categories: a pourable icing for smooth surfaces and a thicker icing for outlines and details. You can use one icing in two consistencies or two different icings depending on your comfort level.
- Outline consistency: Slightly thicker, holds its shape to create borders and small details.
- Flood consistency: Thinner, flows into outlined areas to form an even surface.
- Simple glaze option: Powdered sugar mixed with milk or water for a quick, soft-set finish.
Building a Spooky Color Palette
Halloween cookies do not require dozens of shades. Three to five colors are enough to create a dramatic cookie tray without overwhelming your workspace.
- Core spooky colors: black, white, orange, and a bold accent like purple, lime green, or blood red.
- Mix colors gradually; gel food coloring gives vivid tones without thinning the icing.
- Use white as a base, then layer small amounts of bright color on top for contrast.
Planning Your Halloween Cookie Designs
Planning ahead prevents last-minute chaos and helps you reuse colors and shapes. A simple sketch or list of designs keeps everyone focused, especially when decorating with kids or a group.
| Design Type | Base Shape | Icing Colors | Skill Level |
|---|---|---|---|
| Skull Faces | Circle or skull cutter | White, black | Beginner |
| Cute Monsters | Circle, oval, rectangle | Green, purple, orange, white | Beginner–Intermediate |
| Eyeballs | Circle | White, red, blue/green, black | Beginner |
| Stitched Ghosts | Ghost or teardrop | White, black, pastel accents | Beginner |
| Frankenstein Heads | Rectangle | Green, black, white | Intermediate |
Choose two or three designs you really love instead of trying to make every Halloween shape at once. This allows you to batch tasks and get a coordinated, visually striking cookie set with less stress.
Step-by-Step Decorating: From Blank Cookies to Creepy Characters
The following project ideas build from easiest to more detailed while still staying approachable for home bakers. Each design uses the same basic skills: outlining, flooding, and adding small details once the base layer has dried.
Easy Skull Sugar Cookies
Skulls look complex but rely on a simple white base and a few black shapes. This design is forgiving because slightly uneven lines still look hand-drawn and spooky.
- Outline your skull or round cookie with white icing and flood the center. Let it dry until the surface is no longer shiny.
- Add large black ovals for the eye sockets, a small upside-down heart or triangle for the nose, and simple vertical lines for teeth.
- Customize each skull: flowers around the eyes, heart-shaped eyes, tiny cracks, or colorful dots add personality.
Cute Monster Faces
Monster cookies are ideal for kids because there is no “wrong” way to make them. As long as they have eyes, a mouth, and a wild expression, they match the theme.
- Flood the cookie in a bright color like lime green, neon purple, or orange, then allow it to set slightly.
- Add eyes using white circles and black dots, or press candy eyes into soft icing.
- Pipe jagged mouths, goofy fangs, scars, or eyebrows. Vary the number of eyes—one, three, or a whole cluster of tiny ones.
Bloodshot Eyeball Cookies
Eyeball cookies are strangely simple and always get a dramatic reaction. They work well on small round cookies and are especially fun stacked in a bowl like a “monster snack.”
- Flood the entire cookie with white icing and let it crust over.
- Add a colored circle (blue, green, or yellow) near the center, then a smaller black circle for the pupil.
- Use a thin red icing or food-safe marker to draw small branching lines from the edges toward the center for “veins.”
Ghosts with Personality
Ghost cookies can be spooky, shy, or silly depending on the faces you draw. A simple teardrop shape or classic ghost cutter creates a perfect canvas.
- Cover the cookie with smooth white icing, letting it dry fully so your details do not bleed.
- Draw tiny oval eyes and a round or oval mouth in black. For a friendly look, use curved eyebrows and a small smile.
- Add accessories: rosy cheeks, bow ties, tiny candy hearts, or speech bubbles made from extra cookies that say “boo.”
Frankenstein and Other Patchwork Creatures
Rectangular cookies become little monster heads with flat tops, bolts, and stitches. This design introduces layering colors and adding detail once earlier layers set.
- Flood the cookie with green icing and let it dry.
- Pipe a band of black hair across the top, adding uneven spikes or a flat edge.
- Finish the face with droopy eyelids, a stitched smile, and small gray bolts on the sides.
Time-Saving Shortcuts and Kid-Friendly Hacks
Decorating can quickly grow complicated, so do not hesitate to simplify. A few shortcuts keep the process fun rather than exhausting, especially when baking with children or for a large crowd.
- Use store-bought dough or icing if you’re short on time; the fun is often in the decorating, not perfection.
- Swap piped details for candy: chocolate chips for eyes, licorice for stitches, mini marshmallows for skull teeth.
- Pour sprinkles over freshly iced cookies to create instant texture instead of piping every line.
Set up a “decorate your own monster” station for kids with pre-iced, partially set cookies and small bowls of candies. This avoids the frustration of handling piping bags while still giving them creative control.
Common Mistakes and How to Fix Them
Even experienced bakers occasionally end up with warped shapes or smeared colors. Most issues can be softened, disguised, or turned into new designs with a bit of creativity.
- Spreading shapes: If cookies bake wider than expected, turn them into blobby ghosts or melting monsters where soft edges actually make sense.
- Color bleeding: Allow each flood layer to crust before adding dark details; if you forgot, outline eyes and mouths with a thin white border to separate colors.
- Cracked icing: Cover cracks with strategically placed stitches, cobweb lines, or candy decorations.
- Uneven thickness: Use the thicker cookies as “centerpieces” and the thinner ones as samples or taste-testers.
Displaying and Packaging Your Halloween Cookies
Once decorated, your Halloween sugar cookies deserve a dramatic stage. Presentation elevates even simple designs into something special for parties and gift bags.
Spooky Serving Ideas
- Arrange cookies on a dark slate board or black tray to highlight bright icing colors.
- Mix designs: alternate skulls, eyeballs, ghosts, and monsters for a visually interesting pattern.
- Add inexpensive props like plastic spiders, gauze “cobwebs,” or fake tombstones around the platter.
Gifting and Party Favors
Individually wrapped cookies make excellent Halloween favors for classmates, neighbors, or co-workers. They also transport more safely than loose cookies on a tray.
- Place each fully dried cookie in a clear bag and tie with orange or black ribbon.
- Attach small tags with fun names like “Monster Bites,” “Witchy Treats,” or “Bone Crunchers.”
- Layer cookies in a decorated box with parchment between layers to protect the designs.
Frequently Asked Questions About Halloween Sugar Cookies
How far in advance can I bake and decorate the cookies?
Plain sugar cookies can usually be baked several days in advance and stored in an airtight container at room temperature. For safest results, decorate them one to two days before your event so the icing has time to dry but the cookies remain fresh.
Do I have to use special cookie cutters?
Specialty cutters are convenient but not essential. Circles, squares, and rectangles can be trimmed or decorated into skulls, monsters, ghosts, or eyeballs simply by adjusting the icing and facial features.
How do I keep the icing from smudging?
Allow the base layer of icing to dry completely before stacking or wrapping cookies. Drying can take several hours or overnight depending on your recipe and kitchen humidity, so plan for that time in your schedule.
Can children help with the decorating?
Yes, and Halloween cookies are especially forgiving for young decorators. Give children thicker icing in squeeze bottles, pre-colored candies, and simple tasks like adding eyes, sprinkles, or mouths to already-flooded cookies.
How should I store leftovers?
Once decorated and fully dry, store cookies in an airtight container with parchment between layers. Kept at room temperature and out of direct sunlight, they typically stay enjoyable for several days.
Final Tips for Confident Halloween Cookie Decorating
The secret to impressive Halloween sugar cookies is not perfection but consistency: a reliable dough, a few well-practiced designs, and a limited palette of bold colors. Focus on having fun, experimenting with faces, and embracing the slightly chaotic, spooky charm that makes Halloween treats so memorable.
With a single batch of dough and a handful of colors, you can create skulls, monsters, ghostly figures, and eerie eyeballs that delight kids and adults alike—and turn your kitchen into the most deliciously haunted corner of the house.