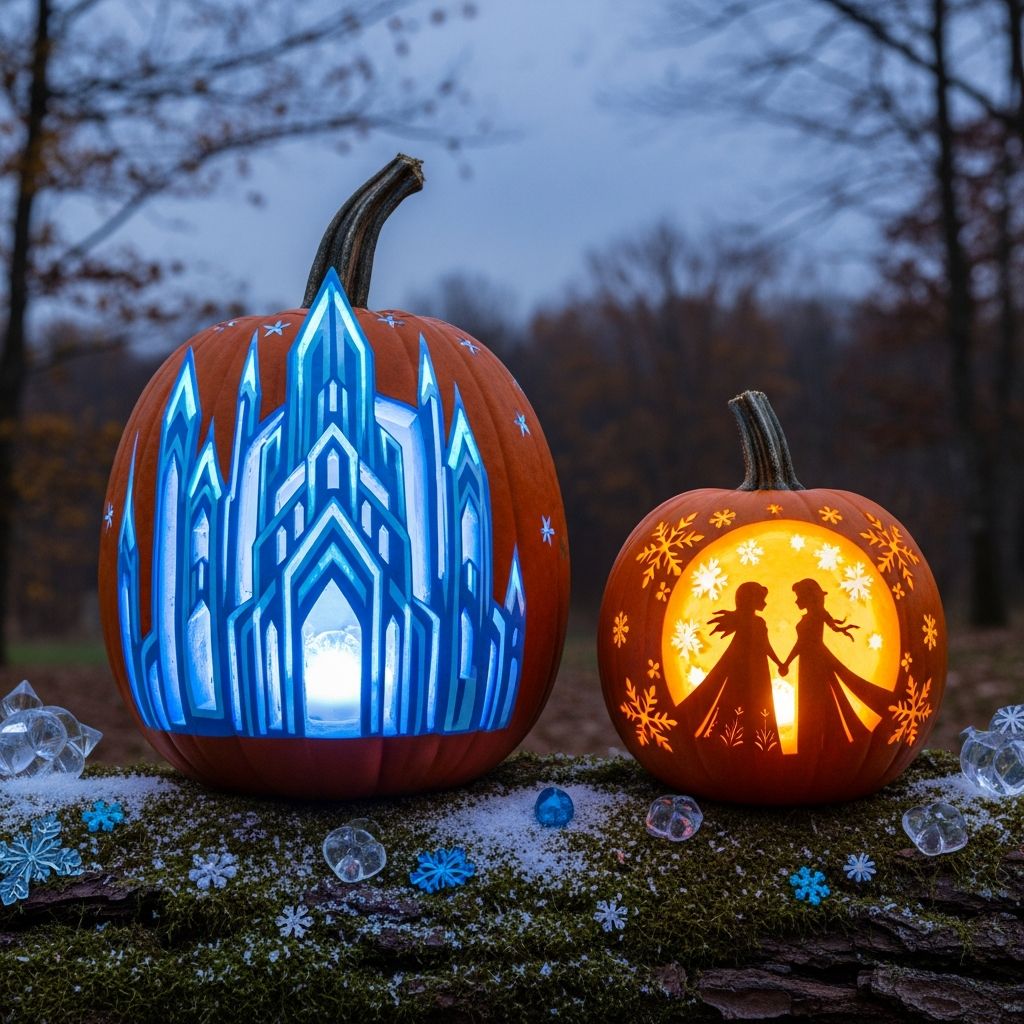
If your home is filled with sing-alongs from a certain snowy kingdom, transforming your pumpkins into Frozen-inspired jack-o’-lanterns is the perfect way to bring that magic to your doorstep this Halloween.
Why Choose a Frozen-Themed Pumpkin?
Frozen has become a modern classic for families, which makes it a natural fit for a kid-friendly Halloween theme. A Frozen-inspired jack-o’-lantern lets young fans enjoy the fun of spooky season without leaning too heavily into scary designs.
Instead of ghouls and goblins, you can celebrate glowing snowflakes, icy castles, and lovable characters that children already recognize and adore. This approach keeps your décor whimsical, photo-ready, and suitable for all ages.
Planning Your Frozen Pumpkin Project
Before you begin carving or painting, take a few minutes to plan your designs and gather supplies. Good preparation makes the activity smoother, safer, and far more enjoyable—especially if you’re working with excited kids.
- Decide whether you want traditional carved pumpkins, no-carve painted pumpkins, or a combination of both.
- Choose a color palette that matches the Frozen universe: icy blues, cool whites, silver, lavender, and touches of teal.
- Pick one main focus: snowflakes, characters, or an overall “winter wonderland” scene created with multiple pumpkins.
Basic Supplies and Helpful Extras
You do not need specialty equipment to make an impressive Frozen pumpkin, but a few targeted tools will make your designs cleaner and more detailed. Below is an overview you can adapt based on your budget and how elaborate you want to get.
| Category | Items | Notes |
|---|---|---|
| Core tools | Small serrated knife, pumpkin scoop, large spoon | Use kid-safe tools for children and reserve sharp knives for adults. |
| Detail tools | Craft knife, linoleum cutter, clay tools | Help with shallow carving for delicate snowflakes and lettering. |
| Drawing supplies | Washable markers, pencils, masking tape | For sketching designs and attaching templates before carving. |
| Decorative accents | Glitter, craft paint, rhinestones, sequins, faux snow, ribbon | Transform simple pumpkins into shimmering, royal centerpieces. |
| Lighting | LED candles, fairy lights, battery tea lights | Safer than real candles and ideal for children’s displays. |
Carving Safety and Kid-Friendly Roles
Frozen pumpkins are meant to be fun, not stressful, so safety should come first. Children can participate throughout the process as long as adults handle the sharp tools and any difficult cutting.
- Let kids help clean out the pumpkin, save seeds for roasting, and choose colors or embellishments.
- Assign older children detail tasks like tracing snowflakes with markers or placing stickers, rhinestones, and glitter.
- Limit carving to adults or teens who are comfortable with knives, especially when making thin, intricate shapes.
Design Idea 1: Snowflake Glow Pumpkin
A glowing snowflake pumpkin can evoke the feel of a blizzard swirling around Elsa’s castle without requiring advanced drawing skills. The design looks complex from a distance, but it is actually made from small, repeated shapes.
How to Create a Snowflake Pumpkin
- Draw a large snowflake pattern on paper or print a simple geometric snowflake template.
- Cut out the design and tape it to the front of a cleaned, hollow pumpkin.
- Use a pin or toothpick to poke along the lines of the template into the pumpkin skin, then remove the paper.
- Connect the dots lightly with a washable marker and carve the lines slowly with a small serrated knife.
- Drop a bright LED candle inside to make the lines glow like ice crystals.
This approach can be scaled up or down: a single large snowflake for a bold statement by the front door, or multiple smaller snowflakes scattered around the pumpkin to create a sparkling pattern.
Design Idea 2: Character Silhouette Lanterns
If your family has a favorite Frozen character, silhouette pumpkins are a striking way to feature them. Instead of trying to capture every facial detail, you focus on recognizable outlines like Elsa’s braid or Olaf’s carrot nose.
Steps for Character Silhouettes
- Locate a simple side-profile image of a character and trace just the outline onto paper.
- Adjust the size so it fits your pumpkin, then tape the template to the pumpkin surface.
- Use the pin-poking method to transfer the outline, then carefully carve along the dotted line.
- For extra drama, carve only the outline fully and lightly scrape away the pumpkin flesh inside the silhouette instead of cutting it out completely.
- Place a strong internal light so the scraped sections glow softly, creating a layered, shadowy effect.
You can repeat this technique on multiple pumpkins to create a mini lineup: one pumpkin for Elsa, one for Anna, and another for Olaf, arranged as a glowing family of characters on your porch.
Design Idea 3: No-Carve Glitter Castle Pumpkin
Not every pumpkin has to be carved to deliver a Frozen vibe. A no-carve castle pumpkin is ideal for very young children, apartment dwellers, or anyone who prefers less mess while still making an impact.
Simple No-Carve Castle Steps
- Paint your pumpkin in an icy base color such as pale blue, white, or soft lavender and let it dry completely.
- Lightly sketch a stylized castle with towers, windows, and flags using pencil or a faint marker.
- Fill in the castle shapes with metallic or glitter paint, layering until the design looks opaque and bright.
- Add tiny adhesive gems to highlight windows or doorways and glue on sequins to mimic falling snow.
- Arrange fairy lights around the base of the pumpkin so they reflect off the glitter and make the castle sparkle.
This design doubles as both Halloween décor and a winter centerpiece that can stay on display well after the trick-or-treaters go home.
Design Idea 4: Olaf-Inspired Stacked Pumpkins
Olaf’s round body lends itself perfectly to stacked pumpkins. By combining different sizes, you can build a playful 3D version of the cheerful snowman to greet guests on the porch.
Building a Pumpkin Olaf
- Choose three pumpkins in small, medium, and large sizes, making sure they stack fairly steadily.
- Paint or lightly scrape away the outer skin to create Olaf’s face and buttons on separate pumpkins.
- Use toothpicks or wooden dowels to secure the stack, inserting them through the centers for stability.
- Add twig “arms” and a small painted or crafted foam carrot nose for extra personality.
- Position an LED light behind or beside Olaf so that his features remain visible after dark without needing to carve deeply into the pumpkins.
This design becomes a natural photo spot for children in costume, and you can adapt the elements each year, changing expressions or adding scarves and hats.
Design Idea 5: Frozen-Themed Pumpkin Centerpiece
Beyond front-porch displays, Frozen pumpkins can be styled as a table centerpiece for classroom parties, birthday events, or family movie nights. Instead of a single carved pumpkin, think in terms of a small snowy landscape.
- Start with a white or silver table runner, then cluster several small pumpkins painted in shades of blue and white.
- Scatter faux snow, clear glass beads, and snowflake confetti between the pumpkins to mimic glistening ice.
- Add a few character figurines or mini castle toys to complete the miniature Frozen world.
This style emphasizes ambiance over detailed carving, giving you a flexible, reusable set of elements you can rearrange across multiple events.
Lighting Tips for a Frosty Glow
The right lighting transforms your pumpkin from a daytime craft to an evening spectacle. For a Frozen theme, aim for light that looks cool, icy, and magical rather than harsh or flickering.
- Use white or cool-blue LED tea lights inside carved pumpkins for a crisp, frosty shine.
- Wrap battery-powered fairy lights around the base of pumpkins or tuck them into hollow pumpkins through the back.
- Layer multiple light sources—one inside, one outside—to emphasize both carved details and surface glitter.
Keeping Your Frozen Pumpkins Fresh Longer
Even the most magical pumpkins eventually droop, but a few simple techniques can help your designs last beyond a single night. Proper cleaning and storage are key to preserving both carved and painted pumpkins.
- Clean the inside thoroughly and scrape away as much stringy flesh as possible to slow mold growth.
- Keep pumpkins in a cool, shaded area during the day and bring them indoors if temperatures are very warm or freezing.
- For painted pumpkins, avoid leaving them in heavy rain and handle them by the base instead of the stem.
Making It a Family Tradition
Turning your porch into a mini Arendelle can become an annual tradition that children look forward to year after year. You might start with simple painted snowflakes and progress to more detailed character lanterns as your skills grow.
Encourage kids to sketch their own ideas each year, then choose one or two to bring to life. Taking photos of your pumpkins and saving sketches creates a visual history of your Frozen-themed celebrations and highlights just how much everyone’s creativity has evolved over time.
Frozen Pumpkin FAQs
Do I need artistic skills to make a Frozen pumpkin? No. Using simple templates, basic shapes, and easy color blocking is enough to achieve a recognizable Frozen theme, even if you are not confident at drawing. Can I make a Frozen pumpkin without carving at all? Yes. Paint, stickers, glitter, and adhesive gems can turn any pumpkin into a Frozen decoration, making the project completely kid-safe and mess-minimal. How early before Halloween should I carve my pumpkin? Carved pumpkins usually look their best for only a few days, so aim to carve them shortly before your main event. Painted pumpkins tend to last much longer. What colors work best for a Frozen theme? Icy blue, turquoise, white, silver, and light purple are classic Frozen colors, especially when combined with reflective materials like glitter and rhinestones. Can I reuse my designs next year? You can save paper templates, sketches, and photos of previous pumpkins to recreate or adapt the designs in future years, even though the pumpkins themselves are temporary.
With a little planning and a touch of sparkle, your Frozen-inspired jack-o’-lanterns can turn Halloween night into a glowing winter fairy tale that delights trick-or-treaters and movie fans alike.