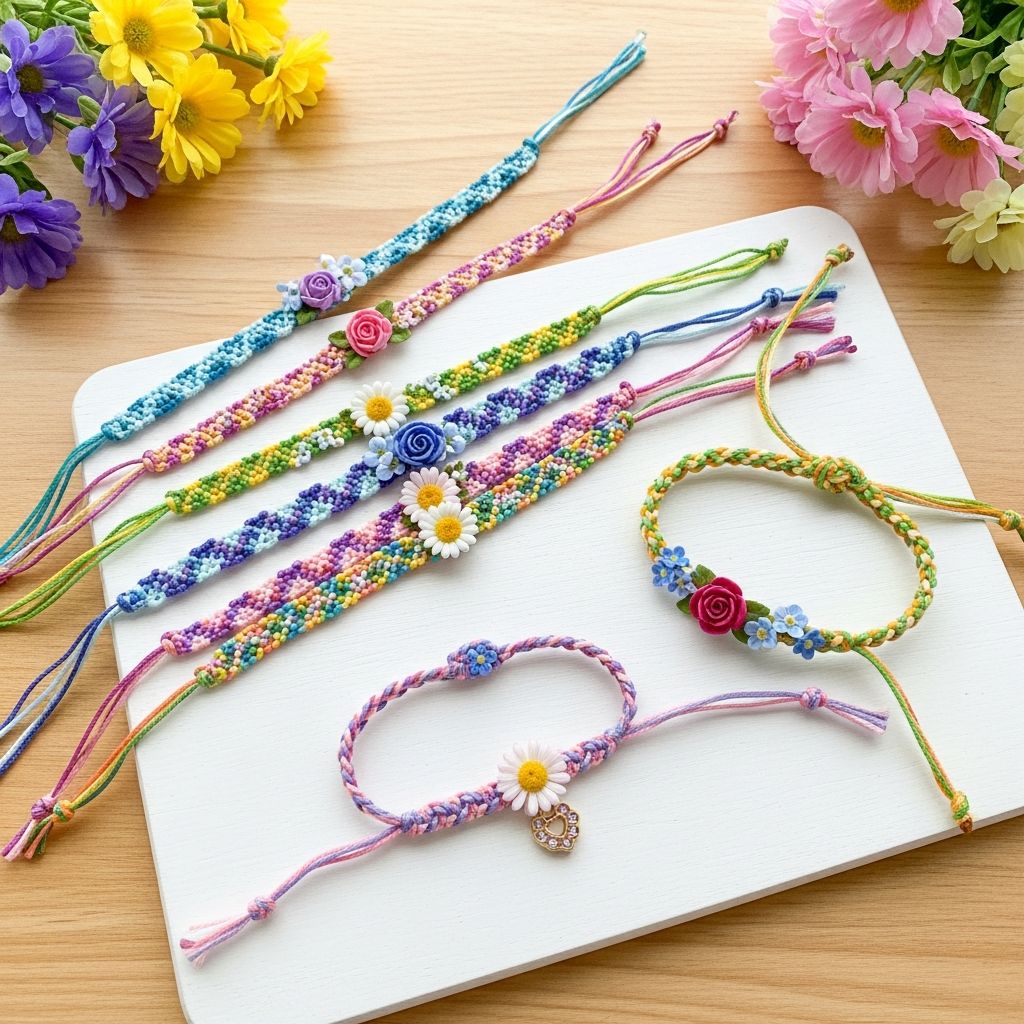
Flower friendship bracelets are a cheerful way for kids to say “I love you” with something handmade, colorful, and wearable. These simple bracelets combine basic knotting or beading with bright flower shapes, making them perfect for Mother’s Day, birthdays, or just-because gifts.
This guide walks you through how to help kids make flower friendship bracelets safely and successfully, with ideas to adapt the project for different ages and skill levels.
Why Flower Friendship Bracelets Make Meaningful Gifts
Handmade gifts like friendship bracelets offer more than a cute accessory. They support emotional connection and important developmental skills while giving kids a sense of pride in their work.
- Emotional connection: Crafting for a loved one can strengthen a child’s sense of closeness and empathy, especially when they personalize colors and patterns.
- Fine-motor practice: Tasks like threading beads and tying knots help refine small hand movements and hand–eye coordination, which are key building blocks for writing and self-care skills.
- Focus and patience: Simple, repetitive steps allow kids to practice sustained attention and planning.
- Creative expression: Children choose colors, patterns, and even add words or initials, building confidence in their creative decisions.
Choosing a Bracelet Style: Knotted vs. Beaded Flowers
There are two kid-friendly ways to create flower friendship bracelets:
| Style | Best For | Materials | Skill Level |
|---|---|---|---|
| Knotted flower bracelet | Kids who like classic embroidery-floss bracelets | Embroidery floss or craft thread | Confident beginners to intermediate |
| Beaded flower bracelet | Kids who enjoy beads and simple jewelry | Seed beads, elastic or beading cord | Beginner-friendly with adult setup |
You can choose one method or try both. If you’re crafting with a group of kids of different ages, offering both options can help everyone find a level that feels just right.
Gathering Materials
You likely already have many of the necessary supplies at home. Keep colors bright and inviting so the final bracelets feel joyful and gift-worthy.
Basic Supplies for Either Style
- Flat work surface: A table or desk that’s easy to clean.
- Good lighting: Natural light or a lamp helps kids see small details clearly.
- Tape or clip: Painter’s tape, washi tape, or a clipboard to hold the bracelet in place.
- Scissors: Child-safe scissors for younger kids; sharper craft scissors for adults.
- Small containers: Bowls or muffin tins to keep threads and beads sorted.
Extra Supplies for Knotted Flower Bracelets
- Embroidery floss or soft craft thread in at least three colors:
- One background color for the bracelet band
- One petal color for the flower shape
- One center color for the middle of the flower
- Optional: safety pin for attaching the bracelet to a small pillow or fabric while working
Extra Supplies for Beaded Flower Bracelets
- Seed beads or small round beads in 2–3 colors
- Stretchy bead cord or thin beading thread
- Jewelry clasp and jump rings if not using elastic
- Optional: bead stopper or masking tape for the cord end
Safety and Age-Appropriate Adaptations
Crafting should be fun and safe. A few simple adjustments help you match the project to each child’s age and abilities.
- Under 5 years: Avoid tiny beads because of choking risk; larger pony beads are safer for supervised activities and easier for small hands to grip.
- 5–7 years: Use elastic cord and larger beads; keep instructions short, with clear visual steps.
- 8+ years: Most kids this age can manage seed beads and simple knot patterns with a bit of practice.
- Always supervise: Young kids should be supervised when using scissors, sharp needles, or very small beads.
Step-by-Step: Knotted Flower Friendship Bracelet
This version uses embroidery floss and simple knots to form little flowers along a braided or knotted band. You don’t need advanced macramé skills—just the patience to repeat a few basic moves.
1. Measure and Cut the Threads
To make sure the bracelet fits comfortably, measure loosely around Mom’s wrist using a piece of string, then add extra length for tying knots at the ends.
- Cut multiple strands of the background color slightly longer than the measured wrist size.
- Cut shorter strands for the center and petal colors—these will be used mainly where each flower appears.
- Bundle all strands together and tie a knot at one end, leaving a small tail for fastening.
2. Secure the Bracelet for Working
- Use tape to attach the knotted end to the table; or
- Clip it onto a clipboard; or
- Pin it to a folded towel using a safety pin (adults should handle the pin).
Stabilizing the bracelet helps kids focus on knotting without the frustration of slipping threads.
3. Create the Background Band
The bracelet begins with a simple background before you add the first flower.
- Separate out two strands to act as the working threads and keep the rest together as the core.
- Show kids how to tie a basic knot around the core, pulling it snug but not so tight that it bends the bracelet sharply.
- Repeat the same knot several times to form a short solid band of color.
This repetitive step is calming for many children and allows them to get used to holding the threads consistently.
4. Forming a Simple Flower Shape
There are many ways to form a flower, but a kid-friendly approach is to think in three parts: petals, center, and petals again.
- Bring out the petal threads: Gently pull the petal-color strands to the outside edges of the bracelet so they are easy to see.
- Knot the petals: Use the petal threads to wrap around the background core a few times on each side. This creates the impression of petal clusters.
- Add the flower center: Use the center-color threads to tie a small, tight knot in the middle, right between the petal knots. This becomes the heart of the flower.
- Lock in the flower: Make another round of petal-color knots around the core to “frame” the center and keep everything in place.
Encourage kids to pause and gently smooth the flower shape with their fingers before continuing; this helps them see the pattern emerging and adjust if something feels uneven.
5. Repeat the Pattern
- Make another short section of background knots after the first flower.
- Repeat the petal–center–petal sequence to create the next flower.
- Continue alternating background sections and flowers until the bracelet is the desired length.
You can vary the design by changing petal or center colors for each flower, or by making some flowers closer together for a fuller “garden” effect.
6. Finish and Tie the Bracelet
- Stop when the knotted portion is slightly shorter than the wrist measurement; the final tying knot will add extra length.
- Tie all strands together in a firm end knot.
- Trim the ends, leaving enough tail for tying the bracelet onto the wrist.
For younger children, an adult may need to handle the final fitting and tying to ensure it’s comfortable but secure.
Step-by-Step: Beaded Flower Friendship Bracelet
Beaded flower bracelets are colorful and eye-catching, and the process of stringing beads can be soothing and rhythmic. Simple flower units repeat along a single strand of elastic or thread.
1. Prepare the Cord
- Cut a length of elastic or thread long enough to go around Mom’s wrist with extra room for tying (about 10–12 inches for most adults).
- Tape one end of the cord to the table or attach a bead stopper so beads do not slide off.
2. Plan the Color Pattern
Before stringing, invite kids to plan their colors. This is a nice opportunity to talk about what colors Mom loves and how certain combinations feel cheerful, calm, or bold.
- Choose one color for petals, one for the center, and one for the spacer beads between flowers.
- Lay out a few sample flower units on the table so kids can see how the pattern will repeat.
3. Build the First Flower
- String one center bead onto the cord and slide it down near the end.
- Add four or five petal beads, depending on how round and full the child wants the flower to look.
- Bring the cord back through the first petal bead to create a loop so the petal beads surround the center. Gently tighten.
This simple loop already looks like a tiny daisy and can be repeated across the bracelet.
4. Add Spacer Beads and More Flowers
- String one or more spacer beads to create a small gap.
- Repeat the flower steps: one center bead, several petals, then looping back through the first petal bead.
- Continue until the bracelet is close to the desired length.
Encourage kids to count beads aloud as they go. Counting and matching bead patterns provide informal practice with early math skills.
5. Test the Fit and Tie Off
- Wrap the unfinished bracelet gently around the intended wrist to check size.
- When it fits, remove any extra beads if needed.
- Tie a secure knot in the elastic, pulling slowly and firmly until the knot tightens fully.
- For extra security, an adult can add a dab of clear-drying craft glue to the knot (keeping it away from young children until dry).
Design Ideas to Personalize Mom’s Bracelet
Once kids understand the basic method, they can turn a simple bracelet into a truly personal gift.
- Favorite colors: Let kids choose colors that remind them of Mom’s clothes, jewelry, or favorite flowers.
- Birth month flowers: Match bead or thread colors to Mom’s birth flower (for example, violet tones for February or daisy tones for April).
- Initial or word beads: Add letter beads to spell “MOM,” “LOVE,” or initials between flowers.
- Siblings’ colors: Assign one flower color to each child in the family so Mom wears everyone’s “signature” hue.
- Matching sets: Make a set of mini bracelets so Mom and child can wear coordinated flower bands.
Making It a Special Gift-Giving Moment
The way kids present the bracelet can be as meaningful as the craft itself. Small rituals help children practice gratitude and communication.
- Handmade card: Encourage kids to draw flowers matching the bracelet and write a short message inside. Even very young children can dictate their message to an adult.
- Gift wrapping: Wrap the bracelet around a small piece of colored card and place it in an envelope or tiny box.
- Sharing feelings: When giving the bracelet, invite the child to say one thing they love or appreciate about Mom.
Research suggests that noticing and expressing gratitude supports emotional well-being in both children and adults, making this small ritual a powerful part of the craft activity.
Frequently Asked Questions (FAQs)
How long does it take to make a flower friendship bracelet?
For most school-age kids, a simple beaded bracelet takes about 20–40 minutes, while a knotted bracelet may take 30–60 minutes depending on length and skill. Younger children may work best in short sessions.
What if my child struggles with tiny beads or knots?
Try using larger beads and thicker elastic, or reduce the number of flowers. You can also let the child choose colors and hand beads to an adult who does the actual threading, turning it into a team project.
Can we reuse old jewelry or leftover craft supplies?
Yes. Old necklaces, broken bracelets, or leftover bead mixes are great for this project. Just check that beads are smooth (no sharp edges) and an appropriate size for the child’s age.
How do we clean and care for the bracelet?
Elastic and cotton thread bracelets last longest when kept dry and stored away from sharp objects. Wipe gently with a soft cloth; avoid soaking in water, which can weaken fibers and elastic over time.
Is this a good group activity for a classroom or party?
Yes. Prepare kits in advance with pre-cut cords and portioned beads. Demonstrate the steps to the whole group, then circulate to help with tying knots and checking bracelet lengths.
References
- Understanding and Encouraging Fine Motor Skills — ZERO TO THREE. 2016-10-01. https://www.zerotothree.org/resource/understanding-and-encouraging-fine-motor-skills-in-young-children/
- The Importance of Play in Promoting Healthy Child Development and Maintaining Strong Parent-Child Bonds — American Academy of Pediatrics. 2018-09-01. https://publications.aap.org/pediatrics/article/142/3/e20182058/38616/The-Importance-of-Play-in-Promoting-Healthy-Child
- Choking First Aid for Children — Mayo Clinic. 2022-02-04. https://www.mayoclinic.org/first-aid/first-aid-choking/basics/art-20056637
- Early Math Matters: Preparing Preschoolers to Succeed — National Association for the Education of Young Children (NAEYC). 2012-01-01. https://www.naeyc.org/resources/pubs/yc/mar2012/early-math-matters
- Birth Month Flowers and Their Meanings — The Old Farmer’s Almanac. 2021-03-15. https://www.almanac.com/content/birth-month-flowers-and-their-meanings
- The Role of Gratitude in the Development of Social Support, Stress, and Depression — Wood, A. M. et al., Journal of Research in Personality. 2008-02-01. https://doi.org/10.1016/j.jrp.2007.11.003