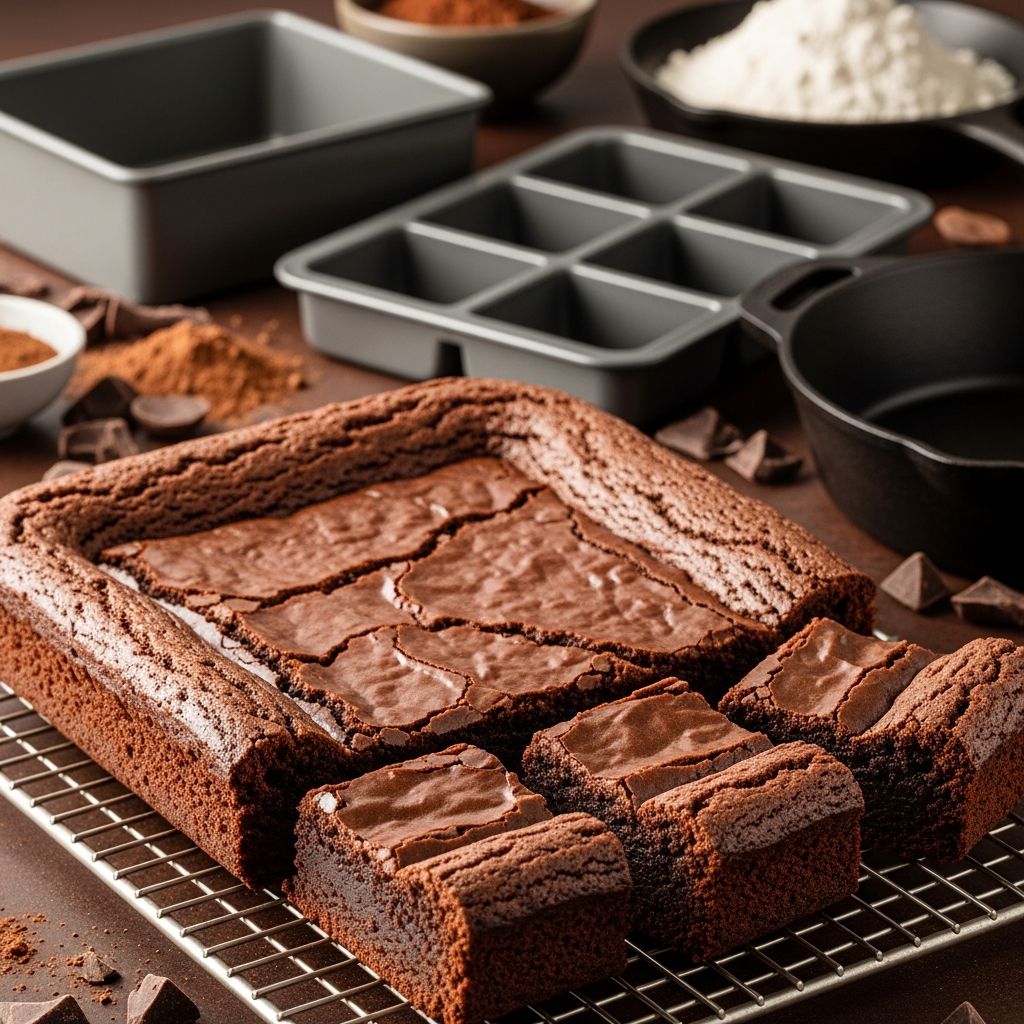
Most home bakers obsess over chocolate brands and baking times, but the unsung hero of deeply fudgy centers and chewy corners is the brownie pan itself. Swap an ordinary pan for an edge-focused design and even your favorite boxed mix can taste like a bakery treat.
What Makes Brownie Edges So Irresistible?
Ask a group of brownie fans whether they prefer the middle or the edge, and the conversation quickly becomes passionate. The outer pieces are where textures collide: a crisp, almost caramelized crust meets a dense, fudgy interior.
- Caramelization of sugars: The sides of the pan get hotter, encouraging sugars at the edges to brown and deepen in flavor.
- Chewy structure: Slightly drier edges give that satisfying pull when you bite into them.
- Contrast in every bite: A perfect brownie offers soft middle, crackly top, and edge chew all at once.
Traditional square pans only give a handful of edge pieces, which means someone at the table inevitably settles for a soft, middle square that feels less exciting by comparison.
How Edge-Focused Brownie Pans Work
Edge-focused brownie pans are cleverly engineered to solve a simple problem: too few corners. Instead of a plain square cavity, they use interior walls and channels to create multiple paths of batter, turning one big brownie slab into a maze of edges.
Think of them as a track for brownie batter. Where a standard pan has four outer sides in contact with heat, a channel-style design increases that contact dramatically, giving nearly every piece at least two browned sides.
Key Design Features
- Serpentine or zig-zag walls: Internal ridges snake through the pan, dividing the batter and maximizing surface area.
- Higher proportion of edges: More edges mean more chewy pieces and fewer soft, middle-only squares.
- Portion-friendly channels: The design often creates neat, bar-sized strips that are easy to cut and serve.
- Consistent thickness: Channels are typically sized so batter depth stays even, helping everything bake at the same rate.
The goal is not just novelty, but predictable baking. When every section of the batter is close to a wall, you get fewer underbaked centers and fewer overdone, dry corners.
Comparing Brownie Pan Types
Before investing in specialized bakeware, it helps to understand how different pan styles affect texture, browning, and ease of use.
| Pan Style | Typical Material | Texture Result | Best For | Potential Drawbacks |
|---|---|---|---|---|
| Standard square or rectangular pan | Glass, ceramic, or metal | Chewy edges, very soft center pieces | General baking, classic pan brownies | Only four corner pieces, uneven doneness if not watched carefully |
| Edge-focused channel pan | Usually light-colored nonstick metal | Many chewy edges, more even baking | Edge-lovers, parties, gift-worthy batches | Harder to grease and clean, usually higher cost |
| Muffin or cupcake pan | Nonstick or silicone | Individual brownie “bites” with full edge crust | Portion control, lunch boxes, bake sales | Can overbake easily, more surface area to grease |
| Bar pan with square wells | Metal nonstick pan | Uniform bars with defined sides, moderate chew | Neat presentation, layered bar cookies | Less fudgy centers, more pan-to-batter contact |
An edge-focused brownie pan sits between a standard pan and a muffin pan: you still get the feeling of slicing into one big batch, but nearly every serving has multiple crusty sides.
Choosing the Right Material and Finish
A clever shape alone will not guarantee perfect brownies. The material and coating of your pan control how quickly heat moves into the batter and how easily your treats release after baking.
Pan Materials Explained
- Light-colored aluminum: A favorite for home bakers because it heats quickly without scorching, then cools down relatively fast to prevent overbaking.
- Dark nonstick metal: Excellent for browning, but edges can cook faster than the center; you may need to reduce oven temperature slightly.
- Glass and ceramic: Attractive for serving, but slower to heat and slow to cool; brownies may continue cooking after leaving the oven, which is risky if you like a fudgy texture.
- Silicone: Flexible and nonstick by nature, but tends to brown less and may produce softer crusts.
Why Nonstick Matters
In an edge-heavy pan with lots of corners and channels, easy release becomes critical. A quality nonstick coating means less aggressive prying with spatulas, fewer broken pieces, and neater bars for serving or gifting.
Even with a nonstick surface, a light layer of fat and optional parchment in key spots can prevent sticking and prolong the life of the coating.
How to Prep an Edge Brownie Pan
Because edge-focused pans have more surfaces and corners than a regular pan, preparation matters. Rushing this step often leads to frustration when unmolding.
Step-by-Step Preparation
- Wash before first use: Remove any factory residue with warm water, a soft sponge, and mild detergent. Dry completely.
- Grease every surface: Use softened butter, neutral oil, or baking spray. Pay attention to interior walls and corners where batter can catch.
- Optional flour dusting: For scratch recipes, lightly dust greased surfaces with cocoa powder (for chocolate brownies) or flour, tapping out excess.
- Consider parchment “lifters”: Small strips along the length of the channels can help you loosen bars more easily once cooled.
- Check for pooling: Tilt the pan to ensure no puddles of oil collect in corners, which can fry the edges instead of baking them.
Once prepped correctly, you can pour in your favorite batter, knowing that clean release and intact edges are far more likely.
Adjusting Recipes for Edge Pans
You do not need a special “edge pan” recipe. Most standard brownie formulas adapt beautifully with a few small adjustments to time and technique.
Tips for Boxed Mixes
- Use the smaller pan size directions (8×8 or 9×9) when baking in a channel-style edge pan of similar total volume.
- Begin checking for doneness 5–10 minutes earlier than the box suggests, since more surface contact can speed baking.
- If your mix gives options (fudgy vs. cakey), choose the fudgy instructions, as extra edges will already add chew.
- Avoid overfilling; batter should generally sit below the top of the interior walls to prevent overflow.
Tips for Scratch Recipes
- Consider slightly reducing sugar or baking time if you notice edges becoming too crisp after your first test batch.
- For very dense batters with lots of chocolate or mix-ins, spread the batter thoroughly into all channels with an offset spatula to prevent air gaps.
- Use the toothpick test, but pull the pan when a few moist crumbs cling; waiting for a completely dry tester often leads to dry brownies in an edge-heavy design.
The first batch is your calibration round. Take notes on time, rack position, and visual cues so you can repeat success and avoid guesswork next time.
Creative Ways to Use an Edge Brownie Pan
Once you own a channel-style pan, it quickly becomes a go-to tool for more than just brownies. The shape encourages tidy, bar-sized servings and controlled portions.
Sweet Recipes Beyond Brownies
- Blondies and cookie bars: Buttery batters benefit from extra edges, which become pleasantly toasty without burning the center.
- Breakfast bakes: Try baked oatmeal bars or French toast bakes that slice cleanly and reheat well for weekday mornings.
- Snack cakes: Cinnamon-swirl or coffee cakes hold their structure beautifully when baked in narrow channels.
Savory Uses You Might Not Expect
- Mac and cheese bars: The edges crisp up into cheesy, golden ridges that reheat well for lunches.
- Egg bakes and frittatas: Pre-greased channels create individual egg slices perfect for sandwiches.
- Polenta or cornbread strips: Ideal for dipping into chili or soup, with plenty of crusty sides.
Think of the pan as a bar-shape mold, not just a brownie mold. If a recipe is firm enough to slice and hold its shape, it is a candidate for your edge pan.
Care, Cleaning, and Storage
Good bakeware should last for years, and an edge brownie pan is no exception. Caring for it properly protects both performance and nonstick coatings.
Cleaning Tips
- Let the pan cool before rinsing to prevent warping from sudden temperature changes.
- Soak briefly in warm, soapy water if stubborn bits cling to corners; avoid long soaks that can damage coatings.
- Use soft sponges or non-abrasive brushes; never use steel wool or harsh scouring powders on nonstick surfaces.
- Check manufacturer guidance before putting it in the dishwasher, even if it is labeled dishwasher-safe; hand-washing generally extends the life of the coating.
Smart Storage
Because channel pans have raised interior walls, stacking heavy items on top can cause bending or scratches. If you must nest it with other pans, place a soft towel or silicone mat between surfaces to prevent damage.
Store it in a dry cabinet to avoid moisture buildup, which can discolor metal over time and degrade nonstick layers.
Is an Edge Brownie Pan Right for You?
Not every baker needs an extra-specialized pan, but for certain households, an edge-focused brownie pan solves recurring problems: uneven baking, squabbles over corner pieces, and messy slices for parties.
- You have at least one person who always reaches for the corner piece first.
- You bake brownies or bar desserts at least a few times a year for holidays, potlucks, or gifts.
- You enjoy gear that earns its keep by working for both sweet and savory recipes.
- You want bakery-style presentation without fussing over cutting or plating.
If these points resonate, an edge brownie pan can become a favorite tool rather than a gimmick that gathers dust.
Frequently Asked Questions About Edge Brownie Pans
Do I need to change my oven temperature?
In most cases you can keep the temperature the same as your recipe suggests. However, because there is more metal in contact with the batter, edges may set slightly faster, so it is wise to check doneness a few minutes early the first time you use a new pan.
Can I bake half a batch in an edge pan?
Yes, but aim to keep batter depth similar to a full batch by concentrating it in a portion of the pan or by using a recipe scaled specifically for smaller quantities. Too shallow a layer can dry out quickly and lose the fudgy middle that makes brownies so appealing.
Will my brownies stick more because of all the corners?
They do not have to. With proper greasing, optional parchment strips, and a quality nonstick coating, release can be just as smooth as a standard pan. Allow brownies to cool until just slightly warm before loosening with a thin spatula.
Can I cut brownies directly in the pan?
Use plastic, silicone, or wooden tools if you plan to slice in the pan to avoid scratching nonstick coatings. If you want cleaner edges, lift individual bars out first with a flexible spatula and cut them on a cutting board with a sharp knife.
Is it worth buying if I already own a muffin pan?
A muffin pan can create edge-heavy brownie bites, but the texture is not identical to bar-style brownies, and portions tend to be smaller. An edge brownie pan offers the bar-style chew and thickness that many people prefer, while still delivering extra edges.
Edge-focused brownie pans turn an everyday dessert into something people talk about long after the pan is empty. By understanding how the design, material, and preparation work together, home bakers can turn out consistent, crowd-pleasing batches that finally deliver enough chewy corners for everyone.