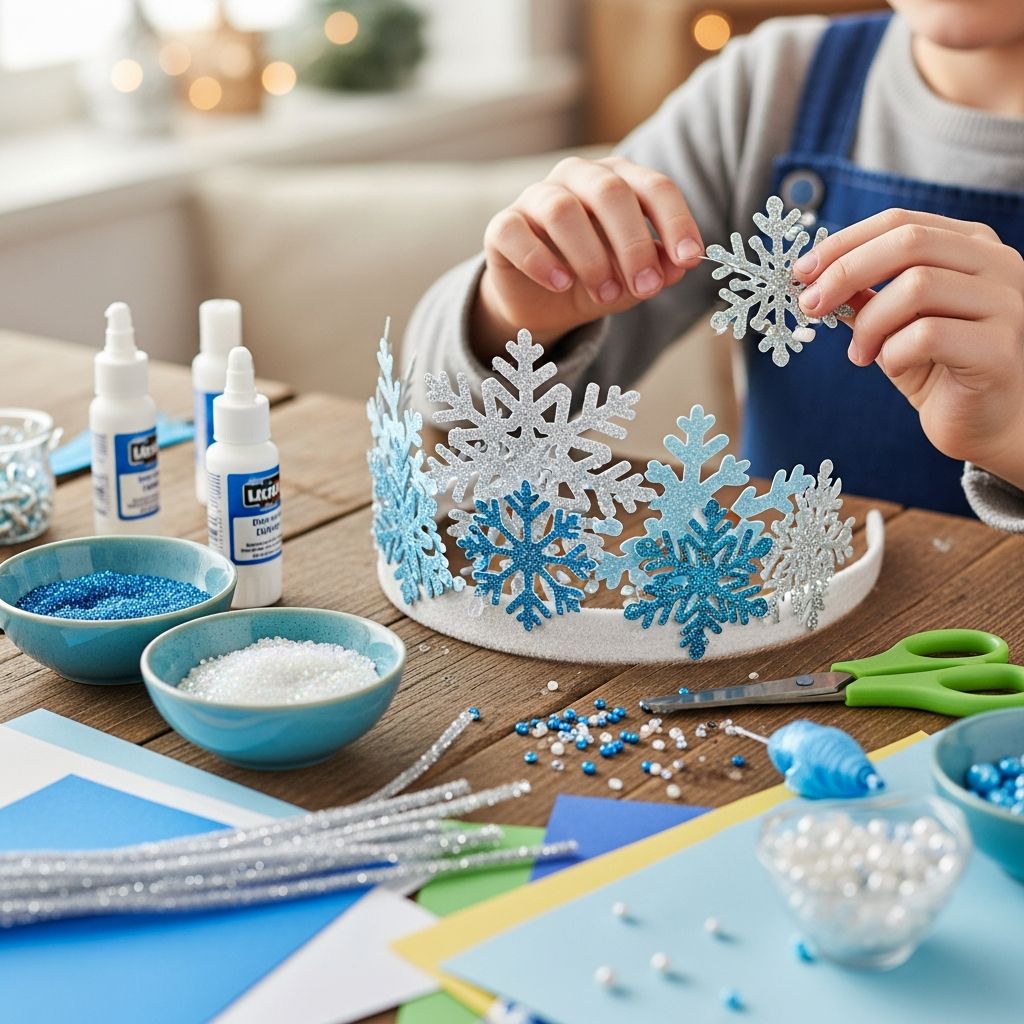
Snowy days and long winter evenings are perfect for simple crafts that invite children to pretend, play, and create. A handmade snowflake crown is an easy, low-cost project that turns kids into ice queens, snow kings, and winter sprites in just an afternoon. Using mostly recycled materials, you can set up this activity as a quiet snow-day project, a party craft, or a classroom center during the colder months.
This guide walks you through materials, preparation, step-by-step instructions, variations for different ages, safety tips, and ideas for extending the fun into learning and imaginative play.
Why Snowflake Crowns Make a Great Winter Craft
Snowflake crowns are more than just cute accessories. They combine creativity, fine motor skills, and sensory play in a single, manageable project that scales easily for one child or a whole group.
- Budget-friendly: Most supplies can be found around the house or in basic craft bins.
- Eco-conscious: Reusing cardboard and scrap paper introduces kids to simple concepts of recycling and waste reduction.
- Developmentally rich: Cutting, gluing, and decorating support hand–eye coordination and fine motor strength, key foundations for early writing skills.
- Flexible: The steps can be simplified for toddlers or expanded into intricate designs for older kids and adults.
- Imaginative: Finished crowns encourage storytelling, dramatic play, and social interaction.
Gathering Your Craft Supplies
You can adapt this project to what you already have. Consider the lists below a starting point rather than a strict recipe.
Essential Materials
- Cardboard base: A rinsed and flattened cereal box or similar thin cardboard.
- White or light-colored paper: Printer paper, paper doilies, scrap notebook paper, or leftover gift wrap.
- Glue: A glue stick for paper; white school glue or tacky glue if you plan to add heavier decorations.
- Scissors: Child-safe scissors for kids; sharper craft scissors for adults to cut cardboard.
- Marking tools: Pencil for sketching crown shapes; light-colored marker or pen for details.
Optional Decorations
- Silver or white glitter or glitter glue for sparkle (use sparingly and with supervision).
- Sequins, rhinestones, or adhesive gems.
- White tissue paper or coffee filters for delicate snowflakes.
- Metallic pens or gel pens for icy details.
- Ribbon, yarn, or elastic to secure the crown around the head.
Tools for Adult Helpers
- Craft knife or box cutter (for cutting cardboard, adults only).
- Ruler or measuring tape to size the crown to each child’s head.
- Hole punch, if you plan to tie the crown closed with string or ribbon.
Planning the Crown Shape
Before kids dive into decorating, an adult should prepare the basic crown bands and think through sizing.
| Step | What to Do | Tips |
|---|---|---|
| Measure | Gently wrap a strip of string or measuring tape around the child’s head, just above the ears. | Add 2–3 cm (about 1 inch) for overlap at the back. |
| Mark | Use the measurement to draw a long rectangle on the cardboard. | Height of 5–7 cm (2–3 inches) works well for most kids. |
| Cut | Adults cut along the lines to create the crown band. | You can get two bands out of most cereal boxes. |
| Shape | Sketch simple points or curves along one long edge to form the crown silhouette. | Keep the design bold and not too detailed for easier cutting. |
Crafting Paper Snowflakes
Snowflakes are the heart of this craft. There is no single right way to make them, and even very simple folds can create beautiful patterns.
Basic Folded Snowflakes
For school-age children, you can introduce a simple folded-paper method:
- Cut the paper into a square.
- Fold it in half into a triangle.
- Fold the triangle in half again.
- Snip small shapes from the edges: triangles, semicircles, or rectangles.
- Unfold carefully to reveal a symmetrical snowflake.
Children learn about symmetry, pattern, and repetition as they experiment with different cuts.
Snowflakes for Younger Children
- Use pre-cut paper doilies or die-cut snowflakes so toddlers can focus on gluing and decorating.
- Offer thick paper or foam shapes if tiny folds and cuts are too challenging.
- Encourage them to stamp, dot, or scribble on the shapes to create their own version of snow.
Step-by-Step: Building the Snowflake Crown
Once you have a crown band and a collection of snowflakes, it is time to assemble everything. These steps assume an adult has already cut out the cardboard bands and drawn or cut the basic crown shape.
1. Cover the Cardboard Base
If you prefer not to see brand logos or colors from the cereal box, cover the band first.
- Cut a strip of white paper or tissue paper slightly taller than the crown band.
- Apply glue stick over the cardboard and press the paper strip firmly in place.
- Smooth out bubbles with your hand or a scrap of cardboard.
- Trim any extra paper from the edges once the glue has set.
2. Arrange the Snowflakes
Lay everything out before gluing. This helps kids visualize the design.
- Invite children to place snowflakes along the top edge of the band.
- Encourage overlapping snowflakes for a layered, frosty look.
- Ask them to decide: Do you want big snowflakes in the center and small ones on the sides?
- Take a quick photo of the layout if they want to remember it before gluing.
3. Glue the Snowflakes
Now it is time to make the design permanent.
- For flat paper snowflakes, a glue stick or thin layer of white glue is enough.
- Press each snowflake down firmly for a few seconds so it adheres well.
- If using heavier decorations (foam shapes, gems), use a stronger school glue and allow extra drying time.
4. Add Sparkle and Details
Fine details give each crown its own personality.
- Draw swirls and tiny snow dots with metallic or gel pens between snowflakes.
- Add glitter glue outlines to the tips of the crown or along the edges of snowflakes.
- Place a single sequin, bead, or gem in the center of each snowflake.
- Use a cotton swab to spread any excess glue and keep lines neat.
When working with glitter, consider using glitter glue rather than loose glitter to reduce mess and inhalation risks.
5. Fit and Fasten the Crown
Once everything is dry to the touch, you can shape the crown into a circle.
- Wrap the crown gently around the child’s head to find a comfortable fit.
- Mark the overlap point with a pencil.
- Use a stapler, strong tape, or a strip of glue and a paper clip (while it dries) to close the band.
- Alternatively, punch a hole at each end and tie with ribbon, yarn, or elastic for an adjustable closure.
Age-Based Variations and Adaptations
Different ages will engage with this craft in different ways. Adapting expectations and steps keeps the activity enjoyable and safe for everyone.
Toddlers (Ages 2–3)
- Pre-cut the crown band and all snowflake shapes.
- Offer a small selection of larger, easy-to-handle pieces.
- Let them explore sticking and pressing shapes to the band with glue sticks.
- Focus on the sensory experience, not the final look.
Preschoolers (Ages 3–5)
- Allow them to help trace and cut simple snowflake shapes with thick paper.
- Introduce basic patterns: snowflake–star–snowflake, or repeating colors.
- Use the activity to talk about shapes, counting points, or comparing sizes.
- Supervise scissor use closely and provide blunt-tip scissors appropriate for their age.
School-Age Children (Ages 6+)
- Encourage them to design their own crown silhouette and more complex snowflakes.
- Challenge them to create “families” of snowflakes with recurring motifs.
- Introduce symmetry: count how many folds, how many repeated cut shapes, and how that affects the final pattern.
- Let them be responsible for measuring and fitting their own crown bands, with guidance.
Safety, Accessibility, and Sensory Considerations
Simple craft precautions help ensure that creative time remains joyful and safe, especially with young children.
- Scissors: Choose age-appropriate safety scissors and monitor their use. Research shows that guided cutting activities can safely support motor development when properly supervised.
- Small parts: Avoid beads, sequins, and other choking hazards for children under 3 years or those who mouth objects.
- Glitter: For children who are sensitive to textures or have respiratory concerns, replace loose glitter with crayons, metallic markers, or foil paper.
- Fragrance: Skip scented glues or heavily perfumed products if anyone in the group is sensitive to smells.
- Breaks: Offer movement or stretching breaks, especially for children who find sitting and focusing for long periods challenging.
Turning Snowflake Crowns into Learning Moments
While the main goal is fun, you can easily weave in gentle learning themes without turning the activity into a formal lesson.
Math and Pattern Exploration
- Count the number of points on each snowflake.
- Sort decorations by size, color, or shape before gluing.
- Create repeating patterns across the crown band and ask the child to predict what comes next.
Science and Seasons
- Talk about how real snowflakes form in clouds and why they are made of ice.
- Mention that natural snowflakes are usually hexagonal (six-sided), though your paper designs can have any shape.
- Compare pictures of real snow crystals with the paper versions children create.
Language and Storytelling
- Invite kids to name their snow kingdom or invent a character who wears the crown.
- Ask open-ended questions: What kind of weather happens in your kingdom? or Who are your friends there?
- Have older kids write a short story or comic featuring their crowned character.
Extending the Craft into Play
Once everyone has a finished snowflake crown, the crafting can naturally flow into dramatic play.
- Host a pretend winter parade around the living room or classroom.
- Create a cozy reading nook with winter-themed books and invite kids to wear their crowns while listening.
- Pair the crowns with simple capes made from blankets, scarves, or old fabric.
- Use music to inspire movement: swirling like snow, marching like winter guards, or gliding like ice skaters.
Quick Troubleshooting Guide
Here are a few common issues you might encounter and some easy fixes.
| Issue | Possible Cause | Simple Solution |
|---|---|---|
| Crown feels too floppy | Cardboard is too thin or damp from glue | Glue an extra layer of cardboard or thick paper on the inside for reinforcement. |
| Snowflakes keep peeling off | Not enough glue or glossy surface underneath | Lightly roughen the cardboard with a pencil, then re-glue using white school glue. |
| Crown is too tight or too loose | Measurement off by a few centimeters | Open the back and re-close with ribbon or elastic for adjustable sizing. |
| Kids lose interest halfway through | Steps feel too long or too complex | Break the project into two short sessions: decorating snowflakes first, assembling crowns later. |
Frequently Asked Questions (FAQs)
How long does it take to make a snowflake crown?
For most children, setting up, decorating, and assembling one crown takes about 30–45 minutes, plus extra drying time if you use a lot of liquid glue or thick layers of decorations.
Can we make these crowns in a classroom or group setting?
Yes. Prepare the cardboard bands and some snowflakes in advance, then set up stations for gluing and decorating. Use name labels on the inside of each crown so they do not get mixed up.
What if we do not have cardboard from cereal boxes?
You can substitute file folders, cardstock, or several layers of construction paper glued together. The goal is to have a base that is flexible enough to bend yet sturdy enough to hold its shape.
How can I reduce the mess from glitter and glue?
Place a tray or sheet of paper under the work area to catch spills, choose glitter glue instead of loose glitter, and keep a damp cloth or wipes handy for quick cleanups.
Are snowflake crowns reusable?
Yes, if you store them carefully. Encourage kids to remove the crowns by holding the band, not the snowflake tips, and keep finished crowns in a box or on a shelf where they will not be crushed.
References
- Packaging and recycling — U.S. Environmental Protection Agency (EPA). 2023-05-08. https://www.epa.gov/recycle/reducing-waste-what-you-can-do
- How to choose toys for toddlers — American Academy of Pediatrics. 2019-12-18. https://www.healthychildren.org/English/ages-stages/toddler/Pages/How-to-Choose-Toys-for-Your-Toddler.aspx
- Snowflakes: Nature’s secret beauty — National Science Foundation / Kenneth Libbrecht. 2010-01-05. https://www.nsf.gov/discoveries/disc_summ.jsp?cntn_id=116662
- Glitter — microplastics in cosmetics — European Chemicals Agency. 2022-11-08. https://echa.europa.eu/hot-topics/microplastics
- Choking hazards — U.S. Consumer Product Safety Commission. 2021-02-10. https://www.cpsc.gov/Safety-Education/Safety-Education-Centers/Choking-Hazards