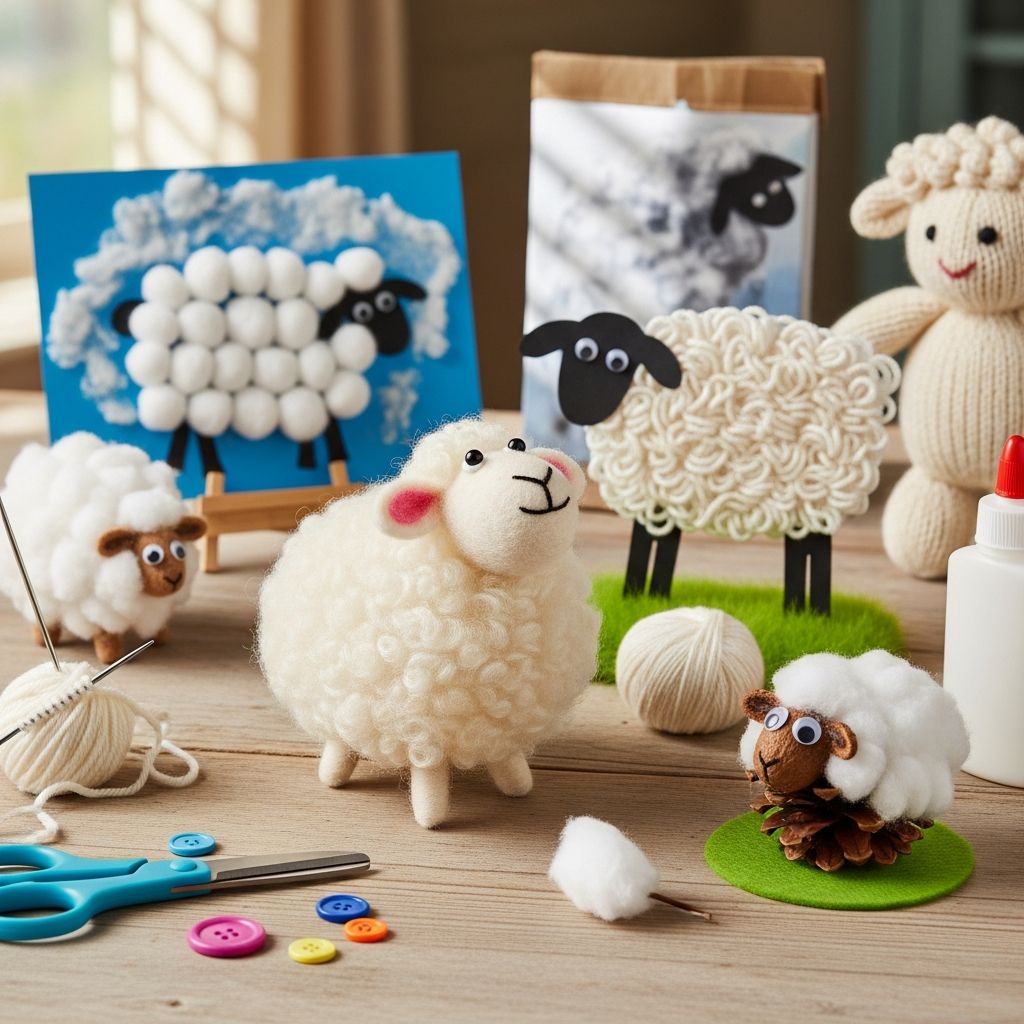
Sheep crafts are an easy way to turn an ordinary afternoon into something memorable, whether you are celebrating a holiday, exploring farm animals with kids, or just looking for a cozy project on a rainy day.
With a few common supplies and a bit of imagination, families can create a whole flock of fluffy sheep while practicing fine motor skills, creativity, and teamwork.
Why Sheep Crafts Are Perfect for Kids
Sheep are naturally appealing to young children: they are soft, gentle, and simple to represent in craft form using circles and clouds, so even beginners feel successful.
Because these projects focus on texture and basic shapes, they work for a wide age range—from toddlers who love sticking cotton balls to older kids who enjoy adding patterns and details.
Essential Supplies for a Fluffy Flock
Before starting, gather materials in a small tray or box so kids can easily reach what they need, and cover your workspace with newspaper or a reusable tablecloth for quick cleanup.
Exact materials can change depending on what you already have at home, but the list below covers the basics plus some fun optional extras.
Core materials
- White card stock or construction paper for sturdy sheep bodies.
- Black or dark paper for faces, legs, and ears.
- Cotton balls, pom-poms, or scrunched tissue paper for the wool.
- Glue sticks for most pieces and liquid glue for heavier items.
- Child-safe scissors sized for little hands.
- Pencils, crayons, markers, or colored pencils for drawing features.
- Googly eyes (optional) for extra personality.
Fun extras
- Pipe cleaners for legs, tails, or decorative borders.
- Paper plates or cardboard circles for quick sheep bodies.
- Glitter pens or metallic markers for festive accents.
- Scrap fabric, felt, or ribbon for scarves, blankets, or bows.
- Clothespins or craft sticks if you want your sheep to stand or become puppets.
Project Overview: Three Ways to Craft a Sheep
To keep this guide flexible, it focuses on three main versions of a sheep project: a flat picture, a standing figure, and a decorative card or banner.
You can pick one style, or combine them into a mini sheep-themed afternoon where each child chooses the design that fits their age and interests.
| Type | Best For | Time Needed | Mess Level |
|---|---|---|---|
| Flat fluffy sheep picture | Toddlers and preschoolers | 15–30 minutes | Low |
| Standing 3D sheep | Early elementary and up | 30–45 minutes | Moderate |
| Sheep cards or banners | Mixed ages and groups | 20–40 minutes | Low–moderate |
Step-by-Step: Flat Fluffy Sheep Picture
This simple version is ideal for very young crafters because it focuses on gluing and sticking rather than detailed cutting, and adults can easily prepare pieces in advance.
Hang completed sheep on the fridge, line them up on a wall as a “pasture,” or slide them into protective sleeves for a child’s art binder.
Prep work for adults
- Draw or trace a large cloud-like oval on white card stock for the sheep’s body.
- Cut small rounded rectangles or ovals from dark paper for legs.
- Cut a circle or oval from dark paper for the head and two smaller ovals for ears.
- Place pre-cut pieces in labeled piles so kids can find what they need.
Craft steps for kids
- Arrange the body: Glue the white body shape onto a colored background page so there is space around it for grass or sky.
- Add the wool: Cover the body area with glue and press cotton balls or pom-poms on top, leaving a small space for where the head will attach.
- Create the face: Glue ears onto the dark head shape; draw a smile and nose, or add googly eyes for extra charm.
- Attach the head and legs: Glue the head to the edge of the fluffy body and attach legs underneath to make the sheep stand on the ground.
- Decorate the scene: Use markers to draw grass, flowers, clouds, or even a barn in the background.
Adaptations by age
- Toddlers: Focus on placing cotton balls and large pre-cut pieces; an adult can handle all scissors work.
- Preschoolers: Allow simple cutting along thick lines and encourage drawing extra background details.
- Older kids: Invite them to design different breeds with patterned wool, spots, or colorful accessories.
Step-by-Step: Standing 3D Sheep Figure
A 3D sheep turns the craft into a toy, a table decoration, or a centerpiece for holiday meals, and kids who enjoy building or imaginative play often love this style.
You can use small cardboard tubes, folded card shapes, or even stacked circles to give your sheep a solid base.
Choosing a base
- Cardboard tube: A sturdy choice that can be covered with paper before adding fluffy wool.
- Folded card “bridge”: A rectangle folded into an upside-down U shape, with legs cut from the sides.
- Double paper plate body: Two plates glued together with stuffing between them for an oversized sheep.
Core construction steps
- Prepare the base: Cover the tube or folded card with white paper to keep the body looking bright even if small areas peek through the wool.
- Add legs: Attach pipe cleaners, folded card strips, or cut-out legs to the underside or sides, checking that the sheep stands steadily.
- Glue the wool: Apply glue around the outside and press on cotton balls or pom-poms until the base is completely covered.
- Make the head: Create a head from card or thick paper, decorate with a face, then glue it to one end of the body.
- Finish with details: Add ears, a tail, and optional accessories like a small scarf or bow.
Using your 3D sheep
- Set up a tiny farm scene with toy fences, green paper grass, and other animals.
- Use the sheep as place cards by writing each guest’s name on the body for a holiday meal.
- Create a story corner where children use their sheep as characters in homemade tales.
Sheep Cards, Bookmarks, and Banners
Once kids understand the basic shapes of a sheep, those shapes can appear on cards, bookmarks, and banners for holidays, birthdays, or classroom themes.
These flat versions travel easily, so they are perfect for mailing to grandparents or decorating a shared space.
Sheep greeting cards
- Fold a piece of card in half to create a simple base.
- Build a small sheep on the front using the flat sheep method with fewer cotton balls.
- Encourage kids to write kind messages inside or add simple drawings.
Sheep bookmarks
- Cut a strip of card and decorate the bottom with grass or a fence pattern.
- Attach a small sheep near the top so that the head or wool peeks out from a book.
- Lamination or clear tape can make the bookmark more durable.
Sheep garlands and banners
- Cut several sheep bodies from medium-weight card and decorate them individually.
- Punch holes near the top and string them along ribbon or yarn to create a banner.
- Alternate sheep with simple shapes like hearts, stars, or flowers to match the season.
Making the Craft Educational
Sheep projects can be more than just cute; they can also introduce gentle learning in science, math, and language arts without feeling like a lesson.
Pairing the craft with books or music about farms can anchor new vocabulary and concepts in a fun, hands-on activity.
Subtle learning goals
- Fine motor practice: Pinching cotton, squeezing glue, and placing small pieces build finger strength.
- Shape and counting skills: Encourage kids to count legs, cotton balls, or sheep in a banner.
- Storytelling: Ask children to name each sheep and invent a short story about its day.
Conversation starters
- “Where do sheep live and what do they eat?”
- “How is a lamb different from an adult sheep?”
- “What could our sheep be doing if it lived on a farm near us?”
Tips for a Smooth Craft Session
Planning a few small details beforehand can reduce stress and keep the focus on creativity rather than cleanup or frustration.
Consider how long your child is likely to stay engaged, and aim to finish the main steps within that time, saving optional extras for those who want to continue.
Practical setup advice
- Use trays or baking sheets to give each child a defined workspace and catch stray cotton.
- Offer aprons or old shirts if you are using liquid glue or paint details.
- Keep a small damp cloth or wipes nearby for quick hand cleaning.
Encouraging independence
- Let kids choose colors for accessories, backgrounds, and extra decorations.
- Provide examples but emphasize that every sheep can look different.
- Invite children to help with simple cleanup tasks as part of the routine.
Safety Notes and Material Alternatives
As with any craft involving small pieces and glue, adult supervision is essential, especially with very young children who may still explore with their mouths.
If you prefer eco-friendly or low-waste options, many standard materials have easy substitutions that still produce charming results.
Safety considerations
- Avoid very small embellishments like tiny beads with toddlers or known mouthers.
- Choose non-toxic glue and markers, and store scissors safely when not in use.
- Model how to handle scissors away from the body and pass them handle-first.
Eco-conscious choices
- Replace new cotton balls with small pieces of reused tissue paper or scrap fabric.
- Use cardboard from packaging for bodies instead of fresh card stock.
- Save leftover shapes in a labeled envelope for future projects.
Frequently Asked Questions About Sheep Crafts
How long does a typical sheep craft take?
For young children, plan about 20–30 minutes for a flat sheep picture and slightly longer if you add a detailed background. Three-dimensional sheep or banners may stretch to 40 minutes or more, depending on the number of pieces and how much decorating your child enjoys.
What if I do not have cotton balls?
You can tear white tissue paper into small pieces and scrunch them into little clouds, cut up soft fabric scraps, or even draw curly wool with markers instead of using textured materials. The finished project will still clearly look like a sheep, and kids often enjoy experimenting with different textures.
How can I adapt this for a group or classroom?
For larger groups, prepare body and head shapes in advance and set up stations: one for gluing wool, one for making faces, and another for background decorations. Rotating through stations keeps traffic flow organized and helps adults focus on safety and guidance in smaller clusters.
What age range is best for these crafts?
Toddlers can participate using pre-cut pieces and plenty of glue, while preschoolers and early elementary children can handle more cutting and design choices. Older kids may enjoy engineering more complex sheep, such as adding moving legs, patterned wool, or building a small farm scene around their creations.
How do I store or display finished sheep?
Flat sheep pictures slide easily into page protectors or a portfolio, while 3D sheep can live on a bookshelf, mantel, or classroom display shelf. If you are short on space, take photos of particularly special creations before recycling bulky bases like large cardboard tubes.
Turning a Simple Sheep into a Lasting Memory
Crafts often matter less for the final object and more for the shared time, so embrace uneven cotton, wobbly legs, and crooked smiles as signs of genuine effort and learning.
By building in choice, conversation, and a relaxed pace, a simple sheep project can become a family tradition you return to year after year with new twists and growing skills.