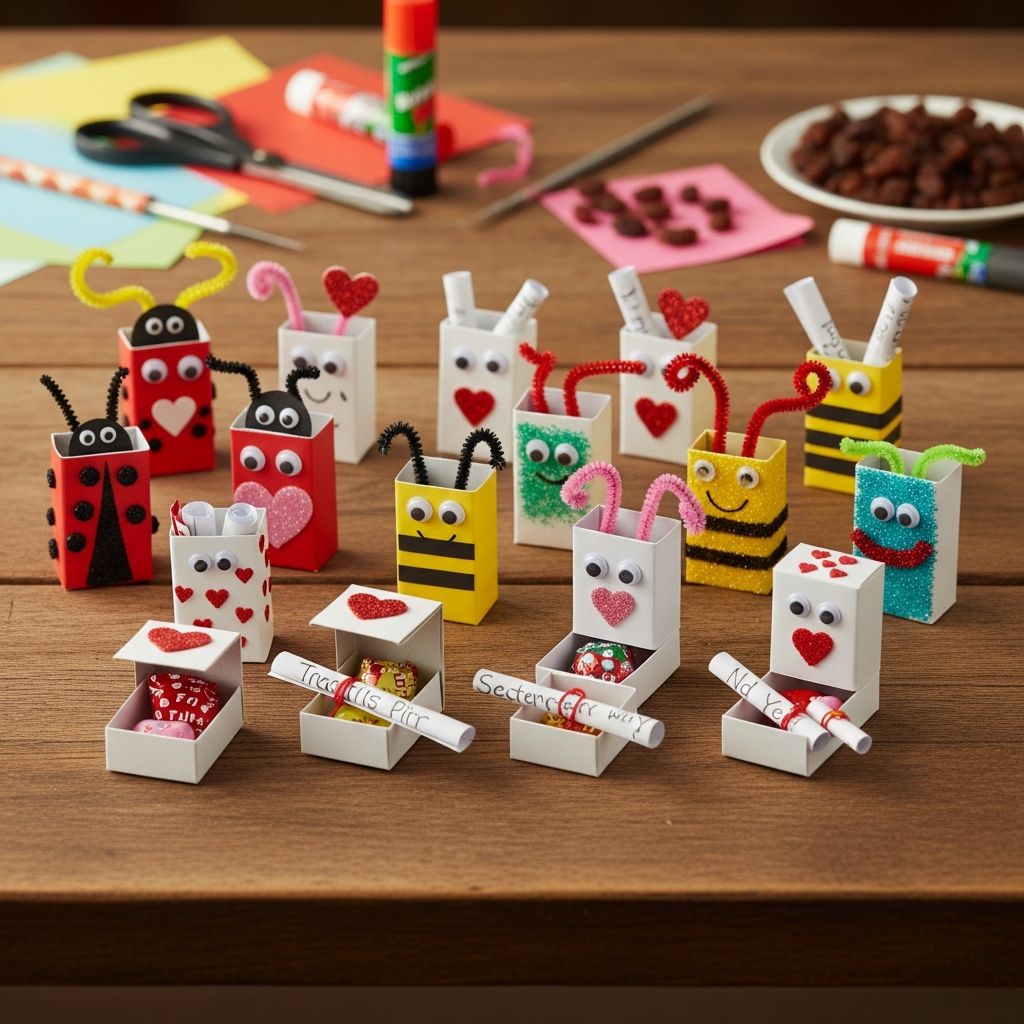
Classroom Valentines do not have to be expensive, sugar-packed, or stressful to pull together the night before the party. With a few basic supplies and a stash of mini raisin boxes, you can create fun, whimsical Valentines that kids love to hand out and teachers actually appreciate.
Why Raisin Box Valentines Work So Well
Raisin box Valentines strike a rare balance between fun, practical, and relatively healthy. They are easy to mass-produce, simple for kids to carry, and can be dressed up with bright colors and playful messages.
- They are inexpensive and widely available in bulk packs.
- They lean healthier than most candy-based treats and are usually lunchbox-approved.
- They are rigid, making them easier for kids to hold, stack, and pack than flimsy paper cards.
- They offer a mini canvas for cute designs without requiring advanced art skills.
Planning Your Raisin Box Valentine Project
A smooth Valentine-crafting session starts with a bit of planning. Decide in advance how many you need, what style you want, and how involved your child wants to be. This helps you avoid last-minute panic and extra store runs.
- Check the class list or party headcount before buying supplies.
- Ask whether there are food restrictions or school guidelines about treats.
- Choose a color palette or simple theme to keep everything cohesive.
- Schedule time over one or two afternoons instead of trying to finish all in one evening.
Essential Supplies and Budget Tips
You can keep this project very basic or upgrade with decorative extras. Start with a simple list, then add fun details only if time and budget allow.
Core Supply Checklist
- Mini raisin boxes (one per Valentine, plus a few extras for mistakes).
- White or colored cardstock for printable wraps or labels.
- Scissors or a paper trimmer for straight cuts.
- Glue stick or double-sided tape for attaching wraps.
- Washable markers or gel pens for names and doodles.
Optional Decorative Extras
- Heart stickers, googly eyes, or small foam shapes.
- Thin ribbon or baker’s twine for little bows.
- Metallic pens for outlines, borders, and tiny accents.
- Mini labels or washi tape to quickly add color.
Approximate Cost Overview
| Item | Typical Quantity | Estimated Price Range | Notes |
|---|---|---|---|
| Mini raisin boxes | 24–36 pack | Low to moderate | Often cheaper at warehouse or discount stores. |
| Cardstock | 25–50 sheets | Low | One pack can last for multiple holidays. |
| Stickers & embellishments | Assorted pack | Low to moderate | Buy one mixed pack and divide among siblings. |
| Glue/tape | 1–2 pieces | Low | Likely already at home in your craft drawer. |
Designing Your Own Raisin Box Wraps
The most fun part of this project is turning a plain snack box into a tiny piece of art. Think of the raisin box as a miniature gift you are wrapping with personality and color instead of just paper.
Theme Ideas Kids Love
Choose one main theme to keep designing simple, especially if you are making dozens of Valentines. You can vary small details, like colors or faces, while sticking to one central idea.
- Friendly fruit characters: Draw smiling grapes or dancing raisins on each wrap.
- Mini robots: Use the box shape as a robot body and add drawn arms, legs, and buttons.
- Animals: Turn each box into a bear, cat, or monster with big eyes and tiny ears taped on top.
- Simple hearts: Use bold heart shapes and patterns for a classic look that is fast to produce.
Layout Tips for Easy Printing or Drawing
Even if you are not a graphic designer, you can sketch or print simple wraps that look polished. Work with the box, not against it, by measuring once and reusing your template.
- Measure the width and height of one box and add a little overlap for the back seam.
- Divide your paper into rectangles that match those measurements before drawing or typing text.
- Place the main design on what will be the front panel, leaving space near the bottom for the child’s name.
- Keep details fairly large; tiny fonts and thin lines get lost when wrapped around a small box.
Step-by-Step: Assembling Raisin Box Valentines
This is a project kids can genuinely participate in, not just watch. Break the process into small steps and let kids repeat the parts they enjoy most, whether that’s coloring, wrapping, or adding stickers.
1. Prepare the Wraps
- Measure one raisin box and mark out rectangles on cardstock.
- Draw or print your chosen designs inside those rectangles.
- Cut out the wraps using scissors or a paper trimmer for straighter edges.
2. Decorate Before Wrapping
- Let kids color in characters, hearts, or borders while the wraps are still flat.
- Add stickers, small doodles, or stamped shapes to personalize each one.
- Write short messages such as “Happy Valentine’s Day” or a simple greeting.
3. Attach Wraps to the Boxes
- Place a strip of double-sided tape or glue along one short edge of the wrap.
- Align the front panel of the design with the front of the raisin box.
- Wrap the paper snugly around the box and secure the overlapping edge at the back.
- Press along the edges to make sure the wrap stays flat and smooth.
4. Add Names and Final Touches
- Write “To:” and “From:” on the front, side, or back of each wrapped box.
- Glue on googly eyes or mini foam hearts if you are using them.
- Optional: Tie a small piece of ribbon around the box and knot in front for a gift-like feel.
Classroom-Friendly and Allergy Considerations
Food-related Valentines can be tricky in classrooms with a variety of allergies and dietary needs. Raisin boxes are often considered a safer option than many candy treats, but it is still worth double-checking.
- Confirm that raisins are allowed at school and in the specific classroom.
- Look for clearly labeled packages and keep the nutritional information visible if possible.
- Consider making a small batch of non-food Valentines (such as stickers or pencils) for kids who cannot have raisins.
Ways to Involve Kids of Different Ages
One of the strengths of this project is that kids of various ages can help at their own level. This makes it perfect for siblings working at the same table with adjusted tasks.
Toddlers and Preschoolers
- Let them place stickers on pre-cut wraps or directly onto the boxes.
- Offer chunky crayons to add simple scribbles or color large heart shapes.
- Have them help count boxes and stack finished Valentines.
Early Elementary Kids
- Trace or cut simple rectangles under supervision.
- Write their own names and classmates’ names in big letters.
- Draw faces, patterns, or decorative borders on each wrap.
Older Kids
- Design digital templates using basic word processing or drawing software.
- Take charge of measuring, cutting, and helping younger siblings.
- Experiment with puns, themed jokes, or more detailed illustrations.
Time-Saving Shortcuts for Busy Families
Some weeks are busier than others, and not every family has the capacity for a full-scale crafting session. You can still enjoy custom raisin box Valentines with a few practical shortcuts.
- Print one simple design and reuse it for all boxes instead of creating unique artwork.
- Skip ribbon and 3D embellishments if you need the Valentines to pack flat in a backpack.
- Pre-cut wraps in advance and store them with your craft supplies so you are ready before February.
- Work in small bursts: cut one evening, decorate the next, assemble on a third day.
Display, Storage, and Transport Tips
Once your tiny treats are finished, you will want to keep them neat and intact until party day. A little planning makes it easier for kids to transport everything without crushed corners or lost boxes.
- Store completed Valentines in a shallow cardboard box or baking pan so they stand upright.
- Label the box with your child’s name and class to avoid mix-ups.
- Ask your child’s teacher if there will be Valentine bags or boxes at school; if not, send a simple paper gift bag for collecting cards.
- Remind kids to handle the box gently, especially if extra decorations are glued on.
Creative Variations on the Basic Idea
Once you learn how to wrap and decorate tiny boxes, you can easily adapt the project for different holidays and occasions. The same structure works for other small treats or trinkets.
- Swap raisins for mini boxes of crayons or small building blocks for non-food versions.
- Change the color scheme to pastels for spring celebrations or bright primaries for birthdays.
- Use the wraps as place cards by adding names prominently on the front for party seating.
- Turn them into mini thank-you gifts for teachers or coaches with a short note on the back.
SEO-Optimized FAQ: Raisin Box Valentines
How many raisin boxes do I need for classroom Valentines?
Start with the official class list and add a few extras for teachers, staff, or last-minute additions. Buying one slightly larger multipack is better than running short the night before the party.
Can I make raisin box Valentines without a printer?
Absolutely. You can cut plain strips of colored paper, wrap them around the boxes, and let kids decorate them with markers and stickers. Hand-drawn designs often look more charming and personal than printed ones.
Are raisin box Valentines considered healthy?
Raisins are still a sweet treat, but they are generally less processed than many candies and often fit within school snack guidelines. For truly health-focused classrooms, you can pair raisin boxes with non-food items like pencils or erasers.
How far in advance can I assemble them?
Because raisin boxes are shelf-stable and individually sealed, you can assemble your Valentines a week or two in advance with no problem. Store them in a dry, room-temperature place away from direct sunlight.
What if some kids in the class cannot have raisins?
Check with the teacher about allergies or dietary restrictions. Keep a small batch of alternative Valentines—such as mini notebooks, sticker sheets, or small toys—so every child receives something they can enjoy.
Can my child’s name go only on the back?
Yes. If you prefer the front design to stay uncluttered, place the “To” and “From” information on the back or one side of the box. Just make sure the names are large and legible enough for classmates and teachers to read.
How do I prevent the wraps from sliding off?
Use a strong glue stick or double-sided tape across the entire overlapping edge, not just a small dot of adhesive. Press along the back seam for a few seconds to help the paper grip the box firmly.
Can we reuse this idea for other holidays?
Yes, the basic method works for many occasions. Swap hearts for stars at New Year’s, pumpkins for autumn parties, or balloons for birthdays while keeping the same raisin box or mini-box base.
Making Valentine’s Day Meaningful, Not Stressful
Raisin box Valentines turn a simple snack into an opportunity for creativity, connection, and hands-on fun. With a bit of planning and a flexible approach, your family can enjoy crafting together and send your child to school with something they are proud to share.
Most importantly, this project keeps the focus on thoughtfulness and effort rather than perfection. Kids remember the time spent side by side at the table far more than whether every wrap was cut in a perfectly straight line.