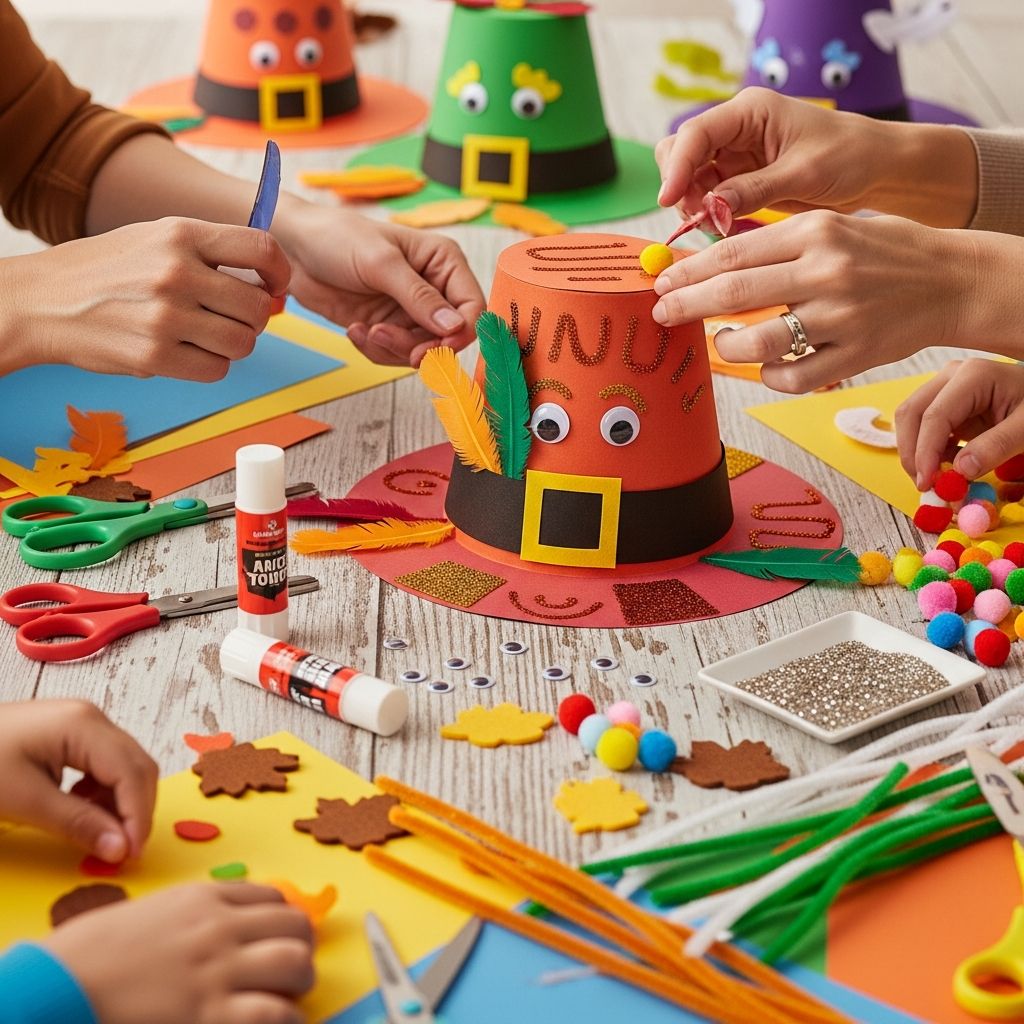
Thanksgiving is the perfect moment to slow down, gather around the table, and invite kids into the celebration with a simple hands-on craft. A playful Pilgrim hat made from paper or lightweight card is a low-mess, high-fun project that doubles as both costume and table décor.
Why Pilgrim Hats Make a Great Thanksgiving Craft
Creating Pilgrim hats is an easy way to keep children engaged while adults cook, set the table, or catch up with guests. The project is flexible enough to adapt to different ages and skill levels, and it requires only common craft materials many households already have on hand.
- Encourages creativity and fine motor skills.
- Can be finished in under 30 minutes for most kids.
- Works well for classrooms, playgroups, or family gatherings.
- Transforms into a costume prop, photo-booth accessory, or place-card holder.
Materials: Simple Supplies With Big Impact
While you can upgrade this craft with specialty paper or embellishments, it starts with a set of very straightforward materials. Feel free to substitute what you have at home to keep things budget-friendly.
Basic Supply List
- Sturdy black paper or light cardstock (for the main hat)
- Brown or orange paper (for the hat band)
- Yellow or metallic paper (for the buckle)
- Scissors suitable for the crafter’s age
- Glue stick or white craft glue
- Clear tape or stapler (for the headband)
- Pencil and ruler
Optional Embellishments
- Markers or colored pencils for designs and doodles
- Self-adhesive foam stickers or gems
- Glitter glue (less messy than loose glitter)
- Craft leaves or felt scraps for added fall flair
Planning Your Hat: Sizing and Style
Before cutting into your paper, it helps to decide how the hat will be worn and who will wear it. A hat designed for a toddler should be lighter, softer, and more flexible than one for an older child or adult.
- Measure the wearer’s head with a string or flexible tape, then transfer the measurement to a paper strip.
- Choose between a simple “front piece + headband” style or a more dimensional, cone-like crown.
- Plan colors and decorations in advance so kids feel involved from the beginning.
Pilgrim Hat Style Options
| Style | Best For | Skill Level | Key Features |
|---|---|---|---|
| Flat-front headband hat | Young kids, large groups | Beginner | One flat hat shape attached to a simple band; quick and low-mess. |
| Boxy crown hat | Older kids, home crafters | Intermediate | Box-like top with separate brim; looks more like a real hat. |
| Mini place-setting hat | Table décor, favors | Intermediate | Small-scale version that sits on plates, napkins, or treat bags. |
Step-by-Step: Classic Flat Pilgrim Hat for Kids
This version is ideal for classrooms, parties, and mixed-age groups. It uses a flat hat shape glued to a wraparound band that fits comfortably on the head.
1. Create the Headband
- Cut two long strips of black paper, each about 4–5 cm wide. The length is not critical as long as the strips can be joined to circle the head.
- Overlap the ends of the strips by a few centimeters and secure with tape or glue to make one long band.
- Wrap the band gently around the wearer’s head, mark where the ends meet, and tape them together. Slide the band off and set it aside.
2. Draw and Cut the Hat Front
- On black paper, draw a tall rectangle with a slightly wider rectangle at the bottom for the brim.
- Keep the proportions playful rather than exact; a slightly exaggerated brim looks particularly fun in photos.
- Cut out the hat shape carefully, smoothing any sharp corners that could bend or tear easily.
3. Add the Band and Buckle
- Cut a narrow horizontal strip from brown or orange paper to serve as the band. Its length should match the width of the hat’s crown (the upper rectangle).
- Glue this strip across the bottom of the crown area, just above the brim.
- From yellow or metallic paper, cut a square slightly taller than the band’s width. Cut a smaller square from its center to mimic a buckle, or draw the inner square with marker for an easier version.
- Glue the buckle in the center of the band, making sure it overlaps both the crown and the band for stability.
4. Attach the Hat to the Headband
- Place the headband on the table with its seam facing up.
- Line the hat front up so the brim overlaps the band by about 1–2 cm.
- Secure the brim to the band with glue, tape, or a few staples near the sides (an adult should handle stapling for safety).
- Allow the glue to dry fully before children put the hat on.
Decorating Ideas: Make Each Hat Unique
Once the basic structure is complete, kids can customize their hats to match their personalities, table settings, or favorite colors. Encourage experimentation instead of aiming for identical results.
- Add doodles: Use metallic markers to draw stars, swirls, or simple harvest patterns along the brim.
- Use stickers: Leaf-shaped stickers, pumpkins, or acorns instantly add seasonal charm.
- Try texture: Glue on small pieces of felt or fabric to the band for a mixed-media look.
- Sparkle subtly: Use glitter glue to trace the buckle outline, avoiding heavy coverage that can flake.
Adapting the Craft for Different Ages
A single craft can serve toddlers, elementary-age kids, and even teens with some simple adjustments. Tailoring cutting, assembly, and decoration to each age group keeps frustration low and engagement high.
- Toddlers: Pre-cut pieces and let them handle gluing large shapes or pressing on stickers.
- Early elementary: Allow children to draw and cut their own hat shapes with safety scissors.
- Older kids and tweens: Introduce more precise measuring, layering of paper, and additional details like stitched lines drawn with marker.
- Teens and adults: Challenge them to design elaborate versions, perhaps adding hand-lettered names or intricate patterns.
Mini Pilgrim Hats for Table Décor
The same basic concept can be scaled down to create charming tabletop accents. Mini hats make whimsical name cards, treat holders, or centerpieces that tie the whole meal together.
How to Make Mini Hats
- Cut smaller versions of the hat shape (about the size of your palm or even smaller).
- Instead of a wearable band, glue a paper circle behind the hat so it stands upright when tucked into a napkin ring or placed on a plate.
- Write each guest’s name on the hat band to turn the hats into personalized place cards.
- For treat holders, create a simple cone or box-shaped base beneath the hat and fill it with wrapped candies or notes of gratitude.
Safety and Cleanup Tips
Holiday crafts are more enjoyable when safety and cleanup are considered in advance. A few simple strategies will help the activity run smoothly, even with a large group of kids.
- Cover the table with recycled paper or an old tablecloth to protect surfaces.
- Hand out blunt-tip scissors to younger children and supervise closely.
- Keep staplers and hot glue (if used) in adult hands only.
- Place a small trash container at the center of the table for easy scrap disposal.
- Store finished hats on a flat tray or empty baking sheet while drying.
Connecting the Craft to Thanksgiving Conversations
Beyond the fun of making and wearing the hats, this activity provides a natural moment to talk about gratitude and the meaning of the holiday. Keeping the conversation age-appropriate ensures everyone feels included and heard.
- Invite each child to share one thing they are thankful for while decorating the hat band.
- Encourage kids to write or draw gratitude notes and tuck them inside mini table hats.
- Use the hats as a cue for storytelling or sharing family traditions during the meal.
Frequently Asked Questions
How long does it take to make one Pilgrim hat?
For young children with adult help, expect about 20–30 minutes from cutting the pieces to a fully decorated, ready-to-wear hat. Older kids who work independently may take longer if they add intricate designs.
What type of paper works best?
Lightweight cardstock or heavy construction paper balances durability with comfort. Thin printer paper is more likely to wrinkle and tear, while thick cardboard can feel stiff and uncomfortable on small heads.
Can the hats be reused year after year?
Yes, if stored flat in a dry place, the hats can often last through multiple seasons. Avoid crushing them under heavy objects, and keep them away from moisture that could warp the paper.
How can this craft be adapted for classrooms?
For groups, pre-cutting the basic hat shapes and headbands saves time and reduces congestion around cutting tools. Set up stations for assembly, decorating, and drying to keep students moving smoothly through the activity.
What if a child does not want to wear a hat?
Some children prefer not to wear costumes, and that is completely fine. Offer the option of making a mini hat for the table or turning their hat into a simple wall decoration instead.
Using Your Pilgrim Hats on Thanksgiving Day
Once the crafting is complete, find creative ways to incorporate the hats into the celebration. They can be worn during a short family photo session, while guests arrive, or just for a few playful moments before dessert.
- Place a hat on each plate as part of the table setting.
- Create a small photo corner with a simple backdrop and props, including the hats.
- Encourage kids to perform a short skit or gratitude speech while wearing their creations.
- Store the hats afterward in a labeled box to bring back memories next Thanksgiving.