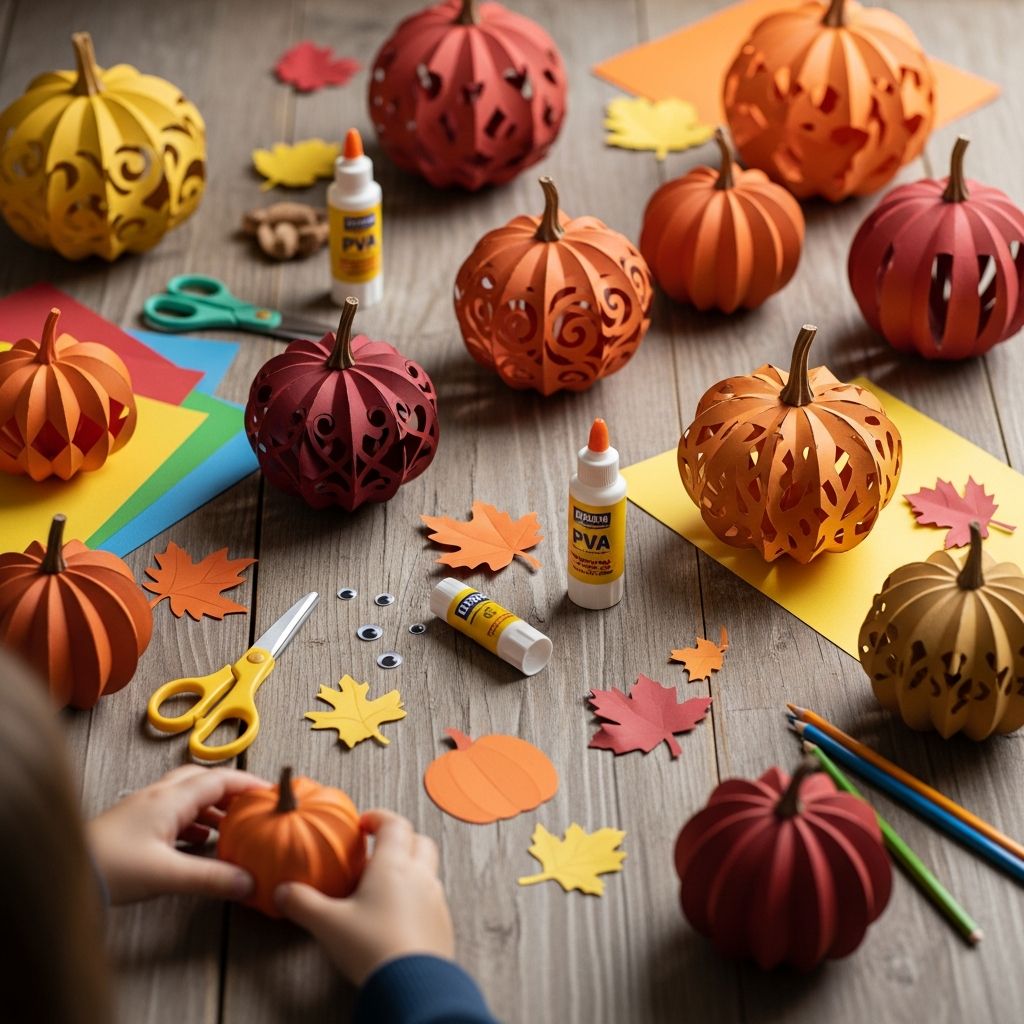
Paper pumpkins are a simple, inexpensive way to bring warm fall color into your home while giving kids a hands-on project they can proudly display. This guide walks through how to create sturdy, adorable pumpkins from basic paper supplies, with variations for different ages and skill levels.
Why Paper Pumpkins Are the Perfect Fall Craft
Paper pumpkins combine creativity, fine motor practice, and seasonal décor in a single activity that works for families, classrooms, and craft nights. Unlike messy projects that require drying time, these pumpkins come together quickly and can be adjusted to fit almost any age group.
- Uses common supplies like paper, scissors, and glue.
- Customizable for Halloween, Thanksgiving, or general autumn decor.
- Easy to adapt for toddlers, school-age kids, and adults.
Supply Checklist for Basic Paper Pumpkins
Gather everything before starting so children can focus on the fun of assembling and decorating. You can substitute many of these supplies with items you already have at home.
- Colored paper or lightweight cardstock (orange, yellow, brown, green).
- Scissors (safety scissors for young children).
- Glue stick or liquid school glue.
- Ruler and pencil for measuring strips.
- Hole punch (optional, for some designs).
- Green pipe cleaners or ribbon for vines (optional but cute).
Keep a tray or shallow box on the table to contain scraps, which makes cleanup quick and keeps pieces from sliding to the floor.
Choosing the Right Paper for Your Project
The type of paper you use changes both the look and the strength of your finished pumpkin. For very young children, thinner paper is easier to cut, while sturdier cardstock helps finished pumpkins stand upright for display.
| Paper Type | Best For | Pros | Considerations |
|---|---|---|---|
| Construction Paper | School-age kids and group crafts | Affordable, colorful, easy to cut | Less rigid; pumpkins may be softer in shape |
| Lightweight Cardstock | Table décor and longer-lasting projects | Holds shape well, stands up easily | Harder for small hands to cut |
| Patterned Scrapbook Paper | Centerpieces and decorative sets | Stylish designs, looks like store-bought decor | More expensive; patterns may make pencil lines hard to see |
| Recycled Paper (bags, packaging) | Eco-friendly crafts | Upcycles materials, rustic look | Thickness may vary; may require stronger glue |
Method 1: Simple Strip-Style Paper Pumpkin
This method uses straight paper strips to form a rounded pumpkin shape. It is a great introduction to measuring, cutting, and building three-dimensional forms from flat materials.
Step-by-Step Instructions for Strip Pumpkins
- Measure and mark the strips. Use a ruler to draw straight lines along the long edge of the paper. For a medium pumpkin, aim for strips about 2–3 cm wide. Older children can do the measuring; younger ones can help count the strips.
- Cut the strips. Cut along the lines to create a neat stack of strips. Around 8–12 strips work well for a full, rounded pumpkin.
- Prepare the center connection. Stack the strips together, ends aligned, and secure the center with a staple, a glue dot, or a small square of tape on both sides.
- Form the pumpkin shape. Gently fan the strips so they spread out in a circular pattern. Bring the loose ends together at the top and secure them with another staple or piece of tape.
- Add the stem and vines. Roll a small piece of brown paper into a tube for the stem and glue it on top. Twist a green pipe cleaner or thin strip of green paper around a pencil to curl it, then attach it near the stem as a vine.
Once children understand the basic structure, they can experiment with longer or shorter strips to change the height and width of the pumpkin.
Tips for Adjusting Size and Shape
- Long strips create taller pumpkins, while short strips make squatter, rounder ones.
- Wider strips give a bold, chunky look; narrow strips feel more delicate.
- Mix two shades of orange or add a strip or two of yellow for a more natural look.
Method 2: Layered Circle Pumpkins for a 3D Look
If you want a more sculpted pumpkin, stacked circles can create a rounded, almost globe-like shape that looks polished enough for centerpieces. This version involves repeated shapes and is excellent practice for careful cutting and gluing.
How to Build a Circle-Based Pumpkin
- Create a template. Trace a small bowl, cup, or jar lid onto a piece of scrap cardboard to create a sturdy circle template.
- Trace and cut circles. Use the template to trace 8–10 circles onto orange paper and cut them out. Consistent shapes help the final pumpkin sit evenly.
- Fold each circle in half. Press the fold firmly to create a clean crease down the center.
- Glue the folded halves. Add glue to the outside of one folded circle and press it against another folded circle, matching edges carefully. Continue until you have a stack of circles that opens like a book.
- Form the pumpkin sphere. Add glue to the remaining exposed sides and press the first and last circles together so the layers fan out in a full circle.
- Add details. Tuck a strip of brown paper into the center top for the stem, and glue green leaf shapes around it.
For extra flair, alternate solid orange circles with patterned paper circles to give the pumpkin visual texture when fully opened.
Making It Easier for Younger Kids
- Pre-cut circles for preschoolers and let them focus on folding and gluing.
- Use glue sticks instead of liquid glue to reduce drying time and mess.
- Limit the project to 6 circles per pumpkin to keep attention spans in mind.
Decorating Ideas: Faces, Leaves, and More
Once the basic pumpkin shape is complete, kids can personalize each one. Turning pumpkins into Halloween characters, adding leaves, or creating name tags makes the craft feel more meaningful and multifunctional.
- Jack-o’-lantern faces: Cut triangles, circles, and toothy grins from black paper and glue on expressive faces.
- Leaf accents: Cut leaf shapes from green or gold paper and glue them around the stem.
- Glitter and stickers: Add sparkle with glitter glue lines, star stickers, or metallic markers.
- Name tags: Tie a small paper tag with each guest’s name around the stem for personalized place settings.
Age-Appropriate Modifications
Every child brings different skills and comfort levels to crafting. Designing the project around your group avoids frustration and ensures everyone ends with a successful pumpkin.
- Toddlers: Offer pre-cut shapes, chunky glue sticks, and large strips or circles they can simply arrange and press.
- Early elementary: Let them measure shorter strips, cut basic shapes, and design faces or patterns.
- Older kids and teens: Encourage them to design their own templates, mix patterned papers, or create sets of pumpkins in graduated sizes.
Safety and Stress-Free Crafting Tips
A little planning goes a long way in keeping the experience calm and enjoyable. Prepare the workspace before inviting kids to the table, and adjust tools to match their abilities and attention spans.
- Use blunt-edged scissors for young children and supervise cutting.
- Cover the surface with kraft paper or an old tablecloth for quick cleanup.
- Keep a small trash bowl or box nearby for scraps and used glue sticks.
- Offer short breaks and praise effort, not perfection, especially with first attempts.
Turning Paper Pumpkins Into Seasonal Decor
These handmade pumpkins can easily move from the craft table to every room in your home. With a few simple arrangements, they become inexpensive and heartfelt decorations for the entire season.
- Table centerpieces: Group several pumpkins of different sizes on a tray with real leaves or faux acorns.
- Mantel display: Line a shelf or mantel with paper pumpkins, framed fall art, and candles (battery-operated for safety).
- Classroom windowsill: Place student-made pumpkins along a window ledge with name tags for a cheerful fall display.
- Party favors: Send guests home from a fall party with mini pumpkins they helped make.
Fun Variations to Try
Once you are comfortable with the basic designs, try experimenting with different materials and shapes to keep the project fresh year after year. Small adjustments can completely change the style and theme.
- Monochrome pumpkins: Create white, cream, or gold pumpkins for a more neutral, elegant look.
- Patchwork style: Use leftover paper scraps in various patterns for a patchwork effect, perfect for using up supplies.
- Glowing pumpkins: Make a hollow strip pumpkin slightly larger and set it over a battery tea light (never use real flames with paper).
- Gratitude pumpkins: Invite family members to write something they are thankful for on each strip before assembling.
Planning a Paper Pumpkin Craft Session
Organizing a dedicated crafting session turns this simple project into a memorable seasonal tradition. A little structure helps large groups stay on track, whether you are in a classroom, club, or hosting neighborhood kids.
- Prepare materials in sets. Bundle enough strips or circles for one pumpkin into individual envelopes or bags so each participant has everything they need.
- Demonstrate slowly. Show each step once with an oversized example, then repeat with children following along.
- Build in display time. Finish by walking around to admire each pumpkin and invite kids to share their favorite part of the process.
Frequently Asked Questions About Paper Pumpkins
How long do paper pumpkins last?
Paper pumpkins can last through the entire fall season if kept dry and handled gently. Store them in a shoebox or plastic container once the season ends to reuse them next year.
Can this craft work for very young children?
Yes. For toddlers and preschoolers, pre-cut the pieces, avoid complex shapes, and focus on letting them glue, press, and decorate. The goal at this age is exploration, not perfect symmetry.
Do I need special tools like a cutting machine?
No special equipment is required. A simple ruler, pencil, scissors, and glue will handle every method described here. Optional tools like a paper trimmer or hole punch can speed up the process for large groups but are not necessary.
What is the best way to store finished pumpkins?
Keep pumpkins in a dry container with tissue paper between layers to prevent them from getting crushed. Label the box and store it with other seasonal decorations so you can pull them out each fall.
Can I use this project in a classroom or group setting?
Absolutely. Paper pumpkins are ideal for classrooms, clubs, and community events because supplies are inexpensive and easy to divide into kits. The activity also supports skills like measuring, following directions, and creative design.
Final Thoughts: A Simple Craft With Lasting Memories
Paper pumpkins offer more than just cute decorations; they create time set aside for conversation, laughter, and shared effort. With flexible methods that work for a wide range of ages and settings, this project can easily become a fall tradition your family or classroom looks forward to year after year.