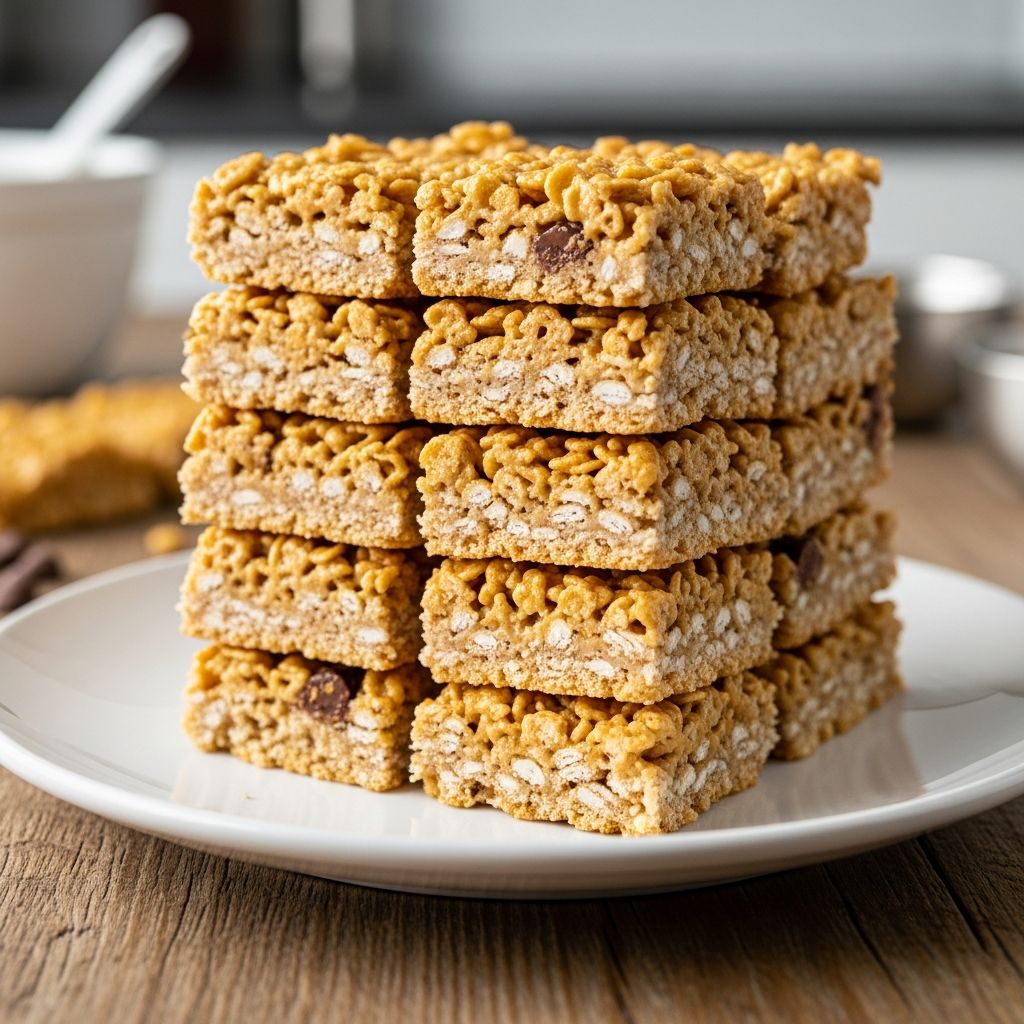
Cereal bars are one of the simplest ways to turn a handful of pantry staples into a snack that feels special, travels well, and keeps kids satisfied between meals. Instead of reaching for another box of packaged bars, you can make your own in minutes with ingredients you probably already have at home.
Why Homemade Cereal Bars Are Worth It
Store-bought bars are convenient, but homemade cereal bars give you full control over the sweetness, texture, and ingredient quality. You decide how much sugar to add, which fats to use, and whether to include nuts, seeds, or dried fruit.
Making bars at home also helps reduce food waste because you can use the last bits of cereal that no one wants to eat on their own. That nearly-empty box of loops, squares, or flakes becomes the base for an entirely new snack.
- Save money by using pantry ingredients instead of buying specialty snacks.
- Customize flavors for picky eaters or dietary needs.
- Keep prep time short—no baking and very little cleanup.
Core Formula: How These Bars Work
Most no-bake cereal bars use a simple structure: a dry base (cereal), a sticky binder (nut or seed butter), and a sweetener that helps everything cling together. When mixed and pressed into a pan, the mixture firms up as it cools, creating neat bars that hold their shape.
Thinking in terms of a basic formula rather than a strict recipe makes it easy to adapt the bars to whatever is in your cupboard. You can swap cereals, change the type of nut butter, or adjust the sweetness without starting from scratch.
| Component | Typical Amount (for 8-inch pan) | Examples |
|---|---|---|
| Dry base | 3 cups | O-shaped cereal, corn flakes, puffed rice, whole-grain squares |
| Binder | 1/2–3/4 cup | Peanut butter, almond butter, sunflower seed butter, tahini |
| Liquid sweetener | 1/3–3/4 cup | Honey, maple syrup, brown rice syrup, agave |
| Flavor boosters | 1–2 teaspoons | Vanilla, cinnamon, cocoa powder, citrus zest |
| Mix-ins | 1/2–1 cup | Mini chocolate chips, dried fruit, seeds, chopped nuts |
Step-by-Step No-Bake Cereal Bar Recipe
Use this flexible recipe as your starting point. As long as you stay close to the proportions, you can switch ingredients to suit your family’s preferences or dietary needs.
Ingredients
- 3 cups cereal (any combination of lightly sweet, whole-grain, or puffed cereals)
- 1/2 cup creamy nut or seed butter (peanut, almond, cashew, or sunflower seed)
- 1/2 cup liquid sweetener (honey, maple syrup, or a mix)
- 1 teaspoon vanilla extract
- Pinch of salt (optional, but helpful if your nut butter is unsalted)
- Up to 3/4 cup total mix-ins, such as:
- Mini chocolate chips or chopped dark chocolate
- Raisins, dried cranberries, or chopped dried apricots
- Sunflower seeds, pumpkin seeds, chopped nuts, or shredded coconut
Instructions
- Prepare the pan: Line an 8×8-inch pan with parchment paper, leaving some overhang on the sides so you can lift the bars out easily later.
- Measure the cereal: Add the cereal to a large mixing bowl. If you like smaller pieces, gently crush the cereal with your hands or the back of a spoon.
- Warm the binder: In a small saucepan over low heat, combine the nut or seed butter and liquid sweetener. Stir continuously until the mixture is smooth and slightly runny. Remove from heat and stir in vanilla and salt.
- Combine wet and dry: Pour the warm mixture over the cereal. Use a spatula to fold until every piece is coated. If using mix-ins that can handle heat (such as seeds or chopped nuts), stir them in now.
- Add heat-sensitive extras: If using chocolate chips or anything that melts easily, let the mixture cool for a few minutes before gently folding them in so they keep some shape.
- Press into the pan: Transfer the mixture to the prepared pan. Place another piece of parchment on top and press very firmly with your hands or the bottom of a measuring cup to compact the mixture into an even layer.
- Chill to set: Refrigerate for at least 45–60 minutes, or until firm enough to slice cleanly.
- Slice and store: Lift the block out using the parchment overhang. Place on a cutting board and slice into 8–16 bars, depending on your preferred size.
Flavor Ideas for Every Household
Once you master the basic formula, you can create endless variations by swapping cereals and extras. Think about who will be eating the bars and what role they play: quick breakfast, lunchbox filler, or dessert-style treat.
Use the ideas below as launching points and then adapt them to match what is already in your pantry.
Kid-Approved Combos
- PB & Chocolate Crunch: O-shaped cereal, peanut butter, honey, and mini chocolate chips.
- Rainbow Confetti: Lightly sweet cereal rings, vanilla, and a small handful of colorful candy pieces for party days.
- Berry Morning: Whole-grain flakes, almond butter, maple syrup, and chopped dried strawberries or blueberries.
More Grown-Up Options
- Nut & Seed Power Bar: High-fiber cereal, tahini or sunflower seed butter, honey, pumpkin seeds, and chopped almonds.
- Mocha Crunch: Crisp rice cereal, almond butter, maple syrup, a spoonful of cocoa powder, and a pinch of instant espresso powder.
- Tropical Morning Bar: Multigrain cereal, cashew butter, honey, shredded coconut, and diced dried mango or pineapple.
Boosting Nutrition Without Losing the Fun
Cereal bars do not have to be sugar bombs. You can quietly add protein, fiber, and healthy fats without making the bars feel like health food. A few small tweaks to the base formula go a long way.
Focus on substitutions that your family will actually enjoy, rather than forcing ingredients no one likes, to keep the bars in regular rotation.
- Use whole-grain cereals with at least a few grams of fiber per serving.
- Swap part of the cereal for rolled oats for a heartier, chewier bar.
- Add 1–2 tablespoons of ground flaxseed or chia seeds for extra fiber and omega-3 fats.
- Choose unsweetened nut or seed butter to control added sugars.
- Reduce the sweetener slightly and compensate with natural sweetness from dried fruit.
Texture Troubleshooting Guide
If your first batch is a bit too soft or crumbles when sliced, small adjustments can fix the problem. Pay attention to how well everything sticks together in the bowl and how firm it becomes after chilling.
Use the table below to diagnose the issue and decide what to change next time.
| Problem | Likely Cause | Next Time, Try This |
|---|---|---|
| Bars crumble when cut | Too much dry cereal or mix-ins; not enough binder | Increase nut butter or sweetener slightly, or reduce cereal by 1/2 cup |
| Bars are sticky and won’t hold | Too much liquid; not enough chilling time | Chill longer, or add a small handful of extra cereal to firm the mixture |
| Bars taste overly sweet | Very sweet cereal plus a full amount of liquid sweetener | Use a low-sugar cereal and reduce sweetener by 2–3 tablespoons |
| Bars are hard to bite | Mixture pressed too firmly or sweetener overcooked | Use gentle pressure when packing and warm the binder just until smooth |
Storage, Freezing, and Packing Tips
Once your bars are sliced, proper storage keeps them fresh and easy to grab on busy mornings. Because the binder is often a mix of nut butter and syrup, the bars stay soft but can gradually dry out if left uncovered.
Take a minute after cutting to wrap or box your bars, and you will have snacks ready for the week.
- Refrigerator storage: Stack bars in an airtight container with parchment between layers; they usually keep well for up to one week.
- Freezing: Wrap individual bars and store them in a freezer-safe bag. They thaw in about 20–30 minutes at room temperature.
- Lunchbox packing: For lunchboxes that sit at room temperature, pack the bar with an ice pack if it contains chocolate or easily melted ingredients.
- On-the-go tip: Keep a few bars in the freezer for last-minute outings. Toss them into a bag, and they will be ready to eat by the time you need them.
Make-It-Your-Own Cereal Bar Template
Use the template below as a quick reference when you want to invent your own combination without looking up a full recipe again. Think of it like a fill-in-the-blanks guide for snack time.
- Choose 3 cups of cereal or a mix of cereals.
- Pick 1/2–3/4 cup creamy nut or seed butter.
- Select 1/3–3/4 cup liquid sweetener, adjusting for how sweet your cereal already is.
- Add a teaspoon of vanilla or another extract if you like.
- Stir in up to 3/4 cup total of mix-ins like dried fruit, nuts, seeds, or chocolate.
- Warm the binder, mix, press into a lined pan, chill, slice, and enjoy.
Frequently Asked Questions
Can I make cereal bars without nut butter?
Yes. If you need a nut-free option, use seed butters such as sunflower seed butter or tahini in place of peanut butter. These provide similar stickiness and richness while keeping the bars safe for nut-free environments.
What if I don’t want to use honey?
You can substitute maple syrup, brown rice syrup, or agave for honey. Keep in mind that very thin syrups may produce slightly softer bars, so you may need to reduce the amount by a tablespoon or two.
Can these bars be made vegan?
Absolutely. Use a plant-based sweetener like maple or agave instead of honey and choose dairy-free cereal and mix-ins. Many cereals and dark chocolates are already vegan, but check the label if you want to be certain.
How do I make them less sweet?
Use a low-sugar or unsweetened cereal and cut back the liquid sweetener slightly. To keep the bars from falling apart, add more nut or seed butter or include sticky mix-ins such as finely chopped dates or raisins.
Can I add protein powder?
Yes, but add it gradually. Start with 2–3 tablespoons of protein powder, then check the mixture. If it becomes too dry or powdery, add a bit more nut butter or sweetener until the mixture holds together again.
Turning Leftover Cereal into Everyday Fuel
A simple pan of cereal bars can transform the odds and ends in your pantry into a snack that feels intentional and satisfying. By understanding the basic formula—cereal, binder, sweetener, and optional extras—you are free to experiment without fear of failure.
Whether you lean toward classic peanut butter and chocolate or prefer fruit-packed, lightly sweet versions, cereal bars are a quick project that pays off all week in lunchboxes, gym bags, and after-school snack plates.