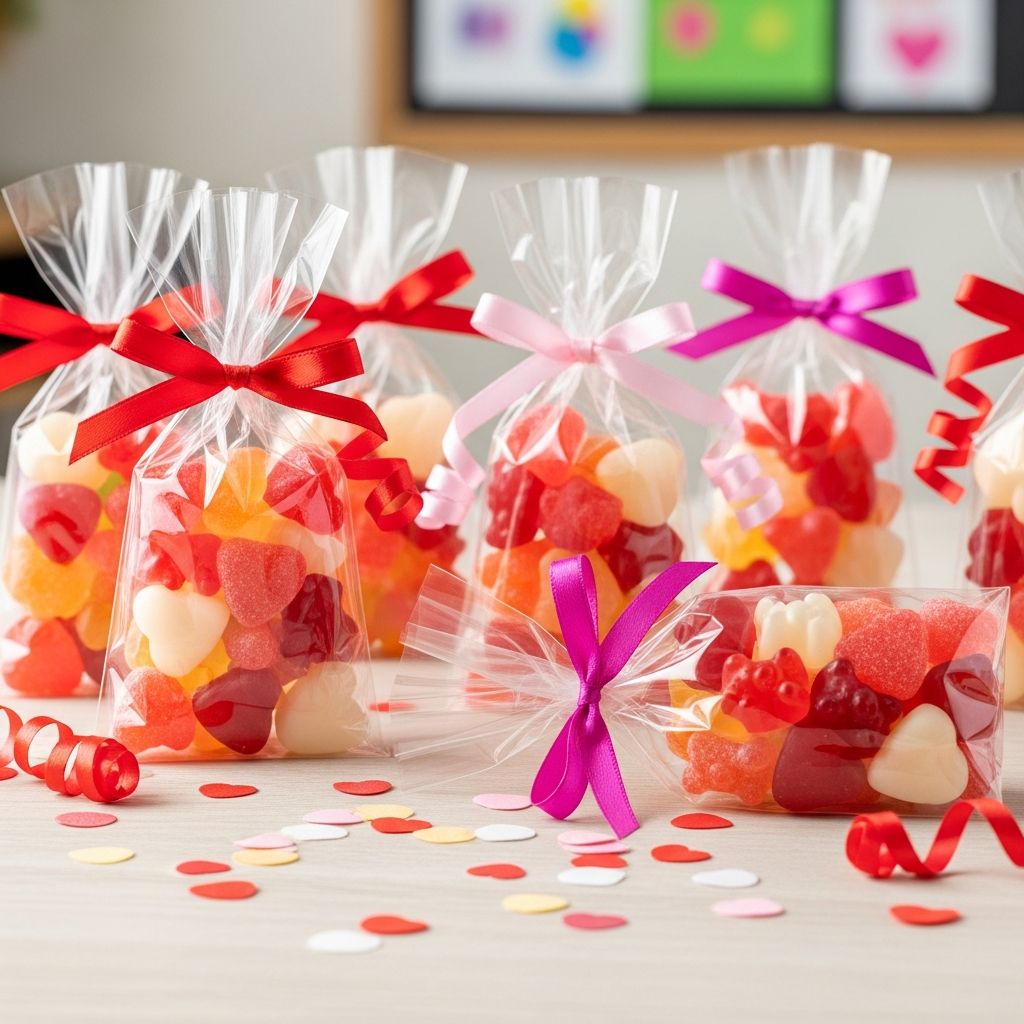
Classroom valentines do not have to be complicated or expensive to feel special. With a few bags of gummy bears, some basic craft supplies, and a bit of creativity, you can put together charming Valentine treat bags that kids will remember long after the candy is gone.
Why Gummy Bear Valentines Work So Well
Gummy bear valentines hit a sweet spot for parents, teachers, and kids: they are easy to assemble, budget-friendly, and irresistibly cute. Instead of store-bought boxed cards, these treat bags add a handmade touch that still fits into a busy schedule.
Because gummy bears come in fun colors and shapes, they naturally match the playful tone of Valentine’s Day, turning a small treat into a mini celebration tucked inside each child’s desk or backpack.
Materials You Will Need
Before you start, gather everything in one place so you can make all the treat bags in one sitting. This also helps if kids are assisting, because you can keep the process organized and mess-free.
- Gummy bears (individually wrapped packs or loose gummies)
- Clear cellophane bags or small resealable bags
- Cardstock or heavy paper for toppers
- Printer (optional, for printed designs) or markers and crayons
- Scissors or a paper trimmer
- Stapler or strong double-sided tape
- Ruler or scoring tool (for crisp folds on the toppers)
- Glue dots or stickers (optional for extra decoration)
If your child’s class has food restrictions, you may also want a list of student dietary needs or allergy information from the teacher before choosing candy.
Designing Your Treat Bag Toppers
The topper is the small folded card that sits across the top of the bag. It turns a simple bag of candy into a finished Valentine and is where you can have the most fun with fonts, colors, and wordplay.
Think about your design in three parts: the message, the visuals, and the space where your child can sign their name. Even a very simple layout can look polished when you repeat the same colors and shapes across all the bags.
Choosing a Fun Gummy Bear Message
Punny phrases are perfect for Valentine’s Day because they keep the mood light and friendly, which is especially helpful in mixed classrooms where not everyone wants a romantic theme. You can tailor the tone for younger grades or older students with just a small tweak in wording.
- “I’m BEARY happy we’re friends”
- “You’re my favorite study BEAR”
- “Life is SWEETER with you, BEAR-y much”
- “Have a BEAR-y fun Valentine’s Day”
- “Thanks for being such a kind BEAR”
Leave a blank area under the message for a “From:” line so your child can add their name in their own handwriting for a personal touch.
Step-by-Step: Assembling the Gummy Bear Treat Bags
With your design decided and your supplies ready, it’s time to put the valentines together. The process is simple enough that even young children can help with portions of the assembly under supervision.
1. Prepare and Print (or Draw) Toppers
Measure the width of your treat bags and add about half an inch on each side to determine how wide your toppers should be. For the height, choose a size that looks balanced when folded; a common choice is around two inches tall when folded, which means four inches total before folding.
- Create a simple template on a computer, or rule off rectangles on cardstock with a pencil and ruler.
- Add your chosen gummy bear phrase, simple hearts, and colored borders.
- Print several toppers per sheet or hand-draw them with your child for a more handmade look.
2. Cut and Fold the Toppers
Use scissors or a paper trimmer to cut out each topper, following your pencil or printed guide lines. Aim for straight, clean edges so they sit neatly on top of the bag.
- Score the center lightly with a scoring tool or the back of a butter knife.
- Fold the topper in half along the scored line so the design faces outward on both sides.
- Press along the fold to create a crisp crease, which helps the topper sit flat during stapling.
3. Fill the Treat Bags
Portion sizes will depend on the age group and the preferences of the school or teacher. For younger children, a small handful of gummy bears is usually enough, especially if they will be receiving multiple treats.
- Pour gummy bears into each cellophane or resealable bag.
- Squeeze out excess air before sealing to help the topper lie flat.
- Double-check each bag for open seals so gummies stay fresh and clean.
4. Attach the Toppers
Once the bags are filled and sealed, slide the folded topper over the top of each bag so the bag opening is sandwiched between the two layers of cardstock. Align the edges so everything looks centered and even.
- Staple near both edges of the topper so it grips the plastic bag securely.
- Or use double-sided tape inside the topper if you prefer a staple-free finish.
- Check that the text is facing the right direction on every bag before securing.
Kid Involvement: Age-Appropriate Tasks
Letting your child participate makes the valentines more meaningful, and it also turns the project into a creative afternoon activity rather than just another item on a parent’s to-do list. Match tasks to your child’s age and comfort level.
| Age Range | Suggested Tasks |
|---|---|
| Preschool (3–4) | Sorting gummy bear colors, placing gummies in bags, adding stickers to toppers. |
| Early Elementary (5–7) | Folding toppers, writing their name, coloring borders, helping line up the topper on each bag. |
| Upper Elementary (8–10) | Cutting toppers with supervision, helping with simple layout on the computer, checking bag counts. |
| Pre-teen and up | Designing the full topper, measuring and trimming cardstock, assembling bags from start to finish. |
Encourage your child to add their own doodles or small messages inside the topper, especially for close friends or classmates they know well.
Safety and Allergy Considerations
Before handing out any edible classroom valentines, it is smart to check in with the teacher about school rules and potential allergies. Some schools have strict guidelines about sharing food, and certain students may not be able to enjoy gummy candy.
If allergies are a concern, consider sourcing gummy bears that are clearly labeled nut-free, gluten-free, or free from specific ingredients of concern. You can also make a small batch of non-food alternatives for children who cannot have the candy.
Non-Food Alternatives that Match the Theme
To keep everyone included, prepare a few small non-food treat bags with the same topper design but a different filler. These can be handed to the teacher ahead of time with a note explaining which bags are allergy-friendly.
- Bear stickers or temporary tattoos
- Bear-shaped erasers or mini notepads
- Mini coloring sheets with teddy bear outlines
- Small bear figurines or pencil toppers
Creative Variations on the Gummy Bear Theme
Once you master the basic gummy bear treat bag, it is easy to adapt the idea for different grade levels or personalities. A few simple changes in color palette, wording, or packaging can make the project feel totally fresh.
Color Themes and Styles
You can coordinate the colors of your toppers with the gummy bears inside the bags to create a more cohesive look. For example, pastel toppers match fruit-flavored bears, while bold reds and pinks pair nicely with classic Valentine candy colors.
- Pastel & Sweet: Soft pinks, light blues, and lavender with rounded fonts and hand-drawn hearts.
- Bright & Bold: Red and hot pink with block letters and graphic shapes for older kids.
- Minimal & Modern: White cardstock with a single bear illustration and clean black lettering.
Themed Gummy Bear Messages
If your child loves a particular hobby or subject, you can blend that theme with the gummy bear pun to create a more personalized Valentine. This is a fun way to help your child feel represented in the cards they give to friends.
- Sports fan: “You’re a BEAR-y great teammate”
- Book lover: “You make reading BEAR-y fun”
- Science kid: “Science is BEAR-y cool with you”
- Music fan: “You’re a BEAR-y good friend in my band”
Time-Saving Tips for Busy Parents and Teachers
Between work, school events, and everyday responsibilities, it helps to keep this project as efficient as possible. A few minutes of planning can save a lot of last-minute stress the night before the class party.
- Batch tasks: Cut all toppers at once, then fold all of them, then fill all bags, instead of finishing one bag at a time.
- Use templates: Create one digital or paper template and reuse it every year, updating colors or phrases as needed.
- Invite helpers: Turn the project into a family craft night, assigning small roles to siblings or friends.
- Plan extras: Make a few additional bags in case of new students or last-minute class list changes.
Frequently Asked Questions
How far in advance can I make gummy bear treat bags?
If the gummy bears stay sealed in their packaging or in well-closed bags, you can comfortably assemble treat bags up to a week before the classroom party. Store them at room temperature in a dry place away from direct sunlight so the colors stay bright.
Can I use other candies instead of gummy bears?
Yes, the same topper concept works well with many other Valentine treats such as jelly beans, chocolate hearts, or conversation candies. You only need to update the wording on the topper so the pun matches the new candy type.
What if our school does not allow food valentines?
Simply swap the candy for small non-food items like stickers, pencils, or mini toys, while keeping the bear theme and friendly messages. The presentation of the topper and bag will still make the valentines feel festive and thoughtful.
Do I need a color printer to make cute toppers?
A color printer is helpful but not required. You can print simple black-and-white designs on white cardstock and then let your child color in the details with markers, crayons, or colored pencils for a handmade look.
How many gummy bears should go in each bag?
The ideal number depends on your budget and the size of the class, but a small handful—usually between 8 and 12 gummy bears—looks generous without being overwhelming. When in doubt, aim for consistency so each student receives a similar treat.
Making Valentine’s Day Sweet and Simple
Gummy bear Valentine treat bags prove that you do not need advanced crafting skills or an elaborate budget to create something memorable for your child’s class. A thoughtful message, a cheerful design, and a handful of colorful candy come together to turn a tiny bag into a token of friendship.
Whether you are a parent planning for one classroom or a teacher preparing treats for your students, this project offers a flexible, customizable template you can adapt year after year, keeping the tradition fun and stress-free.