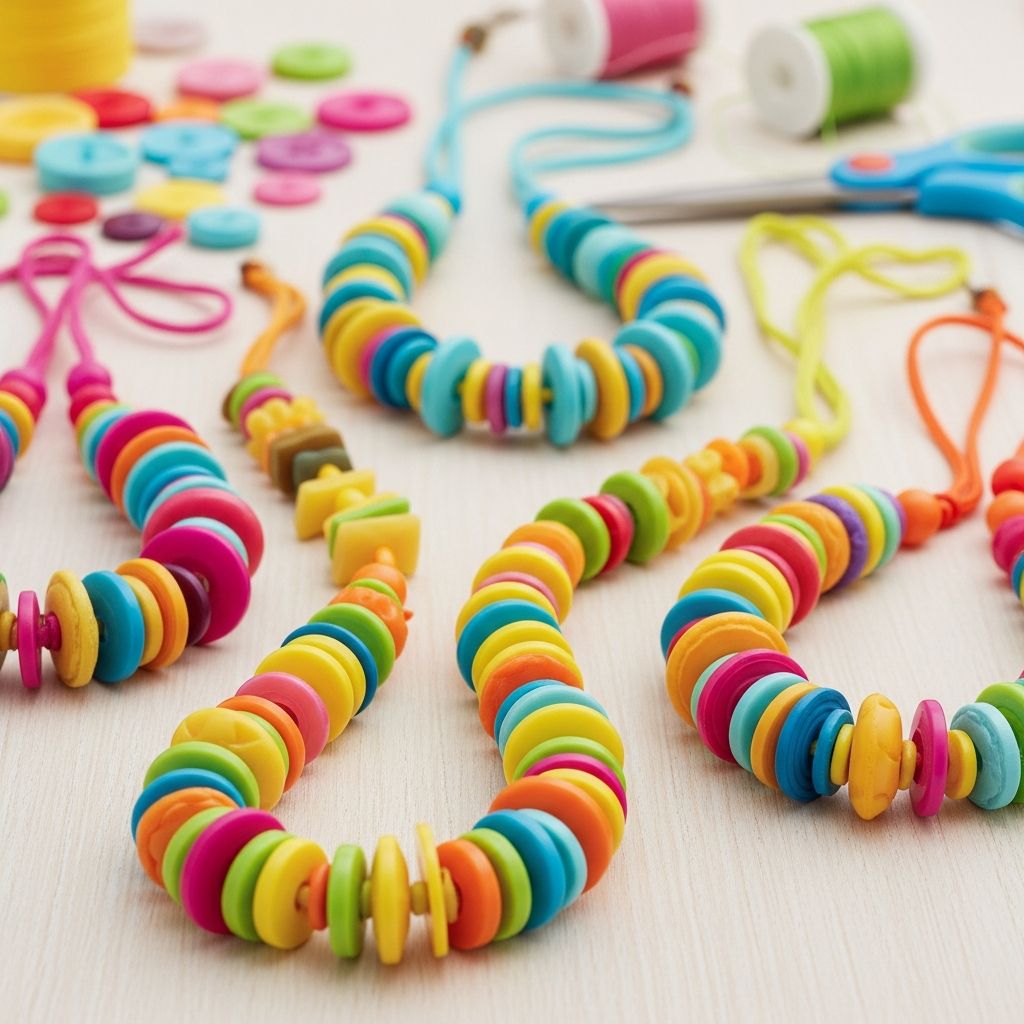
Button necklaces are an ideal summer craft: they are colorful, inexpensive, and simple enough for most kids to tackle with a bit of guidance. With a small collection of buttons, some cord, and basic tools, families can create personalized accessories that double as wearable art and sweet handmade gifts.
Why Button Necklaces Make a Great Summer Project
When school is out, many parents look for hands-on activities that are fun, low-mess, and at least a little bit educational. Button necklaces check all of those boxes while also giving kids something they can proudly wear or give to a friend.
- Low cost and low prep: Most households already have spare buttons and string, so you can start crafting without a trip to the store.
- Fine-motor practice: Threading buttons helps kids strengthen their pincer grasp and hand–eye coordination.
- Creative self-expression: Kids can explore color, pattern, and texture while designing their own wearable piece.
- Short, satisfying project: A single necklace can often be completed in one short crafting session, which works well for younger attention spans.
Gathering Supplies and Choosing Safe Materials
Button necklaces are very flexible, and you can easily adapt the materials to match your child’s age and crafting experience. The key is to choose components that are safe, durable, and easy for small hands to manipulate.
Basic materials checklist
- Assorted buttons (plastic, wood, or lightweight metal)
- Necklace cord (cotton cord, yarn, nylon, or elastic)
- Child-safe scissors
- Optional: large-eye plastic needle for easier threading
- Optional: jewelry clasps or a large “closure” button
- Optional: pony beads or wooden beads to mix with buttons
Button safety considerations
Because buttons are small and smooth, they can pose a choking risk to toddlers and young preschoolers. Always supervise closely and store materials out of reach when not in use. For kids under about five, consider using larger, flat buttons or disc-shaped beads that are at least the size of a quarter, and avoid any components that can easily fit through a cardboard toilet paper roll.
- Choose sturdy cords that will not snap easily if pulled.
- Avoid sharp metal edges or brittle vintage buttons that might break under pressure.
- If kids will be wearing the necklaces at playgrounds or during active play, keep the length short enough that it rests on the chest instead of dangling low.
Planning the Necklace: Color, Pattern, and Length
Before anyone starts threading, spend a few minutes planning the design. This small step helps kids think creatively and can sneak in some learning about patterns, counting, and color theory.
Choosing a length that works
To avoid constant slipping over the head or getting caught on things, measure the wearer before cutting the cord.
| Necklace Style | Approximate Length | Best For |
|---|---|---|
| Short pendant style | 35–40 cm / 14–16 in | Older kids and adults who want a neat, everyday necklace |
| Mid-length | 40–50 cm / 16–20 in | Most children; comfortable, not too tight or long |
| Long slip-over | 60–70 cm / 24–28 in | Young kids who struggle with clasps; easy to put on and take off |
Encouraging pattern play
Spread buttons out on a tray or table and invite kids to plan their sequence before they ever touch the cord. Encourage them to “test” different arrangements by setting buttons in a line on the table, then adjusting until they like the look.
- Suggest simple repeating patterns: for example, red–blue–yellow–red–blue–yellow.
- Try gradients: light-to-dark shades of one color, or small-to-large sizes.
- Mix textures: smooth, ridged, matte, and shiny buttons add visual interest.
Step-by-Step: Simple Threaded Button Necklace
The easiest style for children is a classic threaded necklace in which each button is strung in a line. You can simplify or add steps depending on your child’s age and patience level.
Step 1: Cut and prepare the cord
Measure the desired length, then add approximately 15 cm (6 inches) of extra cord to allow for knots and trimming. Cut the cord with scissors and, if it tends to fray, quickly pass the tips through a bit of clear glue or tape them temporarily so buttons slide on smoothly.
- For younger kids, use a thicker cord or yarn that is easier to grip.
- If using a plastic needle, thread the cord through the needle and tie a secure knot at the end.
Step 2: Add a starter knot or bead
To prevent buttons from sliding off the end, tie a double knot about 5 cm (2 inches) from one end of the cord. Alternatively, thread a single bead, slide it to the knot, and tie another knot to lock it in place; this creates a “stopper” that also looks decorative.
Step 3: Thread the buttons
Show kids how to push the needle or cord through one hole and out another. For two-hole buttons, going straight across makes them lie flat; for four-hole buttons, you can create a crisscross pattern or simply use two opposite holes.
- Encourage children to follow their planned sequence but remind them that changing their minds is part of the creative process.
- If a button hole is too narrow for the cord, set it aside instead of forcing it and risking frayed fibers.
Step 4: Adjust spacing
Decide whether the necklace will have tightly packed buttons or small gaps. Gapped designs look airy and make the necklace lighter, while closely spaced buttons feel more like a solid statement piece. Kids can push groups of buttons together and slide them along the cord until they are happy with the overall look.
Step 5: Finish the ends
When the necklace is the desired length, leave another 5–7 cm (2–3 inches) of loose cord at the end. Remove the needle if used and tie the two ends together with a secure double knot for a simple, slip-over style. Trim the extra cord, leaving at least 1 cm (about half an inch) so the knot will not unravel.
- For an adjustable style, tie one end around the other in a sliding knot or add a basic jewelry clasp.
- Check that the necklace can comfortably go over the wearer’s head before trimming too much cord.
Creative Variations to Try
Once your family has mastered the basic threaded version, it is easy to branch out into more decorative or themed designs. These variations can keep older kids engaged and spark new ideas for gifts or seasonal accessories.
Layered “stacked” button clusters
Layer two or three buttons of different sizes onto the same spot on the cord to create small clusters that resemble flowers or medallions. Start with the largest button against the cord, then add smaller buttons on top, lining up their holes and threading through all layers at once.
- Use a contrasting color for the top button to make the “center” pop.
- Space clusters evenly, for example every 2–3 cm (about 1 inch) along the cord.
Statement pendant button
Choose one oversized or unusually shaped button to serve as a focal point in the middle of the necklace. Thread smaller buttons symmetrically on either side so the large button sits front and center when worn.
- Try heart-shaped, flower-shaped, or wooden buttons for an eye-catching centerpiece.
- Keep the rest of the necklace relatively simple so the pendant remains the focus.
Mixed media: buttons with beads and charms
If your craft stash includes other small items, use them to elevate the design. Pony beads, wooden beads, felt shapes, or lightweight charms can be combined with buttons for more texture and dimension.
- Alternate bead–button–bead for a repeating rhythm along the cord.
- Add a felt shape behind a button cluster to mimic petals or leaves.
Making the Project Kid-Friendly and Stress-Free
The goal of this craft is not a perfectly spaced, symmetrical necklace. It is a relaxed, creative experience that lets kids explore materials and feel proud of what they make. Thoughtful setup and realistic expectations go a long way toward keeping the mood light and fun.
Setting up your workspace
Choose a table or tray where small items will not roll away. A shallow box lid or baking sheet works well as a contained surface. Lay out buttons in small containers or muffin tins by color or size so kids can clearly see their options.
- Use a plastic tablecloth or old newspaper if you are using glue or paint as part of the decoration.
- Keep drinks and snacks at a separate spot to avoid spills on small pieces.
Supporting different ages
Adjust your level of involvement based on the child’s age and comfort with small objects. Younger children may need help with knots and needle threading, while older kids can often manage the entire process independently.
- For preschoolers, pre-thread a few buttons or use very large buttons and chunky cord.
- For tweens, introduce more advanced techniques like crimp beads and metal clasps.
Summer-Themed Ideas and Gift Inspiration
Because this craft is so customizable, it can easily tie into summer themes, celebrations, or special outings. Whether your family loves the beach or backyard camping, kids can design a necklace that reminds them of their favorite warm-weather memories.
- Beachy blues: Combine blue, white, and sandy beige buttons to echo the colors of the ocean.
- Garden party: Use flower-shaped buttons and green cords to create a garden-inspired piece.
- Camp keepsakes: Invite kids at a sleepaway camp or backyard campout to make matching friendship necklaces.
- Birthday favors: Set up a button necklace station at a party so guests can design and take home their own jewelry.
Handmade button necklaces also make thoughtful presents for grandparents, teachers, or caregivers. Attach each necklace to a simple card labeled with the child’s name and the date, turning it into a keepsake that captures a particular summer.
Care, Storage, and When to Say Goodbye
With reasonable care, these necklaces can last through many days of dress-up and outdoor adventures. A few simple habits will help them stay bright and wearable.
- Have kids remove necklaces before swimming, bathing, or sleeping.
- Store finished pieces flat in a small box or hung on a hook to avoid tangling.
- Check occasionally for loose knots or cracked buttons and repair as needed.
If a necklace becomes too worn or outgrown, consider taking it apart and reusing the buttons in a new project. This teaches kids that materials can have more than one life and encourages resourcefulness and environmental awareness.
Frequently Asked Questions About Button Necklace Crafts
What age is appropriate for making button necklaces?
Because of small parts, button crafts are best for children who no longer put objects in their mouths and who can follow basic safety rules. Many families find that kids around age five or six can participate with supervision, while older kids can handle more complex designs and tools.
How can I make this project easier for very young kids?
Use large buttons with oversized holes and thick cord or yarn, and skip the needle entirely. You can also pre-tie the end of the cord and partially thread the first few buttons, then invite the child to continue the pattern.
Do I need special jewelry tools or findings?
For a simple summer craft, no specialized tools are necessary. Basic scissors and strong cord are enough for a slip-over necklace, though you can certainly add clasps or crimp beads if you already have jewelry-making supplies at home.
Can button necklaces go in the washing machine?
It is usually better to spot-clean them gently with a damp cloth, especially if the cord is cotton or if any of the buttons are vintage or delicate. Machine washing can cause fraying, fading, or accidental tangling with other garments.
What if we do not have many buttons at home?
You can ask friends or relatives if they have spare buttons from old sewing kits, or look for inexpensive mixed bags of buttons at thrift stores and craft shops. Another option is to punch circles from sturdy cardstock and decorate them as “pretend” buttons, then hole-punch and string them just like the real thing.
Wrapping Up Your Summer Craft Session
Button necklaces turn a simple afternoon at the table into an opportunity for creativity, conversation, and skill-building. Kids come away with a colorful accessory they can wear proudly, and adults gain an easy, repeatable project that can evolve as children grow and their design ideas become more sophisticated.
Whether you keep things extremely simple or experiment with layered clusters and mixed materials, the most important part is giving kids room to explore and enjoy the process. A jar of buttons and a length of cord may not look like much at first, but in a child’s hands they can become a necklace that feels as special as any store-bought treasure.