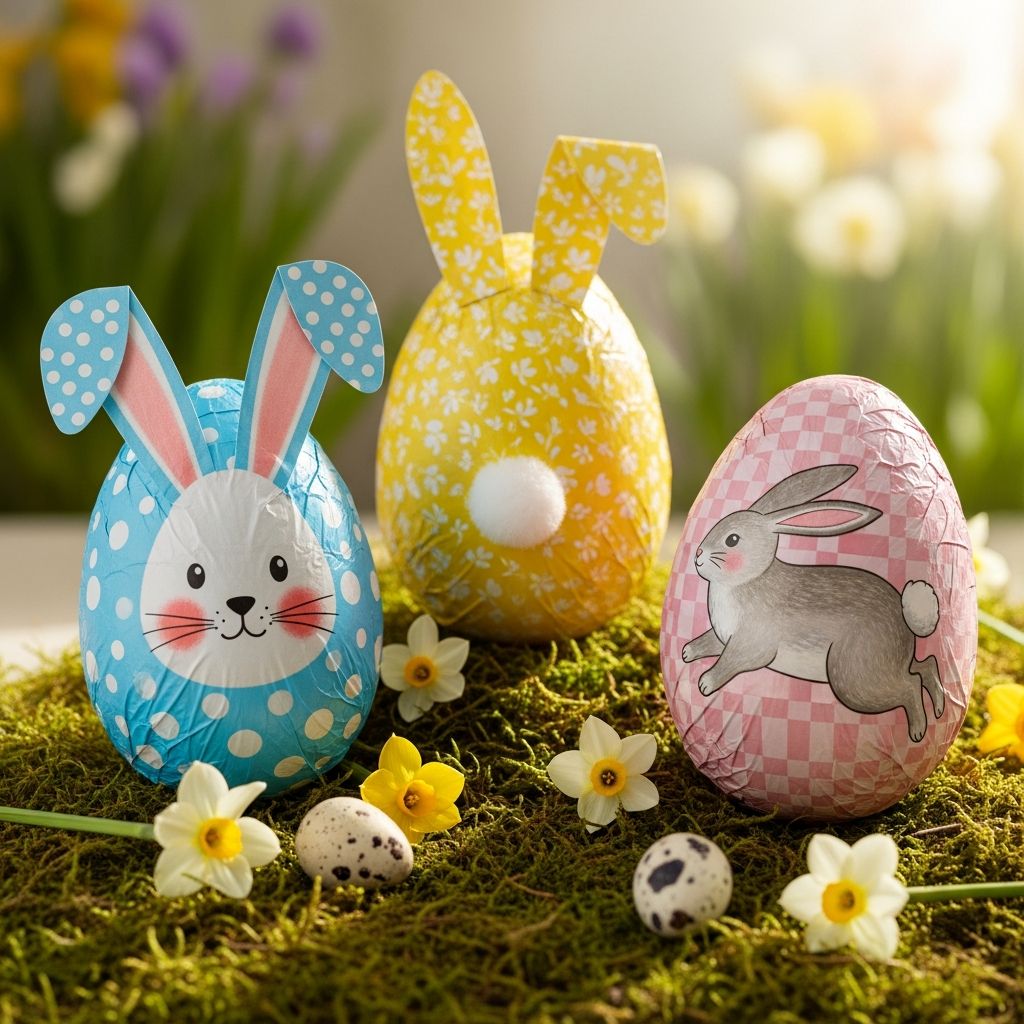
Chocolate eggs are already a favorite Easter treat, but adding a handmade bunny wrapper turns them into something extra special: a tiny, giftable character with big personality. With a simple printable template or hand-drawn design, you can transform ordinary foil-wrapped eggs into a whole parade of bunnies for baskets, party favors, table decor, or classroom surprises.
This guide walks through everything needed to create Easter bunny egg wrappers from scratch, including materials, basic construction steps, display ideas, and practical tips for crafting with kids. The project works with most popular filled chocolate eggs, so you can easily pair your favorite candy with a custom wrapper.
Why Bunny Wrappers Are the Perfect Easter Craft
There are many ways to decorate eggs, but bunny wrappers offer a unique blend of simplicity and charm. Instead of dyeing or painting, the fun comes from dressing each egg in a tiny paper costume that can be slipped on or off without touching the chocolate inside.
- Great for last-minute gifts because the wrappers can be printed, cut, and assembled quickly.
- Ideal for kids who prefer drawing, gluing, and cutting to messy dyes or paints.
- Easy to customize with different faces, bow ties, and accessories for each bunny.
- Perfect for party favors since the candy remains individually wrapped and hygienic.
Choosing the Right Chocolate Eggs
Before starting on the bunny wrappers, decide which chocolate eggs you want to dress up. The size and shape of the egg determine how tall the wrapper should be and how snugly it should fit.
| Egg Type | Approximate Size | Best Wrapper Style | Notes |
|---|---|---|---|
| Filled mini eggs (single-serve) | Small, about thumb-length | Short body with tall ears | Great for classroom treats and place settings. |
| Standard cream-filled eggs | Medium, palm-length | Classic bunny body with wrap-around band | Ideal for gift baskets and Easter hunts. |
| Large hollow eggs | Quite tall and wide | Oversized bunny with extra-wide band | Works best for centerpiece display pieces. |
Most people find that medium, individually wrapped eggs create the most balanced bunny shape: the egg forms the rounded tummy, while the paper wrapper adds the face, ears, and feet. If you switch to a markedly different brand or size, adjust the template slightly so the wrapper overlaps neatly around the widest part of the egg.
Supplies and Tools You Will Need
This project is designed to use readily available materials, and most items are common in family craft drawers. Feel free to substitute with what you have on hand; the basic concept remains the same.
- Printer paper or light cardstock (white or pastel).
- Home printer or markers if you are drawing by hand.
- Scissors or a craft knife (adults only for knife use).
- Glue stick, double-sided tape, or small glue dots.
- Black fine-tip pen for drawing faces.
- Colored pencils or markers for cheeks, clothing, and details.
- Ruler or bone folder (optional) for crisp folds.
- Foil-wrapped chocolate eggs of your choice.
Cardstock yields sturdier, more durable bunnies that stand up better in centerpieces and baskets. Plain printer paper, however, is easier for young children to cut and wrap around smaller eggs, and it works perfectly for single-use party favors.
Designing Your Bunny Wrapper Template
The heart of this craft is a simple wrap-around strip with ears and a face at the front. You can either design and print a digital template or sketch the shapes directly onto paper before cutting. Creating a base template once will save time when making multiple bunnies.
- Measure the circumference of your chosen egg at its widest point using a strip of paper and a pencil mark.
- Add a small overlap (about 1–1.5 cm) to that measurement so the wrapper can be glued closed securely.
- Decide how tall you want the bunny body to be; typically, it should cover about two-thirds of the egg’s height.
- Sketch or design two tall ears that rise above the body and a rounded area on the front where the face will go.
If you are comfortable with basic graphic design tools, you can create a printable page with multiple wrappers arranged in rows. That approach is convenient when assembling many bunnies for parties or classrooms because each sheet can produce a matching set in a single print run.
Step-by-Step Assembly Instructions
Once you have a template ready, the assembly process is pleasantly repetitive and easy to master. This makes it an excellent project to set up as a small production line with children or friends, where each person takes on one or two steps.
- Print or trace the wrapper shapes. Use white or pastel paper for a classic spring look, or bright colors for a more playful vibe.
- Cut out each bunny wrap. Carefully trim around the outer edges, including the ears. Younger children may need help around tighter curves.
- Pre-shape the wrapper. Gently curl the body section around a marker or the chocolate egg itself to make it easier to wrap later.
- Draw the face. Add eyes, a little nose, whiskers, and a tiny mouth using a fine-tip pen. Colored pencils or markers can add rosy cheeks and inner ear details.
- Decorate clothing and accessories. Draw bow ties, scarves, aprons, or tiny vests on the lower portion of the body. Add small patterns like dots or stripes.
- Attach adhesive. Apply glue or double-sided tape along one short edge of the wrapper, forming a vertical glue strip.
- Wrap the egg. Place the egg in the center of the strip with the face facing outward, bring the ends together around the egg, and press to secure the overlap.
- Adjust and stand. Gently press the bottom edges against a flat surface so the bunny can stand upright, then bend the ears slightly forward for character.
Allow any wet glue to dry fully before moving the bunnies, especially if you plan to transport them as gifts. If you expect children to handle the bunnies frequently, glue dots or strong double-sided tape create a faster, cleaner bond than liquid glue.
Fun Variations on the Classic Bunny
Once the basic bunny wrapper is mastered, it is easy to create a whole cast of seasonal characters by ising the same underlying structure. This keeps the project fresh even if you revisit it every year, and it allows each child to personalize their creations.
- Storybook animals: Turn the bunny into a fox, bear, chick, or lamb by adjusting the ear shapes and face details while keeping the same wrap-around body.
- Dress-up themes: Create bunnies wearing superhero capes, ballerina tutus, raincoats, or pajamas by drawing different clothing elements on the body.
- Family portraits: Match each bunny’s clothing colors, glasses, or hairstyles to members of the family and label the back with names.
- Monogrammed bunnies: Add an initial to the belly or a tiny tag tied around the ears to designate place settings or individual gifts.
Encouraging kids to design their own variations builds creativity and ownership. The wrappers can be as simple or as detailed as time allows; even a minimal face and plain ears look charming when wrapped around a bright foil egg.
Styling Ideas for Display and Gifting
Part of the joy of these bunny-wrapped eggs is how versatile they are for decorating and gifting. Rather than hiding them all in a basket, consider creating small vignettes or scenes throughout the home.
- Easter basket centerpieces: Arrange a group of bunnies in a shallow basket filled with paper grass, moss, or shredded tissue to form a table centerpiece.
- Place setting markers: Stand one bunny at each dinner plate with a small name flag taped behind an ear.
- Mini bouquets: Tuck a few bunnies into small jars or mugs with fresh flowers or faux greenery.
- Classroom or office surprises: Line the bunnies along a windowsill, whiteboard ledge, or reception desk for a cheerful seasonal display.
For gifting, small cellophane bags tied with ribbon work well to hold one or two bunny eggs. Another option is to place several bunnies in a shallow box lined with tissue paper, turning them into a ready-made present that travels easily and looks polished on arrival.
Crafting with Kids: Tips for Success
Because these wrappers involve cutting, drawing, and simple gluing, the project is accessible to a wide range of ages. With a few adjustments, it can become a relaxed family activity rather than a stressful, perfection-oriented project.
- Pre-cut simple body shapes for younger children and let them focus on drawing faces and coloring ears.
- Offer a limited set of colored markers or pencils to avoid overwhelm and to keep the color palette cohesive.
- Use glue sticks or tape instead of wet glue for small hands to reduce mess and drying time.
- Model one bunny from start to finish, then let kids invent their own versions with whatever details they like.
Remember that slightly crooked ears and wobbly smiles add to the charm. The goal is not identical bunnies but a collection that reflects the personalities and imagination of the makers.
Storage, Transport, and Safety Considerations
Since these wrappers are primarily paper, they benefit from gentle handling and dry storage. Keep them away from moisture, direct sunlight, and very warm areas that might soften or melt the chocolate inside.
- Store finished bunnies in a single layer in a shallow box to protect the ears from bending.
- When transporting, wedge the eggs snugly in tissue paper or paper grass so they do not roll or collide.
- Always keep wrapped chocolate out of reach of very young children until supervised eating time.
- If any foil comes loose or tears, rewrap the egg or replace it to keep the candy hygienic.
For very hot climates or long car trips, consider using candy that tolerates higher temperatures, or delay adding the chocolate eggs to the paper wrappers until closer to the event.
Frequently Asked Questions
Can these wrappers be reused next year?
Yes, if you use sturdier cardstock and remove the eggs gently, the wrappers can be flattened and stored in a small envelope for future use. Simply re-curve the body around new eggs and secure with fresh tape or glue when you are ready to use them again.
Do the wrappers fit only one specific brand of chocolate egg?
No. The template can be adapted easily by adjusting the length of the body band and the height of the wrapper to match the size of any similarly shaped egg. When trying a new candy, test the fit on a scrap strip first, then edit the template before creating a full batch.
What if I do not have a printer?
You can still enjoy this project by drawing the bunny shapes directly onto paper with a pencil and then outlining in pen. Once you create a version you like, trace it multiple times onto fresh sheets to build a small family of bunnies without needing any printed templates.
How long does it take to make one bunny?
After the first test run, most people can assemble a bunny in a few minutes, especially if several steps are batched, such as cutting all wrappers at once or drawing all faces before gluing. For a small group of children, setting aside an hour offers plenty of time for both crafting and decorating.
Can I add non-paper elements like felt or ribbon?
Absolutely. Thin felt is perfect for soft ears or tiny bow ties, while narrow ribbon works well for scarves or belts. Just be mindful of extra weight or bulk, which can make the bunny less stable when standing upright.
Bringing Character to Your Easter Table
Easter bunny wrappers for chocolate eggs combine the delight of seasonal candy with the warmth of handmade crafts. With only simple tools and a bit of time, it is possible to turn a box of store-bought eggs into a charming, personalized display that feels thoughtful and festive.
Whether you are filling baskets, dressing a holiday table, or creating small gifts for friends, these whimsical bunnies offer a playful way to celebrate the season. Once you have made one or two, the process becomes so simple that it is easy to imagine them hopping back into your traditions year after year.