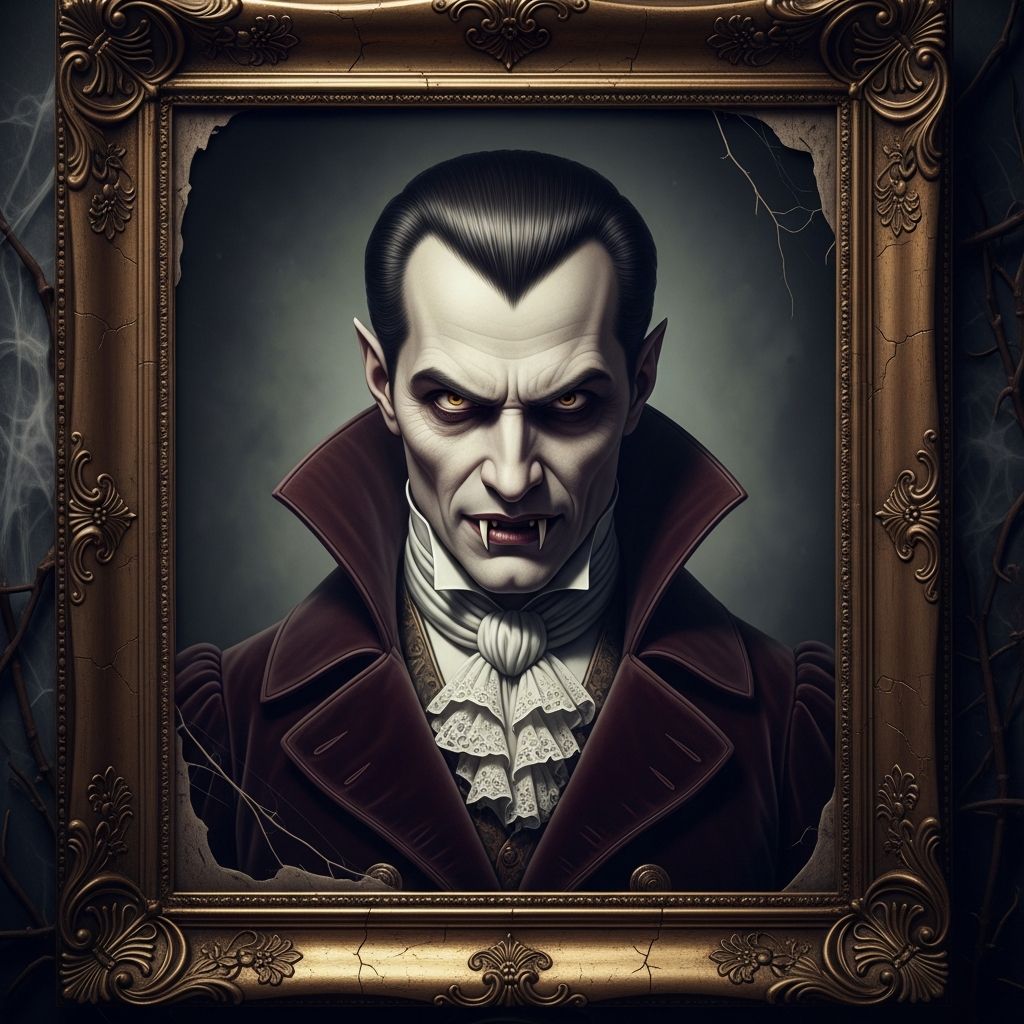
Turning your home into a haunted mansion does not require expensive props or animatronics. With a few simple supplies and a bit of imagination, you can transform ordinary portraits and frames into eerie vampire artworks that look straight out of a Gothic castle. This guide walks you through creative ways to design vampire portraits that are spooky enough for Halloween but still fun and family-friendly.
Why Vampire Portraits Make Perfect Halloween Decor
Vampires have stalked through folklore and fiction for centuries, giving them an instantly recognizable look: pale skin, sharp fangs, dark clothing and an unsettling elegance. Their iconic appearance makes them perfect for visual crafts and decorations that are both thematic and easy to recognize.
- Instantly spooky: You do not have to explain what a vampire is; everyone gets the reference right away.
- Flexible style: Designs can range from cute cartoonish vampires for kids to dark, Gothic portraits for adult parties.
- Budget friendly: Most projects use basic art materials and old frames you already have at home.
- Reusable: Unlike perishable decor, portraits can be stored and reused every year.
Children and adults can participate in these crafts, supporting creative art play that is encouraged by educators as a way to build fine motor skills and imagination.
Gathering Your Haunted Art Supplies
You do not need professional art tools to create convincing vampire portraits. Many key items can be found in your recycling bin or local discount store.
Core Materials
- Old photo frames (wood, plastic or metal)
- Printed photos (family pictures or royalty-free portraits)
- Cardstock or watercolor paper
- Acrylic paints or markers in black, red, white, gray and purple
- Glue stick and craft glue or hot-glue gun (for adults)
- Pencils and erasers
- Scissors or craft knife (adult use)
Spooky Embellishments
- Scrap fabric in dark colors (black, burgundy, navy)
- Black lace, ribbon or tulle
- Plastic bats, tiny spiders, skull charms or faux pearls
- Metallic pens (gold, silver) for frame accents
- Tea bags or brown ink to “age” paper
According to child-safety guidance from pediatric organizations, sharp tools, hot-glue guns and small embellishments should always be handled by adults or older teens, and kept away from very young children to avoid burns and choking hazards.
Designing Your Vampire Characters
Before you paint or glue anything, plan the style and personality of your vampire portraits. Treat each piece as if you are creating a character for a story.
Pick a Portrait Style
- Regal vampire lord or lady: Think high collars, brooches and severe expressions.
- Vintage aristocrat: Sepia or black-and-white tones with faded edges.
- Comical cartoon vampire: Oversized fangs, round eyes and friendly grins for younger kids.
- Shadowy silhouette: A profile cut from black paper against a blood-red background.
Classic Vampire Features to Include
| Feature | How to Create It | Effect |
|---|---|---|
| Pale skin | Lighten faces with white paint or desaturate printed photos | Gives an undead, nocturnal look |
| Fangs | Draw small triangle teeth or cut tiny white paper fangs | Instant vampire signal |
| Red eyes or lips | Use bright red markers or paint | Adds a dramatic, unsettling contrast |
| Dark clothing | Paint on capes, collars and suits over existing clothes | Makes portraits cohesive and Gothic |
| Background fog | Blend gray and black around the figure | Creates a nighttime cemetery mood |
Project 1: Transform Family Photos into Vampiric Heirlooms
One of the most entertaining options is to turn your own family portraits into creatures of the night. Use copies or printed digital files, never irreplaceable originals.
Step-by-Step Photo Makeover
- Print and protect: Print photos on regular paper and lightly glue them to cardstock so they do not wrinkle when you draw on them.
- Sketch changes: Lightly outline where new hairlines, collars and fangs will go. Plan first; ink later.
- Add vampire details: Use fine markers or a thin brush for fangs, widow’s peaks, capes and dramatic eyebrows.
- Drain the color: If the photo is in color, mute the tones with gray shading or overlay a thin wash of diluted black paint around the edges.
- Finish with a title: Hand-letter a name beneath the portrait, such as “Count of the Living Room” or “Lady of Eternal Bedtime.”
For kids, this is a lighthearted way to explore drawing and storytelling, both of which are linked to language and cognitive development in early childhood education.
Mounting in a Frame
- Trim the portrait to fit your frame.
- Add a backing sheet in a dark color for contrast.
- Glue the portrait in place, then close the frame securely.
- Optionally, distress the frame (see next section) before inserting the art.
Project 2: Aging Ordinary Frames into Haunted Relics
The frame is just as important as the picture. A distressed, Gothic-style frame makes even a simple drawing feel like it belongs in a haunted castle.
Simple Frame Distressing Techniques
- Base coat: Paint the entire frame black and let it dry.
- Dry brushing: With a nearly dry brush, lightly sweep silver, gray or deep red across raised areas to mimic worn metal or old wood.
- Cracked corners: Draw fine crack lines with a thin brush or metallic pen to imitate age.
- Fake cobwebs: Stretch a tiny amount of cotton or craft spiderweb across a corner, securing with glue at the back.
Gothic Embellishments
Add one or two focal elements to reinforce the vampire theme:
- A small plastic bat perched at a corner
- Black lace wrapped around one side of the frame
- Tiny red rhinestones to resemble drops of blood
- A ribbon bow in burgundy or deep purple at the top center
Ensure that small decorations are firmly attached to avoid becoming loose parts, especially in homes with young children or pets.
Project 3: Paper-Craft Vampire Silhouette Gallery
If you prefer a more graphic look, silhouette portraits are clean, bold and quick to make. They look especially striking when grouped together.
Creating the Silhouettes
- Trace a profile: Have a friend or family member take a side-view photo of you. Print it and cut around the head and shoulders.
- Use as a template: Trace the cut-out onto black paper or cardstock to form a clean silhouette.
- Add vampire traits: Modify the silhouette with a pointed collar, exaggerated nose or spiky hair.
- Mount on a background: Glue the silhouette on red, purple or parchment-colored paper.
Arranging a Mini Gallery Wall
- Use frames of different sizes but keep color schemes consistent (e.g., all black or black and gold).
- Hang silhouettes in a tight cluster above a console table or along a hallway.
- Mix silhouettes of people with bats, coffins or castle towers to vary the display.
Safe Display Ideas for Homes with Kids or Pets
Safe decorating is as important as aesthetics, especially for families. Fire, cords and unstable objects are common hazards during holidays. With a few precautions, you can display your vampire portraits securely.
- Avoid real candles: Use LED candles near portrait displays to keep flames away from paper, fabric and curious hands.
- Use removable hooks: Hang lightweight frames with removable adhesive hooks to reduce the risk of heavy items falling.
- Keep tiny items high: Frames that include beads, rhinestones or small charms should be placed out of young children’s reach.
- Secure surfaces: If frames are leaning on shelves, add non-slip pads under the corners.
Setting the Scene: Where to Showcase Your Vampire Portraits
Once your artwork is ready, think about how to integrate it into the rest of your Halloween decorating. Strategic placement can make simple portraits feel like part of a complete haunted experience.
High-Impact Locations
- Entryway: Hang a cluster of vampire portraits near the front door so guests are greeted by your “undead ancestors.”
- Stairway wall: Line the stairs with portraits, increasing in size as you go up.
- Dining room: Place one large, dramatic portrait at the head of the table, as if the vampire host presides over dinner.
- Mantel or shelf: Lean framed portraits against a wall and surround them with LED candles and faux cobwebs.
Combine with Other Decor Themes
Vampire portraits pair well with other classic Halloween motifs:
- Black paper bats flying across the wall or ceiling
- Gravestone cutouts and cemetery backdrops
- Old books stacked under frames for height
- Rich fabrics like velvet or brocade used as table runners
Making It a Family Craft Night
Involving the whole household turns decorating into a shared tradition. Family craft activities have been associated with improved communication and emotional bonding, as they provide low-pressure time together focused on a shared goal.
Age-Appropriate Tasks
- Toddlers: Choose background paper colors, stick pre-cut shapes and help hand over safe tools.
- School-age children: Draw fangs and accessories, select embellishments and assist with gluing.
- Teens and adults: Handle cutting tools, hot glue, frame painting and hanging portraits.
Fun Variations for Group Projects
- Host a “vampire gallery contest” where each person designs a character with a short backstory.
- Create a fictional family tree for your vampire portraits and display it next to the wall of frames.
- Record a short “museum tour” video where someone explains each portrait as if guiding visitors.
Cleaning, Storage and Reuse
To get more than one season out of your hard work, store portraits carefully after Halloween ends.
- Dust frames gently with a soft cloth before packing.
- Wrap each frame in tissue or newspaper to protect paint and embellishments.
- Label the storage box so next year’s decorating is faster.
- Consider removing fragile 3D pieces and storing them in a small container inside the main box.
Proper storage not only extends the life of your decor but reduces waste and the need to purchase new items each year, which supports more sustainable holiday habits.
Frequently Asked Questions (FAQs)
Q: How can I make vampire portraits that are not too scary for young children?
Focus on cartoon-style faces with big eyes, smiles and tiny fangs. Use bright or pastel backgrounds, avoid realistic blood, and add playful elements like bow ties or silly hats so the tone stays light and friendly.
Q: Can I make these portraits without a printer?
Yes. Draw faces directly onto cardstock or use simple collage techniques. Cut basic head shapes from colored paper, then add hair, eyes and capes with markers and glue. Silhouette-style portraits also work well without any printed photos.
Q: What type of paint is best for decorating frames?
Acrylic craft paint is usually the easiest choice because it adheres to wood and many plastics, dries quickly and cleans up with water. Let each coat dry completely before adding details or dry-brushing highlights.
Q: How do I protect my artwork if I want to reuse it next year?
Allow all glue and paint to dry fully, then place portraits inside frames or clear sleeves. Store them in a dry area away from direct sunlight. If possible, keep frames upright in a padded box to avoid dents and scratches.
Q: Is it okay to hang decorated frames outdoors?
Most paper-based portraits are best kept indoors. If you want outdoor decor, consider scanning your artwork and printing it on heavier paper, then displaying it in inexpensive frames under a covered porch where it is protected from rain and wind.
References
- The Arts in Education: An Imperative for the 21st Century — National Assembly of State Arts Agencies. 2013-01-01. https://nasaa-arts.org/nasaa_research/the-arts-in-education-an-imperative-for-the-21st-century/
- Choking Prevention — American Academy of Pediatrics. 2023-04-01. https://www.healthychildren.org/English/health-issues/injuries-emergencies/Pages/Choking-Prevention.aspx
- Burn Prevention — American Burn Association. 2020-01-01. https://ameriburn.org/burn-prevention/
- Halloween Health and Safety Tips — Centers for Disease Control and Prevention. 2022-10-25. https://www.cdc.gov/family/halloween/index.htm
- Benefits of Family Mealtimes and Shared Activities — American Academy of Pediatrics. 2021-06-15. https://www.healthychildren.org/English/family-life/family-dynamics/Pages/The-Benefits-of-Family-Meals.aspx
- Reduce, Reuse, Recycle — United States Environmental Protection Agency. 2023-05-10. https://www.epa.gov/recycle/reducing-and-reusing-basics