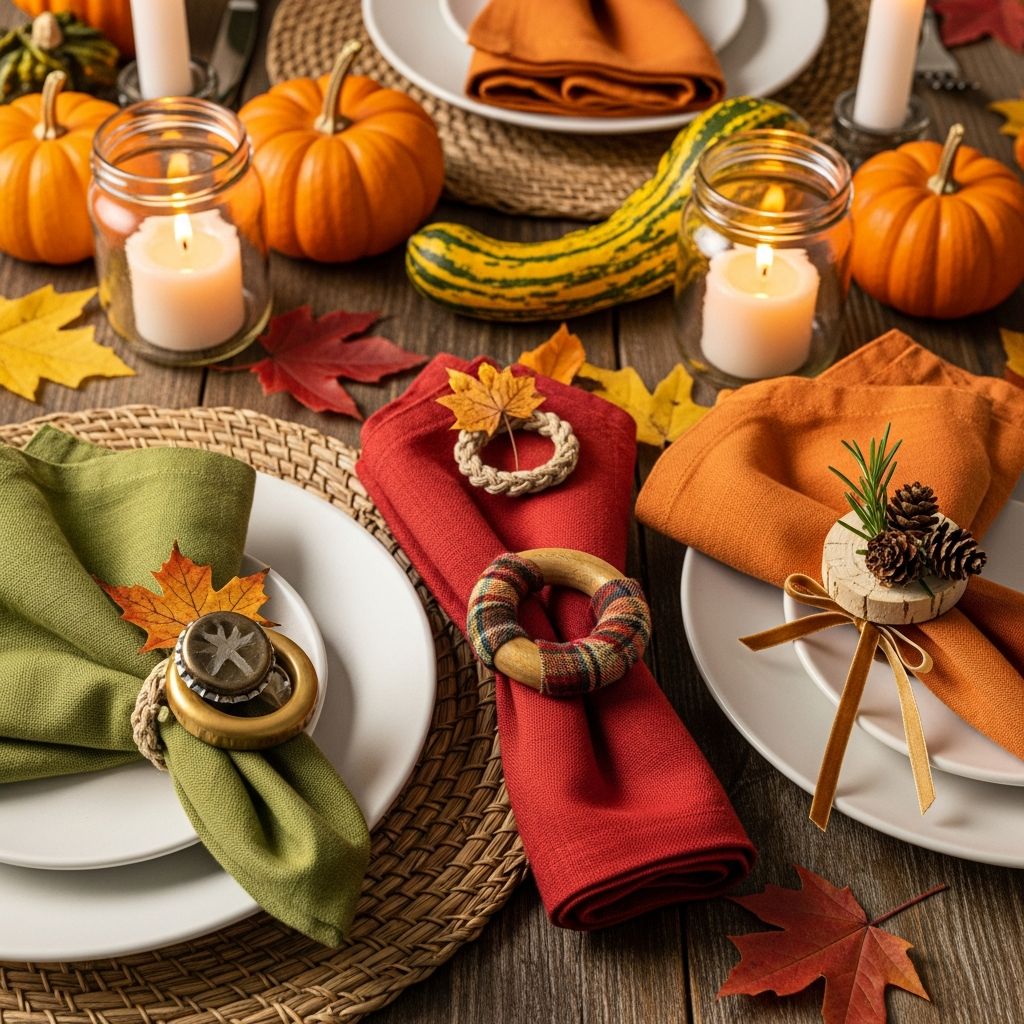
Napkin rings are a small detail that can transform a Thanksgiving table from ordinary to memorable, and they do not have to be expensive or wasteful. By upcycling common household materials, you can create charming, personalized napkin rings that reflect your style and keep extra trash out of the bin.
This guide walks through several creative ideas for turning cardboard tubes and other recycled supplies into beautiful napkin rings, along with styling tips and practical FAQs to help your project go smoothly.
Why Make Napkin Rings From Recycled Materials?
Upcycled napkin rings are more than just a craft; they bring personality, sustainability, and a handmade touch to your holiday table. Instead of buying generic decor, you can design pieces that match your color palette and themes while using items you already have at home.
- Reduce waste by repurposing cardboard tubes, scrap paper, and leftover ribbons.
- Save money compared with store-bought napkin rings, especially for large gatherings.
- Involve kids and guests in an easy, low-stress, holiday-appropriate craft activity.
- Create decor that feels meaningful and personal instead of mass-produced.
Core Materials and Tools
You can make these napkin rings with very simple supplies. Consider this list a starting point; feel free to substitute what you already have.
Basic Materials
- Cardboard tubes (paper towel, toilet paper, or other clean, sturdy tubes)
- Decorative paper (brown paper bags, scrapbook scraps, old calendars, book pages)
- Adhesive (glue stick, craft glue, or double-sided tape)
- String elements (twine, yarn, thin ribbon, embroidery thread)
- Embellishments (buttons, dried leaves, faux leaves, tiny pinecones, labels)
Tools
- Scissors or a craft knife
- Ruler or measuring tape
- Pencil or pen for marking cuts
- Cutting mat or protected surface (if using a craft knife)
- Clips or clothespins (helpful for holding glued edges while they dry)
Sizes and Styles at a Glance
Before you start cutting, it helps to know the most common proportions for napkin rings and how different finishes can change the overall look of your table.
| Feature | Recommended Range | Effect on Table Style |
|---|---|---|
| Ring height | 2–4 cm | Short rings feel subtle and minimalist; taller rings stand out as a focal point. |
| Diameter | About 4–5 cm internal | Fits most cloth or folded paper napkins without crushing or slipping. |
| Finish | Matte paper, fabric, twine, or paint | Matte and natural textures create a warm, rustic look; smooth finishes feel more formal. |
| Color palette | Neutrals, deep greens, burnt oranges, burgundy, golds | Autumn colors instantly signal Thanksgiving and coordinate with typical seasonal decor. |
Project 1: Rustic Twine-Wrapped Napkin Rings
These rustic napkin rings use twine or thin yarn wrapped around cardboard to create a warm, farmhouse-style accent that looks especially nice with linen or plaid napkins.
What You Need
- Cardboard tube (paper towel or toilet paper)
- Twine, jute, or thick string
- Craft glue
- Scissors
- Optional: small charm, wooden bead, or dried leaf for decoration
Steps
- Measure and mark the tube into equal sections about 2–3 cm tall, then cut along the marks to create several plain cardboard rings.
- Place a small dab of glue on the inside edge of a ring and press one end of the twine into the glue until it begins to hold.
- Wrap the twine tightly around the ring, keeping each wrap close to the previous one so the cardboard does not show through.
- When you reach the starting point, trim the twine, secure the end with glue, and smooth it into the wrapped layers.
- Add a charm, bead, or small decorative element with a drop of glue, or leave the ring plain for a simple look.
Styling Suggestions
- Pair with off-white or cream napkins for a calm, neutral table.
- Layer with wooden chargers or woven placemats to emphasize the rustic texture.
- Mix twine colors (for example, natural and deep green) for a subtle striped effect.
Project 2: Paper-Covered Harvest Rings
This version uses recycled paper to create smooth, colorful napkin rings that can coordinate with your table runner, invitations, or place cards.
What You Need
- Cardboard tube
- Decorative paper (brown bags, kraft paper, or patterned paper)
- Glue stick or double-sided tape
- Ruler and pencil
- Scissors or craft knife
- Optional: alphabet stickers or pens for names and messages
Steps
- Cut the tube into rings as before, aiming for consistent height so they look cohesive on the table.
- Measure the ring’s circumference and height, adding a small overlap for the paper seam.
- Use these measurements to cut rectangular strips from your chosen paper.
- Apply glue or double-sided tape to the back of a strip and wrap it around a ring, pressing firmly as you go.
- Fold any small excess paper to the inside of the ring for a neat finish.
- Write guest names, short messages (such as “Grateful” or “Blessed”), or add stickers to personalize each ring.
Design Ideas
- Use pages from an old, damaged cookbook or novel to create a vintage, text-heavy pattern.
- Choose a different color or pattern for each guest to help them identify their place setting.
- Layer a thin ribbon or strip of contrasting paper over the base layer for extra dimension.
Project 3: Leaf-Adorned Nature Rings
If you want your napkin rings to echo the outdoors, leaf-adorned designs are a perfect fit. You can use real leaves (briefly) or faux leaves for a reusable option.
What You Need
- Cardboard rings (prepared as above)
- Acrylic paint in neutral or autumn tones
- Small real or faux leaves (pressed leaves, silk leaves, or paper cut-outs)
- Paintbrush
- Craft glue or hot glue (with caution)
Steps
- Paint each ring in a solid color such as deep green, burnt orange, or warm brown and allow it to dry completely.
- Arrange your leaves on the ring before gluing to find a pleasing layout.
- Attach the leaves with small dabs of glue, pressing gently so they adhere without crushing.
- If using real leaves, consider sealing them with a thin layer of clear-drying glue or sealer to help them last through the meal.
Styling Suggestions
- Place the leaf cluster at the front of each setting so it is visible when guests sit down.
- Combine these with a centerpiece of branches, gourds, and candles for a woodland-inspired table.
- Choose leaves that coordinate with your centerpiece colors to keep the table unified.
Project 4: Name-Tag Napkin Rings for Place Settings
These napkin rings double as place cards, which simplifies your table arrangement and adds a thoughtful, personalized detail for each guest.
What You Need
- Any base ring style (twine-wrapped, paper-covered, or painted)
- Cardstock or thick paper for tags
- Hole punch
- Thin ribbon or string
- Pen or marker
Steps
- Cut small rectangles or simple shapes (such as leaves or pumpkins) from cardstock.
- Punch a single hole near one edge of each tag.
- Write each guest’s name clearly in the center of the tag.
- Thread a piece of ribbon or string through the hole and tie the tag around the napkin ring.
- Trim the ribbon ends at an angle for a polished look.
Benefits
- Eliminates the need for separate place cards and holders.
- Makes each guest feel noticed and appreciated.
- Helps you manage seating arrangements for family dynamics or dietary needs.
Tips for a Cohesive Thanksgiving Table
Homemade napkin rings look best when they feel like part of a larger story on your table rather than a random add-on. A little planning helps everything work together smoothly.
- Choose a palette first: Pick 2–4 main colors (for example, cream, dark green, copper, and burgundy) and use them across plates, napkins, rings, and candles.
- Repeat textures: If your rings use twine, echo that rustic fiber with woven placemats or burlap runners.
- Vary heights: Combine low napkin rings with taller candlesticks, vases, or cake stands so the table has visual movement.
- Balance patterns and solids: If your napkins are busy and patterned, keep the rings simpler; if the napkins are plain, let the rings carry more detail.
Working Safely and Efficiently
Even a simple craft goes more smoothly when you take a few basic precautions and set up your materials in a thoughtful way.
- Use a cutting mat or thick cardboard under your work if using a craft knife.
- Keep hot glue guns and sharp tools away from small children, assigning them safer tasks like wrapping twine or placing stickers.
- Batch your tasks (cut all the rings first, then cover them, then add decorations) to save time when making a larger quantity.
Shortcuts for Last-Minute Hosts
If Thanksgiving preparations are already hectic, there are still ways to incorporate upcycled napkin rings without spending hours crafting.
- Skip painting and use plain cardboard rings wrapped in a single band of decorative paper or washi tape.
- Tie a length of twine or ribbon directly around the napkin and add a tiny tag, skipping the cardboard tube entirely.
- Mix homemade rings with a few simple metal or wooden store-bought pieces if you do not have enough time to make one for every place setting.
Frequently Asked Questions
Can these upcycled napkin rings be reused?
Yes, most of these designs can be reused for several seasons if treated gently and stored in a dry container. Rings with real leaves or other natural elements may not last as long, but paper-covered, painted, and twine-wrapped versions can be kept in a box or tin between holidays.
How do I clean napkin rings made from cardboard?
Cardboard-based rings cannot be washed like metal or ceramic ones, so it is best to keep them away from sauces and liquids. If something spills, lightly blot with a dry cloth and allow them to air dry completely; avoid scrubbing or soaking so the cardboard does not warp.
Are cardboard napkin rings strong enough for everyday use?
Yes, if cut from sturdy tubes and wrapped or covered tightly, cardboard napkin rings hold up well for normal use. For frequent, year-round use, consider adding an extra layer of paper or a coat of clear sealer to improve durability.
What if my cardboard tubes are different sizes?
Minor differences in diameter are usually fine, especially once the rings are wrapped or covered. If the size difference is large, group rings of similar diameter at the same end of the table so the variation feels intentional rather than random.
Can kids help with these Thanksgiving crafts?
Absolutely. Children can help measure and wrap paper, wind twine, choose colors, and add embellishments while adults handle cutting and hot glue. Turning the project into a family activity not only speeds up the process but also creates memories that guests will feel when they see the finished table.
Bringing It All Together
By turning simple materials like cardboard tubes, scrap paper, and twine into charming napkin rings, you add character and warmth to your Thanksgiving table without spending much money or creating extra waste. Whether you favor rustic textures, sleek painted finishes, or personalized name tags, these upcycled napkin rings prove that thoughtful details can come from the most ordinary items in your home.