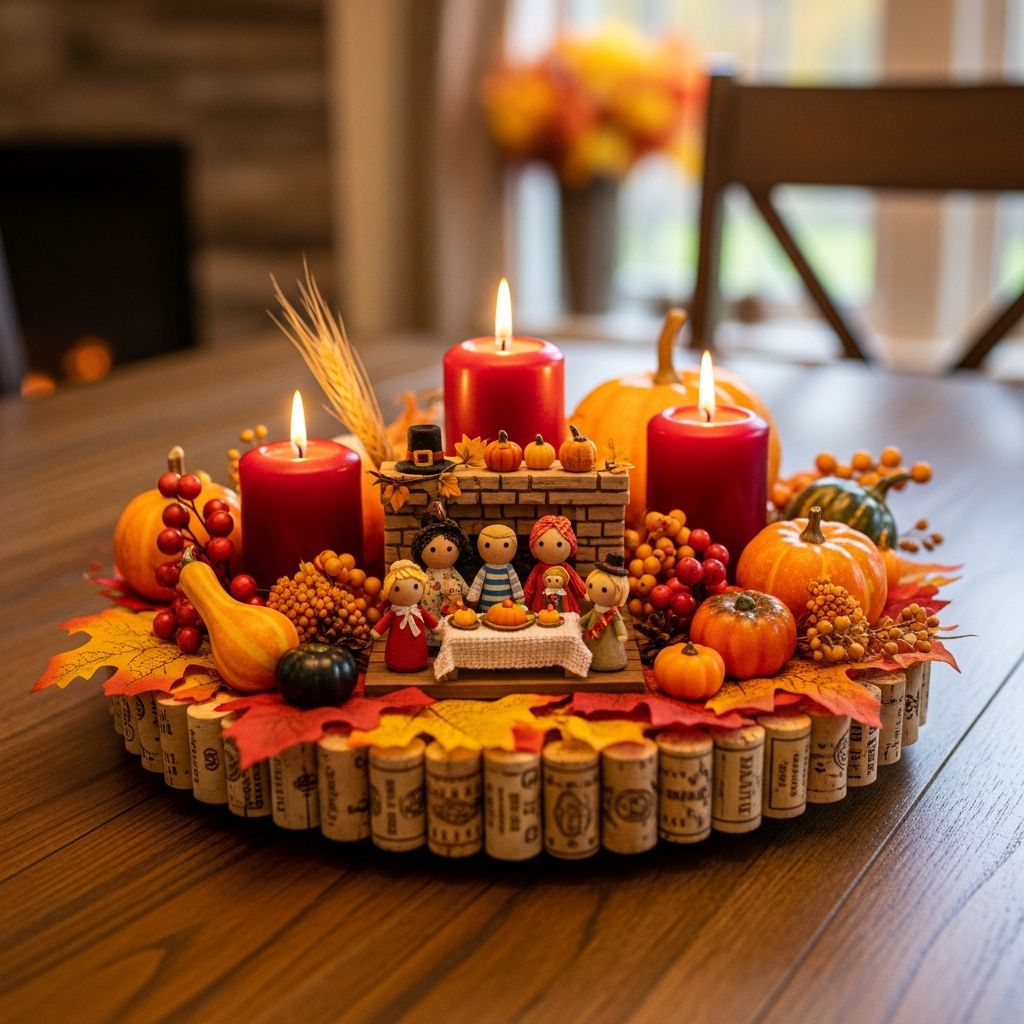
Thanksgiving is all about gathering, gratitude, and the stories that bind a family together. A centerpiece that showcases favorite photos alongside warm autumn textures turns your table into a conversation starter and a heartfelt tribute to those memories.
This guide walks you through creating a Thanksgiving family photo centerpiece built around humble corks, simple supplies, and meaningful images. You will learn how to plan the design, build the cork base, attach photos securely, and style the final piece for your Thanksgiving table or buffet.
Why a Family Photo Centerpiece?
Traditional Thanksgiving centerpieces often focus on pumpkins, flowers, or candles. A photo centerpiece adds another layer: stories, shared history, and the people who make the holiday matter. Instead of purely decorative objects, the focus shifts to snapshots of birthdays, vacations, and everyday moments.
- It invites guests to reminisce and share stories.
- It honors loved ones who may not be at the table this year.
- It doubles as seasonal decor and a keepsake you can reuse or update each year.
Once assembled, this centerpiece feels personal and cozy while still being simple enough to create in an afternoon with just a few tools and supplies.
Materials and Tools You Will Need
The basic version of this project uses easily accessible items. Feel free to customize materials based on what you already have at home.
Core Materials
- Wine corks (real or synthetic; ideally cleaned and dry)
- Printed family photos (preferably on cardstock or mounted to thicker paper)
- Thin floral wire or decorative wire
- Cardboard, wood tray, or foam block as a base
- Hot glue sticks and hot glue gun
Decorative Add-Ons
- Mini pumpkins or gourds
- Dried leaves, acorns, pinecones, or seed pods
- Ribbon, twine, or jute string
- Tea lights or LED candles (for safety)
- Faux berries or small silk flowers
Basic Tools
- Scissors or paper trimmer for photos
- Wire cutters or sturdy scissors
- Ruler or measuring tape
- Optional: craft knife for shaping corks or base
Planning Your Centerpiece Design
Before you heat up the glue gun, spend a few minutes planning. A little forethought helps the finished piece feel balanced and intentional, not cluttered.
Deciding on the Shape
First choose a basic shape for your centerpiece based on table size and layout:
- Long rectangle: Ideal for a rectangular dining table; runs down the center without blocking sightlines.
- Compact circle: Works well on a round table or small coffee table.
- Clustered sections: Several small groupings spaced along the table, easier to move if you need room for serving dishes.
After choosing the shape, lightly sketch a simple outline on paper showing where cork clusters, photos, and any candles or pumpkins will sit.
Selecting Photos with Purpose
Pick images that tell a story together instead of random single shots. Consider these themes:
- Photos from past Thanksgivings or autumn gatherings.
- Generational images (grandparents, parents, children) shown side by side.
- Major milestones from the current year as a visual gratitude list.
Limit the total number of photos to avoid visual chaos. For a medium-size centerpiece, about 6–10 small images usually feels full but not overwhelming.
Preparing and Printing Your Photos
Because this centerpiece will be handled and displayed near food, you want the photos to be durable and neat. Spending a little time on preparation helps the project last more than one holiday.
Photo Size and Layout
- Print photos in smaller sizes such as 2×3 inches or 3×4 inches.
- Use the same orientation (mostly vertical or mostly horizontal) for a more cohesive look.
- Consider converting images to black and white or a warm sepia tone for a unified feel.
Once printed, mount each photo on a slightly larger piece of cardstock to create a subtle border and extra stability. A border of 2–4 millimeters around the photo is often enough.
Laminating or Sealing (Optional)
If you plan to reuse the centerpiece, light sealing goes a long way.
- Slip photos into small clear sleeves or self-adhesive laminating pockets.
- Alternatively, brush a thin coat of decoupage medium or clear-drying glue onto the surface for a protective layer.
Allow any sealant to dry fully before attaching wire or inserting photos into cork holders.
Building the Cork Base
The corks form the structural base and also contribute to the warm, rustic look. You can create a simple grid, a flowing organic shape, or a cluster of mini towers.
Arranging Corks on the Base
Start by placing your base (cardboard, wooden tray, or foam block) on a flat surface. Arrange corks without glue at first, testing different patterns.
- Lay corks horizontally in snug rows for a low-profile mat.
- Stand corks upright for a more textured, vertical look.
- Mix horizontal and vertical orientations to mimic a natural, uneven surface.
Step back and check the shape from all sides. Adjust until it feels balanced and leaves enough gaps for candles or small decorations if you plan to add them.
Gluing the Corks Securely
Once satisfied with the arrangement, begin gluing corks in place.
- Work in small sections so the glue stays warm and workable.
- Apply a line or dot of hot glue to the cork, then press it onto the base and hold for a few seconds.
- Stagger joints so no long, straight lines of gaps appear in the design.
Allow the glue to cool completely before handling the centerpiece. If any corks feel loose, reinforce them with an extra bead of glue at the base or between neighboring corks.
Creating Photo Holders from Corks
Next you will transform selected corks into mini stands that securely grip your photos. There are two main approaches: cutting a slot in the cork or using wire to create a loop.
Option 1: Slotted Cork Holders
- Choose a cork and stand it upright on a stable surface.
- Using a craft knife, carefully slice a shallow vertical slit across the top, about one-third of the cork’s diameter.
- Wiggle the blade gently to widen the slit just enough for a piece of cardstock.
- Test with a scrap of thick paper to ensure a snug but not overly tight fit.
Repeat for as many slotted holders as you need. Distribute them across the base so photos appear at varying positions and angles, not all in a straight line.
Option 2: Wire Loop Cork Holders
If you prefer not to cut the corks, wire loops offer a secure and decorative method.
- Cut a piece of floral wire about 15–20 centimeters long.
- Twist one end into a small spiral or circle large enough to hold the corner of a photo.
- Wrap the remaining length of wire tightly around the cork several times, then twist the ends together at the back.
- Gently bend the loop so it stands upright and angled slightly backward for better visibility.
Wire loops can be left plain for a simple look or wrapped with ribbon or twine for added color and texture.
Attaching and Arranging Your Photos
With the holders ready, it is time to bring the centerpiece to life by adding your chosen images. This stage is where the piece becomes truly personal.
Inserting Photos into Holders
- Slip each photo into its slot or wire loop, checking that the image is secure and upright.
- Alternate photos of different sizes so shorter and taller images create an interesting skyline.
- Place especially meaningful photos near the center of the arrangement.
If a photo feels wobbly, add a tiny bit of double-sided tape on the back or slightly deepen the cork slot for a better grip.
Balancing Height and Visibility
Step around the table and look at the centerpiece from all seating positions. Everyone should be able to see at least a few photos clearly without having their view blocked.
- Lower the tallest photos if they interfere with conversation across the table.
- Pull a few images closer to the table edges so guests do not have to lean over plates to see them.
- Cluster related photos (such as all siblings or a trip series) in small groupings that invite discussion.
Adding Seasonal Touches and Texture
Now that the structural elements are in place, it is time to wrap the centerpiece in autumn warmth. Natural accents, color, and light will elevate the look from simple craft to polished decor.
Incorporating Natural Elements
- Nestle mini pumpkins, gourds, or pinecones between the corks.
- Tuck in sprigs of eucalyptus, dried grasses, or fall leaves for soft movement.
- Scatter a few acorns or berries along the base for extra detail.
Stick to a limited color palette—such as warm oranges and browns with touches of deep green—to keep the overall design cohesive and calm.
Lighting for Autumn Glow
Soft light can make the photos appear warmer and more inviting.
- Place LED tea lights or small battery-operated candles among the corks.
- If using real candles, ensure no flame is near paper photos, ribbon, or dried foliage.
- Consider a narrow string of micro fairy lights woven through cork rows for a subtle sparkle.
Avoid overly bright or colored lighting that might distort the look of the photos. Warm white tones complement the autumn palette and skin tones best.
Practical Tips for Table Placement
A centerpiece should enhance the meal, not get in the way. A few practical choices will keep your creation functional as well as beautiful.
Maintaining Comfort at the Table
- Keep the overall height low to medium so guests can see one another.
- Leave clear spaces near plate edges for passing dishes and setting glasses down.
- Position the centerpiece slightly off-center if serving dishes occupy the main middle area of the table.
If your table is very narrow, consider using a single compact version of the centerpiece at one end of the table or on a nearby console, where guests will still see and enjoy the photos.
Ideas for Personalization and Variations
Once you learn the core method, you can adapt the idea for different families, traditions, or spaces. Changing the materials, color palette, or theme can give the project a completely fresh personality.
Theme Variations
- Recipe memories: Display photos of relatives cooking or sitting at past holiday tables, paired with handwritten recipe cards tucked into corks.
- Gratitude prompts: Mix photos with small cards that say “Today I am grateful for…” where guests can write notes.
- Travel reflections: Use travel photos from the past year to celebrate journeys that led everyone back to the same table.
Material Substitutions
- Replace corks with small wooden blocks for a more modern look.
- Use a shallow wooden crate instead of a flat base for a more substantial centerpiece.
- Swap wire for mini clothespins clipped to thin twine stretched between taller corks.
Centerpiece Features at a Glance
| Feature | Benefit | Tips |
|---|---|---|
| Cork base | Provides a sturdy, rustic foundation. | Mix horizontal and vertical corks for texture. |
| Family photos | Turn the centerpiece into a storytelling display. | Use smaller prints for better table visibility. |
| Wire or slotted holders | Securely display photos at various heights. | Angle photos slightly back to reduce glare. |
| Natural accents | Add color, movement, and seasonal charm. | Limit colors for a cohesive autumn palette. |
| Soft lighting | Enhances warmth and highlights images. | Choose LED candles for safety near paper. |
Storing and Reusing Your Centerpiece
When the holiday ends, you can preserve the centerpiece for future gatherings with a few simple steps. Treat it like a keepsake rather than a disposable decoration.
- Remove loose natural elements (like real leaves and gourds) and discard or compost them.
- Gently take out the photos and store them flat in a labeled envelope or photo box.
- Wrap the cork base in tissue paper and place it in a box to protect it from dust and pressure.
Next year, you can slip new photos into the existing holders, tweak the color scheme, or add updated gratitude cards while keeping the same handmade structure.
Frequently Asked Questions
How many corks do I need?
The number of corks depends on the size of your base. As a rough guide, a 30-centimeter by 10-centimeter rectangular base often uses around 40–60 corks when they are packed closely together. If you plan on a larger or more clustered design, gather extra corks so you do not run short mid-project.
Can I make this without a hot glue gun?
Yes, but it will require some adjustments. Strong craft glue or a thick white glue can work, though drying times will be longer. Another option is to contain loose corks tightly inside a shallow tray or crate so they hold each other in place, then simply wedge photo holders between them without glue.
Is this safe to use with real candles?
Using real candles near cork, paper, and dried foliage always involves some risk. If you choose real flames, keep candles in tall glass holders and place them slightly apart from the photo sections. Many people prefer battery-operated candles because they offer the same warm glow with far less worry.
What if I do not have enough family photos?
You can mix the available photos with other meaningful pieces. Consider adding small handwritten notes of gratitude, printed quotes about thankfulness, or simple illustrations drawn by children in the family. This actually increases variety and gives everyone something personal to contribute.
How can I include guests who cannot attend in person?
Ask distant relatives or friends to send digital photos or brief messages in advance. Print their pictures and notes, then display them in the centerpiece alongside local family members. During the meal, invite everyone to read the messages aloud or share stories connected to those who are represented but not physically present.
Bringing It All Together
A Thanksgiving family photo centerpiece built from corks does more than decorate the table; it brings shared memories into the heart of the celebration. Simple materials and a bit of planning transform corks, paper, and wire into a warm display of gratitude. Each photo and detail becomes a reminder that what makes the holiday special is not the menu or the perfect place setting, but the people and stories that gather around the table year after year.