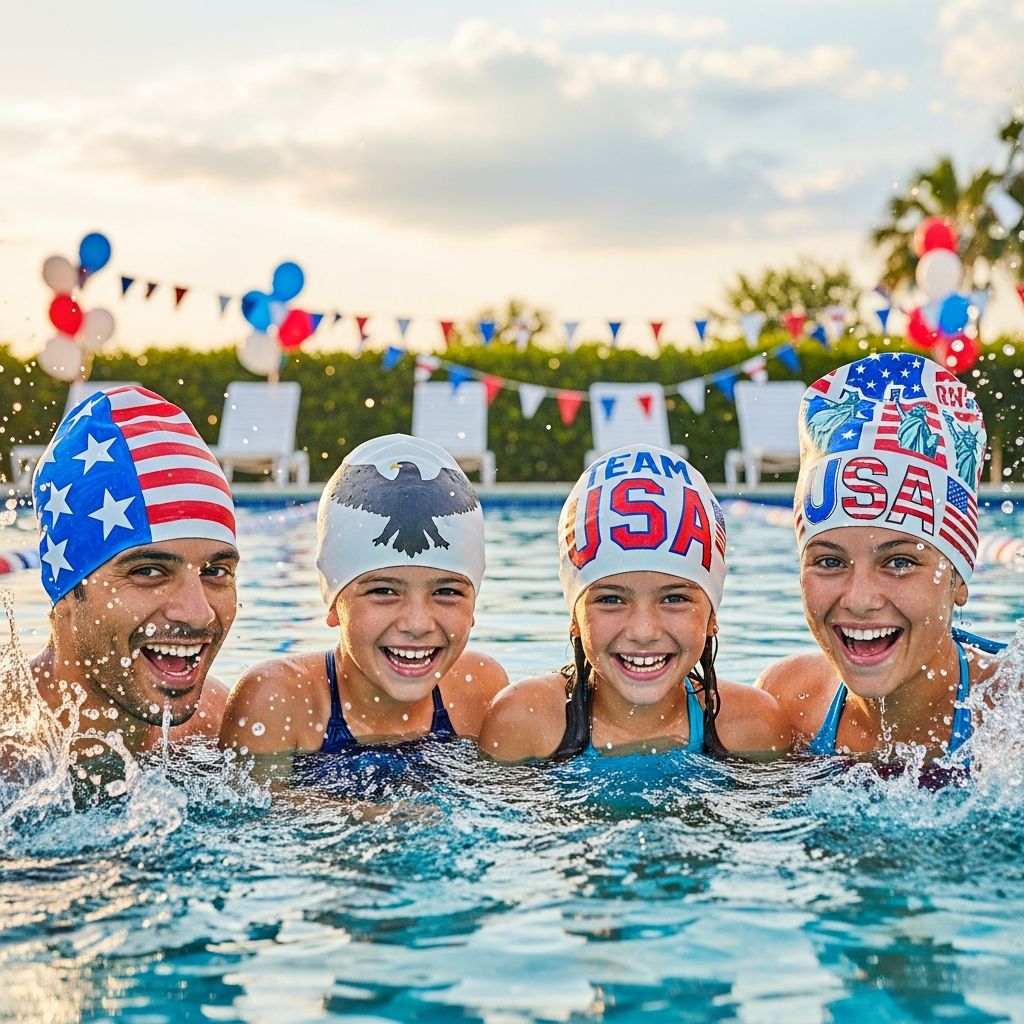
Transform an ordinary swim day into an Olympic-inspired celebration by decorating your own Team USA swim caps. This project is quick, low-mess, and perfect for families, parties, or anyone who loves cheering on American swimmers.
Why Make Your Own Team USA Swim Caps?
Decorating your own swim caps is more than just a craft; it becomes a shared experience that builds excitement for watching swimming events and gets kids outside and active. When children help design their own gear, they feel more invested in the games and often show extra enthusiasm in the pool.
Unlike store-bought themed caps, DIY versions allow complete freedom: you can showcase your favorite swimmers, add personal mottos, or mix national pride with playful doodles. This flexibility makes the project suitable for a range of ages and artistic skills, from preschoolers to teens.
Supplies You Will Need
This project relies on basic, easy-to-find materials. Most families can complete it using items already available at home plus a few inexpensive additions from a craft or sporting goods store.
- Plain swim caps (white or light-colored fabric or lycra caps work best for bold designs)
- Permanent markers in red, blue, black, and any other favorite colors
- Scrap paper or paper towels to stuff inside the caps while decorating
- Optional: stencils, washi tape, painter’s tape, or masking tape for crisp lines and shapes
- Optional: pencil or washable marker to sketch rough outlines before coloring
- Protective layer for your work surface (old newspaper, a plastic tablecloth, or a cardboard sheet)
- Aprons or old T-shirts to protect clothing from marker stains
Preparing the Swim Caps for Decorating
A few minutes of preparation will help the ink apply evenly and prevent it from bleeding through to the other side of the cap. This step is simple enough that older kids can take charge once they understand the process.
- Wash and dry the caps if needed. If they are new and have a slight coating or smell from packaging, a quick rinse and air-dry can improve ink adhesion.
- Stuff the caps. Fill each cap with loosely crumpled paper towels or scrap paper until it holds a rounded shape, similar to how it would look on a head.
- Secure the paper. Fold the cap’s edge over the paper so it stays put, or add a small piece of tape at the base if it shifts while you draw.
- Protect the table. Spread out newspaper or a disposable cloth under your work area to catch any stray ink.
Design Ideas for Team USA Swim Caps
Before anyone starts drawing, spend a moment brainstorming design ideas together. Encourage kids to combine symbols of the United States with visual hints of water and motion so the caps feel both patriotic and sporty.
- Classic Team USA look: Bold “USA” lettering on the side of the cap with red and blue stripes streaking back like speed lines.
- Stars and waves: Scatter navy stars across the cap and weave light blue waves around them to represent powerful strokes in the water.
- Flag-inspired panels: Divide the cap into sections with tape, then dedicate one part to stripes, one to stars, and one to a large number or initial.
- Personal mascots: Invite each swimmer to choose a personal mascot—like a dolphin, eagle, shark, or sea turtle—and decorate the cap with that character wearing tiny red, white, and blue accessories.
- Motivational words: Add short phrases such as “Go USA,” “Finish Strong,” or “Swim Like a Champion” to keep spirits high during races.
Step-by-Step Decorating Tutorial
Once the designs are planned, it is time to turn those plain caps into Olympic-inspired gear. Work slowly, let the ink dry in layers, and remember that slightly uneven lines add charm and personality.
- Sketch the main layout. Use a pencil or a very light marker to draw basic outlines of large shapes and words. Focus on placing stars, stripes, or big letters first.
- Add bold elements. Trace over your outlines with darker colors such as navy, black, or deep red. This step defines the structure of the design.
- Fill with color. Color in stars, letters, and shapes using your planned color scheme. For younger kids, keeping to two or three main colors helps avoid a muddy look.
- Include movement details. Add splashes, water droplets, small arrows, or motion lines to give the impression of speed and energy in the pool.
- Layer carefully. Allow one area to dry for a few minutes before adding new details on top to minimize smudges and unwanted color blending.
- Outline for polish. Once the cap is mostly complete, go around key shapes with a fine black or navy marker to make everything pop from a distance.
- Dry completely. Leave the caps sitting with the paper still inside for at least an hour so the ink sets thoroughly before anyone wears them.
Color Schemes and Symbol Ideas
Limiting the color palette to a few carefully chosen hues keeps designs looking intentional instead of chaotic. The traditional American flag colors are an obvious choice, but you can introduce accent colors for added fun.
| Theme | Colors | Suggested Symbols |
|---|---|---|
| Classic Patriotic | Red, navy blue, white highlights | USA letters, stars, stripes, flag corners |
| Speed & Power | Dark blue, black, metallic silver (if available) | Lightning bolts, streaks, lane lines, stopwatch icons |
| Water Waves | Light blue, teal, dark blue, small accents of red | Waves, splashes, bubbles, fish silhouettes |
| Stars & Stripes Remix | Red, blue, gold, subtle white spaces | Oversized star, diagonal stripes, jersey-style numbers |
| Kid Character Caps | Primary colors with black outlines | Cartoon swimmers, animals, initials inside medals |
Tips for Crafting with Different Age Groups
This DIY project can be adapted for a wide range of ages, from toddlers who love scribbling to tweens who care about achieving sleek, modern looks. Adjust responsibilities so everyone feels successful and included.
- Toddlers and preschoolers: Pre-draw simple shapes (stars, stripes, big circles) and let them color inside with a few supervised markers.
- Elementary school kids: Invite them to sketch their own layout on paper first, then help them transfer the design to the cap.
- Teens: Encourage more sophisticated touches such as gradient shading, fine outlines, or stylized typography inspired by sports logos.
- Mixed ages: Assign older kids as “design coaches” to help younger swimmers with sketching and color choices.
Safety, Comfort, and Care Tips
Because the finished caps will go directly on swimmers’ heads, it is important to think about comfort and durability. A well-cared-for cap can last through an entire summer of play and multiple viewing parties.
- Choose markers labeled as permanent and water-resistant so the designs do not smear during the first swim.
- Allow plenty of drying time before wearing caps in the pool to reduce the chance of ink transferring to skin.
- Rinse caps gently in cool water after swimming and let them air-dry out of direct sunlight to preserve color.
- Avoid scrubbing the designs; instead, blot away chlorine and pool chemicals with a soft cloth.
- Store caps flat or loosely folded rather than tightly rolled to prevent creasing heavily decorated areas.
Turning Craft Time into an Olympic Event
Once everyone has created a custom swim cap, extend the fun by staging friendly “mini events” in the pool. The caps become both costumes and team identifiers, making even casual play feel like a medal race.
- Opening Ceremony Walk: Have swimmers line up, play upbeat music, and let each person show off their cap and “country” or personal mascot.
- Relay Races: Divide into Team USA versus “Challengers” or into smaller squads identified by different cap themes (stars team, waves team, mascot team).
- Style Awards: Offer lighthearted awards such as “Most Patriotic,” “Most Creative Waves,” or “Funniest Mascot.” Small ribbons or paper medals add to the excitement.
- Photo Finish Station: Set up an area near the pool with a simple backdrop for snapshots of the decorated caps. These pictures are great for sharing with friends and remembering the event later.
Eco-Friendly and Budget-Friendly Variations
There are many ways to adapt this project if you want to reduce waste or keep costs to a minimum. In fact, reusing items you already own can make the craft even more meaningful and personal.
- Refresh slightly worn caps with new designs instead of throwing them away.
- Limit the color choices to a shared set of markers for everyone to cut down on extra purchases.
- Use leftover paper from school projects or packaging for stuffing and table protection.
- Encourage kids to design caps they will want to wear all season instead of just once, emphasizing reusability over single-use party favors.
Frequently Asked Questions
Do I have to use white caps, or will any color work?
White or light-colored caps make the designs show up most clearly, especially if you rely on red and blue markers. Dark caps can still work, but you will need metallic or light-colored markers specifically designed for use on dark surfaces.
Are permanent markers safe for pool use?
Markers labeled as permanent and waterproof are generally fine for decorating the outer surface of swim caps, particularly when the designs are allowed to dry fully. If you are concerned, focus designs on the outside only and avoid heavy inking right on the edge that touches skin.
Will the designs last in chlorinated water?
Over time, chlorine and sun exposure will naturally fade inks, but careful rinsing and air-drying after each use can help the designs last for many sessions. Darker colors and denser outlines tend to stay visible longer than very light colors.
Can this project work for large groups or parties?
Yes, this craft scales well for teams, classrooms, or birthday parties. Prepare caps and markers in advance, set up separate stations for sketching and coloring, and encourage quick, simple designs so everyone gets a chance to decorate without long wait times.
What if a child does not like wearing swim caps?
Some kids dislike the feeling of caps on their heads, and that is completely normal. They can still join the activity by designing a cap for a friend, a stuffed animal, or as a decorative piece to display during Olympic watch parties.
Bringing Team USA Spirit to Your Backyard
Creating DIY Team USA swim caps turns an everyday pool into a lively scene filled with color, movement, and national pride. With a few markers and some imagination, families can craft wearable art that celebrates both the Olympic spirit and the simple joy of splashing around together.
Whether you use them for backyard races, neighborhood competitions, or just for fun, these homemade caps give kids a tangible way to feel like part of the world’s biggest sporting stage—no qualifying times required.