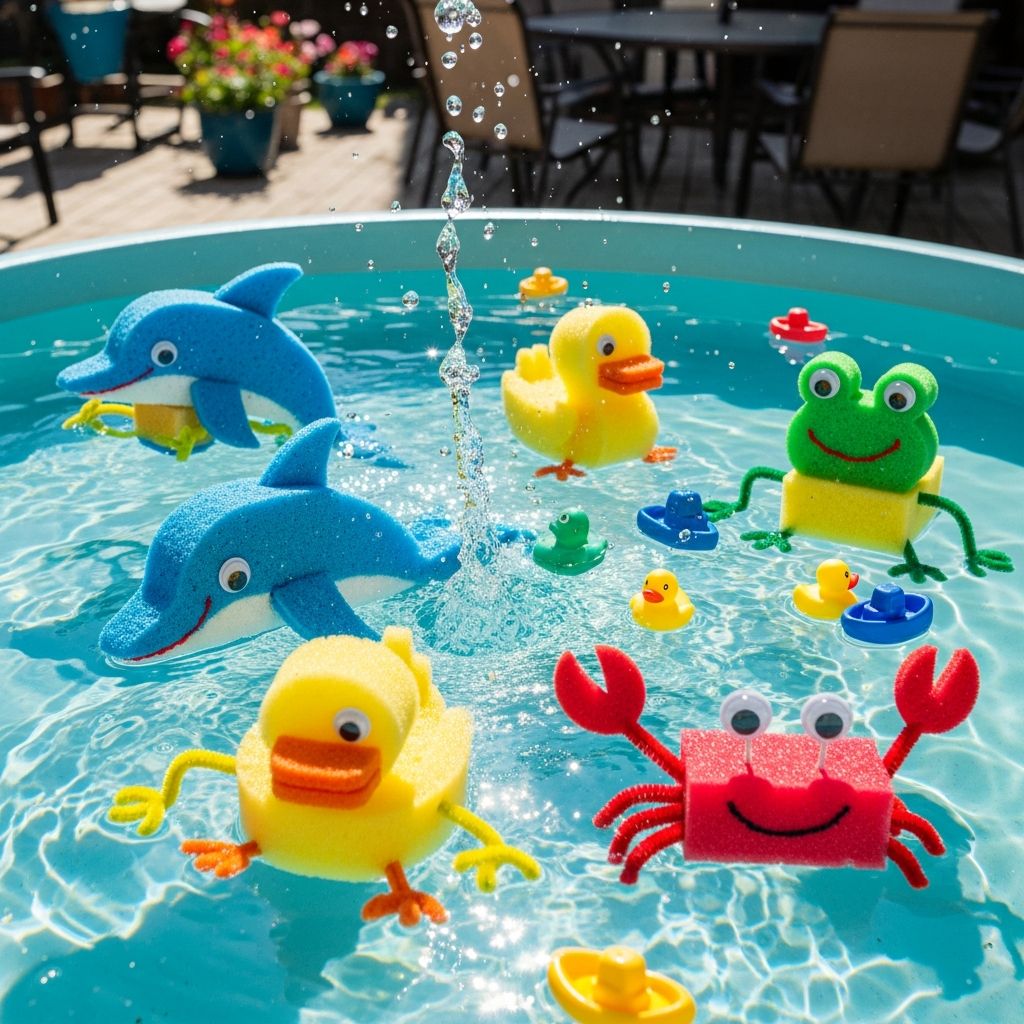
If you are looking for a reusable alternative to water balloons and a craft that doubles as a toy, sponge critter animals are a simple, colorful, and budget-friendly solution. Made from everyday kitchen sponges, these goofy little creatures soak up water, squeeze safely, and keep kids entertained in the backyard, at the pool, or even in the bathtub.
Why Sponge Animals Make Brilliant Water Toys
Unlike single-use water balloons, sponge animals can be used over and over again, making them both eco-friendlier and easier to clean up. Their soft, squishy texture is gentle enough for kids to toss at one another during water play, and the animal shapes add an imaginative twist that plain sponge balls cannot match.
Because sponges hold water well and dry out quickly, these critters work for both outdoor splash battles and calm bath time play. Parents will appreciate that the project is simple enough for kids to help with and customizable to practically any animal theme.
Essential Supplies and Helpful Add-Ons
Before starting, round up a few core materials and decide how elaborate you want your sponge animals to be. The list below gives a solid base plus optional supplies that allow older kids or crafty adults to add extra detail.
Core materials
- Plain, cellulose kitchen sponges in several bright colors.
- Strong scissors for cutting through thick sponge.
- Rubber bands, hair ties, or thin elastic cord for bundling sponge strips.
- Waterproof or quick-drying craft glue for attaching details.
Optional decorative details
- Embroidery floss or sturdy thread and a blunt needle for simple stitching.
- Small sponge scraps or felt pieces for ears, eyes, snouts, wings, and fins.
- Permanent markers to draw facial expressions and simple patterns.
- Googly eyes for older kids who will not put small parts in their mouths.
- Non-toxic fabric or acrylic paint used sparingly for stripes and spots.
For very young children, it is usually safer to keep details stitched or glued flat and avoid tiny detachable add-ons. Older kids can handle more intricate decorations and even design their own fantasy creatures.
Basic Sponge Puff: The Foundation Shape
The easiest way to start is by creating a simple sponge puff, which forms the body of almost every animal. Once you have a few puffs ready, you can add heads, tails, wings, or fins depending on the creature you want to make.
Step-by-step instructions
- Lay three rectangular sponges on your work surface and trim off any scrubber backing if present.
- Slice each sponge lengthwise into three equal strips, aiming for strips about 1–1.5 cm wide.
- Gather nine strips into a neat bundle, mixing colors for a fun mottled look.
- Wrap a rubber band or elastic tightly around the center of the bundle and pull it as snug as possible.
- Fluff and fan the strips outward to create a round, spiky puff that resembles a soft water starburst.
This basic puff can be used as a stand-alone water bomb or become the torso of an animal. You can adjust the number of strips and the thickness of each sponge to make larger or smaller critters.
| Body size | Sponge strips | Approximate sponges | Best for |
|---|---|---|---|
| Mini | 6 strips | 2 sponges | Small hands, bathtub play |
| Standard | 9 strips | 3 sponges | General outdoor water games |
| Jumbo | 12+ strips | 4+ sponges | Big splashes, older kids |
Designing Animal Heads from Sponges
With the puff body ready, the next step is to cut a head shape that suggests a particular animal. This is where the project becomes more creative, and kids can sketch their own shapes on paper first if they like.
To make a sponge head, trim a separate sponge into a silhouette—round for a bear, triangular for a cat, or long for an alligator. Keep leftover scraps because they are perfect for ears, noses, and other tiny accents.
Simple head-cutting ideas
- Cat or fox: Cut a rounded triangle and add two sharp triangles on top for ears.
- Dog or bear: Shape an oval and round the top corners; attach small half-circles as ears.
- Fish: Trim a diamond shape, then round off the top and bottom points.
- Monster or alien: Use any unusual outline with bumps, spikes, or antenna shapes.
Once you have a head shape, test its size by holding it against the puff. It should be large enough to be visible but not so big that it overwhelms the body.
Attaching Heads and Decorative Details
There are several ways to secure heads and features to the sponge body. The method you choose will depend on the age of the children involved and whether these toys will see intense water-fight action or gentle bath time play.
Attachment methods
- Elastic wrap: For a no-sew option, place the head at the top of the puff and wrap a new elastic around both pieces, cinching them together.
- Stitching: Use embroidery floss and a blunt needle to sew through the sponge head and a few strips of the body, tying a firm knot at the back.
- Water-resistant glue: Apply a thin layer of glue where the head meets the body, clamp gently, and let it dry completely before play.
Adding personality
- Cut tiny circles or ovals from sponge scraps or felt for eyes and noses.
- Glue or sew ears, fins, or wings along the sides of the puff to emphasize the animal type.
- Use permanent markers to draw smiles, whiskers, freckles, or scales.
- Add stripes or spots with thin lines of fabric paint, letting each piece dry fully.
Keep facial features simple for durability. Overly detailed faces may wear off more quickly when the toys are used heavily in water games.
Easy Character Ideas for All Ages
If you feel unsure about where to start, pick a theme that matches your child’s interests. Below are a few starting points that balance simplicity with visual impact, making them ideal for family craft sessions or party activities.
Beginner-friendly creatures
- Bubble lions: Golden and orange sponges for the puff, with a small round head and tiny triangular ears.
- Rainbow fish: Multicolored puff body, a diamond-shaped head, and a single side fin.
- Bath-time bears: Neutral-colored puff, simple oval head, round ears, and a drawn-on nose.
Intermediate and imaginative designs
- Dragons: Long, narrow head with triangle spikes cut from sponge scraps and attached along the back.
- Owls: Wide head with two big round eyes and a small triangular beak; short wings attached to each side of the puff.
- Sea monsters: Bright neon sponges, wavy fins, and multiple eyes for a silly, non-scary creature.
Encourage kids to name their creations and invent backstories. This extra imaginative layer keeps the toys interesting long after the crafting portion of the activity is finished.
Water Games to Play with Sponge Animals
Once a small zoo of sponge critters is ready, it is time to take them out for a test splash. These games are easy to set up and can be adjusted for different age groups or group sizes.
Backyard and driveway games
- Critter toss relay: Place a bucket of water at one end of the yard and a dry bucket at the other. Kids soak their animals, toss them to a teammate, and race to fill the dry bucket.
- Target practice: Draw chalk circles on a driveway or set up plastic bowls. Kids try to land sponge animals inside the highest scoring target.
- Capture the critter: Hide wet sponge animals around the yard. Players search and race to collect the most.
Pool and bath-time ideas
- Floating parade: Line up the critters along the side of the pool or tub and nudge them into the water one by one to see how they float or bob.
- Color match splash: Call out a color and have kids grab and squeeze only the animals that contain that color.
- Story-time soakers: While kids play, tell a short story that includes each animal, prompting children to act out what their sponge character is doing.
As with any water activity, close supervision is important, especially for young children or whenever play takes place near deeper water.
Keeping Sponge Critters Clean and Long-Lasting
Because these toys spend much of their life wet, a basic cleaning routine helps them stay fresh. Fortunately, cellulose sponges are easy to rinse and dry when handled correctly.
Care tips after water play
- Rinse each animal under clean running water to remove dirt and soap residue.
- Squeeze out as much water as possible without twisting or pulling off features.
- Place the critters in a single layer on a drying rack or towel in a well-ventilated area.
- Avoid storing them in sealed containers while damp to prevent mildew.
If a sponge animal shows signs of wear, missing pieces, or lingering odor, it may be time to retire it and create a new character. Fortunately, the low cost of sponges makes replacement easy and budget friendly.
Safety Considerations for Families
Although sponge animals are softer than many outdoor toys, basic safety rules should still guide how they are created and used. A few simple precautions ensure that the craft remains fun and low risk for all ages.
Crafting safety
- Have an adult handle cutting thick sponges and trimming delicate shapes.
- Use blunt needles and supervise stitching with younger children.
- Choose non-toxic adhesives and paints that are safe for children’s crafts.
Playtime safety
- Remove or avoid small add-ons like tiny googly eyes for toddlers who still explore with their mouths.
- Set clear rules about gentle throwing and no aiming at faces during splash battles.
- Always supervise children around pools, large buckets of water, or slippery surfaces.
Adjust the design of the animals and the type of games to the age and developmental stage of the children involved to keep everyone comfortable and engaged.
Frequently Asked Questions About Sponge Water Animals
How long do sponge animals usually last?
With regular rinsing and thorough drying, sponge critters can last through an entire summer of backyard play. Over time, repeated squeezing and exposure to the elements will cause some fraying, but that is a sign it is time for a fresh batch and a new crafting session.
Can these be used as regular bath toys?
Yes, sponge animals make excellent bath companions because they are soft, light, and easy for small hands to hold. Make sure each toy dries fully between baths to keep them clean and fresh.
Is sewing necessary, or can everything be glued?
Sewing is not required, although basic stitching can make certain parts more durable. For quick projects or younger children, strong craft glue or hot glue applied by an adult works perfectly well for attaching heads and details.
What if I do not have colored sponges?
Plain white or neutral sponges work just as well and can even be painted lightly to add color themes. Kids can also rely on drawn details rather than colored sponge for stripes, spots, or faces.
Are these suitable for large group activities?
Yes, sponge animals are great for camps, classrooms, and parties because the materials are affordable and the steps easy to repeat. Preparing pre-cut strips and head shapes in advance makes it simple for a group of children to jump straight into decorating and playing.
With a few sponges and some imagination, your family can turn any hot afternoon into a creative splash party. These DIY sponge animals offer a playful blend of crafting, storytelling, and water play that kids remember long after the towels have dried.