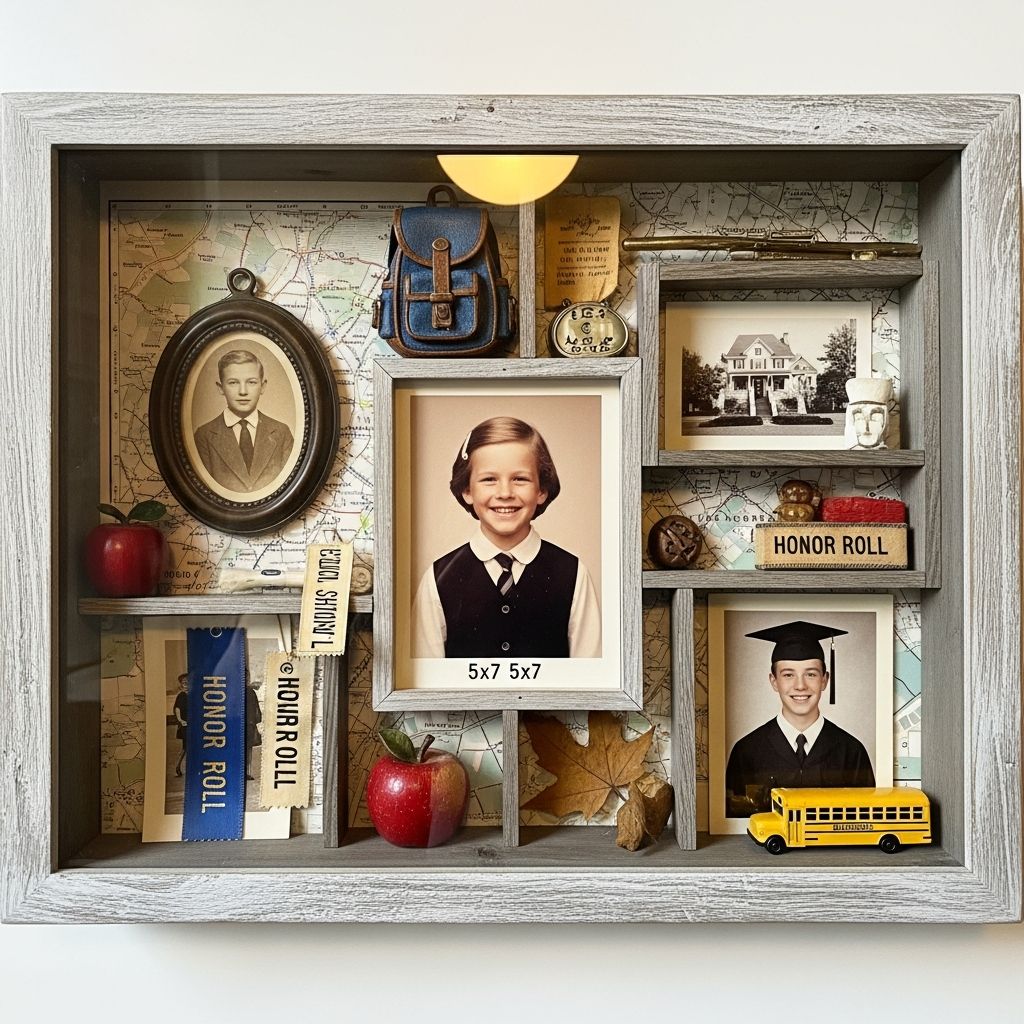
School portraits capture awkward grins, missing teeth, and ever-changing hairstyles that mark the passage of childhood in the most honest way. Instead of hiding those photos in envelopes and drawers, turn them into a centerpiece that celebrates every milestone.
This guide walks you through designing and assembling a DIY shadowbox dedicated to school portraits. You will learn how to choose materials, plan a layout, and style your display so it feels intentional, personal, and timeless.
Why Turn School Photos into a Shadowbox?
A shadowbox is deeper than a regular frame, allowing you to layer photos, labels, and small mementos in a way that feels like a tiny gallery on your wall. For school portraits, that depth gives you room to show growth over time instead of just one isolated snapshot.
- Visual timeline: See each grade lined up so changes in height, smile, and style become part of the story.
- Decluttered storage: Move photos out of envelopes and into a single, organized display.
- Conversation starter: Hang the shadowbox where family and guests can enjoy revisiting years of memories.
Planning Your Keepsake Before You Start
Before buying materials, think about how many years you want to display and where the frame will live. A little planning will keep your finished piece from feeling cramped or unfinished.
- Decide whether you want to include preschool and kindergarten or start at first grade.
- Choose a wall or shelf location with stable light (avoid harsh direct sun to prevent fading).
- Measure the space so you can select a frame size that looks balanced, not too tiny or overwhelming.
Questions to Ask Yourself
- How many portraits do you already have, and how many years are left to go?
- Do you prefer a strict grid layout or a looser, more playful arrangement?
- Will this frame be dedicated to one child, or will it combine siblings?
Supplies and Tools You Will Need
Most of what you need can be found at craft stores, online, or even repurposed from items you already own. Choose colors and textures that match your home decor and your child’s personality.
| Item | Purpose | Tips |
|---|---|---|
| Shadowbox frame | Holds all photos and elements | Consider a size that can grow with future school years. |
| Background material | Visual base behind photos | Use fabric, scrapbook paper, or a painted board. |
| Adhesive or hanging line | Secures photos and labels | Photo-safe tape, glue dots, or twine with clips all work well. |
| Mini labels or tags | Shows grade, year, or age | Handwrite, stamp, or print for a polished look. |
| Small embellishments | Add personality and depth | Use sparingly: charms, ticket stubs, badges, or tiny art. |
Optional Extras
- Metallic or colored pens to write directly on the background.
- Thin foam squares to lift certain photos forward for dimension.
- Transparent sleeves if you want to keep more than one photo behind a single visible print.
Designing the Layout: Timeline, Grid, or Collage?
Your layout determines how easily someone can read the story in your shadowbox. A clear structure keeps the display from feeling chaotic, especially as you add new photos over the years.
Popular Layout Styles
- Linear timeline: Arrange photos in a single row or column from earliest to latest. This is simple and intuitive.
- Grid by grade: Create rows for school levels (elementary, middle, high school) with each square representing a grade.
- Clustered collage: Group photos by era, with early years together and older years together, using labels to keep the order clear.
Planning with Placeholders
If your child is still in school and you do not yet have all the portraits, leave room for future photos. This prevents crowding later and makes the frame feel purposeful from day one.
- Cut pieces of scrap paper to the same size as future photos and place them in the layout.
- Write the grade on each placeholder so you know exactly where the new print will go.
- Consider leaving an intentional blank area with a note like “Future Adventures” until the next photo arrives.
Step-by-Step Instructions to Build Your Shadowbox
Once your design choices are set, assembling the shadowbox becomes a straightforward craft project. Take your time with each step to keep photos safe and aligned.
Step 1: Prepare the Frame and Background
- Open the shadowbox and carefully remove the backing and any stock photo inside.
- Measure the interior dimensions and cut your chosen background material to fit snugly.
- Attach the background to the backing board using double-sided tape or a thin layer of adhesive to avoid wrinkles.
Step 2: Arrange Photos Without Adhesive
- Place all portraits on the background according to your chosen layout, but do not tape anything yet.
- Adjust spacing so that the margins around and between photos look even.
- Lay down paper placeholders where future grades will appear, aligning them with existing photos.
Step 3: Add Lines, Clips, or Mounts
There are two primary ways to hold photos: directly on the background or suspended on lines inside the frame. Choose the method that matches your style and skill level.
- Direct mount: Use photo-safe adhesive on the back corners or small foam squares for a slightly raised effect.
- Hanging line: Stretch twine or thin cord across the background and secure it to the back of the board, then clip photos on with mini clothespins.
Step 4: Secure Labels and Details
- Create small labels that show each grade, school year, or age.
- Position labels just below or above each portrait, or attach them directly to clips.
- Add one or two small embellishments, such as a tiny charm of a pencil or a cut-out of a graduation cap, taking care not to overpower the photos.
Step 5: Assemble and Check the Final Look
- Place the completed backing with photos and decorations into the shadowbox frame.
- Close the frame securely, making sure no photos shifted while you worked.
- Hold the frame upright and gently tap or tilt to confirm everything stays in place.
Personalizing the Shadowbox for Your Child
The most memorable displays feel like they were made specifically for the child they honor. Treat your shadowbox as a blend of artwork and biography.
- Incorporate a favorite color as the background or in subtle border accents.
- Include a small printed quote that reflects your child’s outlook, such as a short line about curiosity, learning, or courage.
- Use handwriting for labels if you want a warm, homemade look, or printed fonts for a sleek, modern style.
Ideas for Tiny Memorabilia
- A miniature version of a team logo from a sport your child loves.
- A tiny folded piece of sheet music for a music student.
- A small charm that represents a favorite subject, like a planet for a science enthusiast.
Where and How to Display Your School Photo Shadowbox
Once complete, your shadowbox deserves a place where it will be seen and appreciated regularly. The right location can turn it into a ritual, encouraging your family to pause and reflect.
- Hang it in a hallway near bedrooms so your child passes it each morning and night.
- Place it in a family room or near a reading nook for cozy storytelling moments.
- Consider lower placement for younger children, so they can see their own journey at eye level.
Lighting and Preservation Tips
- Avoid strong direct sunlight, which can fade prints over time.
- If possible, use prints made on archival or high-quality photo paper.
- Dust the exterior glass regularly with a soft cloth; open the frame only when adding new photos.
Long-Term Maintenance and Updating the Frame
A school photo shadowbox grows right along with your child. Maintaining it becomes a small yearly ritual that can be just as meaningful as creating it the first time.
- Set a reminder at the beginning of each school year to update the frame once new portraits arrive.
- Store extra prints or class photos in a labeled envelope taped to the back of the shadowbox.
- Occasionally check that adhesive remains strong and replace any tape that has dried out.
Alternative Themes Using the Same Method
Once you master the basic process, you can reuse the same concept for other milestones. The shadowbox technique works for any story that unfolds over time.
| Theme | What to Include | Special Touch |
|---|---|---|
| Baby to toddler years | Monthly or yearly photos, hospital bracelet copy, first birthday candle (unlit) | Use soft pastel backgrounds and rounded photo corners. |
| Sports seasons | Team photos, action shots, mini medals, ticket stubs | Add jersey numbers as bold labels for each year. |
| Art or music progression | Photos with instruments, recital programs, tiny copies of artwork | Include a narrow strip of sheet music or doodles along the edges. |
| Family travel timeline | Trip photos, small maps, museum tickets, transport passes | Use pins or mini flags to note destinations. |
Common Mistakes to Avoid
A few simple decisions can make the difference between a polished keepsake and a cluttered frame. Watch out for these pitfalls as you design and build.
- Overcrowding: Cramming too many items into the frame can make it hard to focus on the portraits themselves.
- Inconsistent photo sizes: Mixing drastically different sizes without a plan can disrupt the visual flow; if needed, trim or reprint at a uniform size.
- Weak adhesives: Using low-tack tape can cause photos to drift or fall over time.
Frequently Asked Questions
How many photos can fit in one shadowbox?
The answer depends on your frame size and photo dimensions. As a general guideline, a medium shadowbox can comfortably hold 8 to 12 small portraits if you leave reasonable space for labels and breathing room.
What if some years are missing?
Missing years are common and do not have to break the timeline. Use a labeled placeholder card, a favorite candid snapshot from that year, or a brief written note explaining the gap, which can become part of the story.
Can I use digital prints instead of the original photo package?
Yes, many families prefer to scan or download the digital file and print a consistent size for the shadowbox. This protects the originals and lets you resize images so they line up neatly.
How can I make the display feel cohesive if the backdrops change every year?
Use consistent borders, matting, or label styles to unify the look. For example, you might mount each photo on a small white card or use the same color ink and label shape for all grades.
Is this project suitable as a gift?
Yes, a finished school portrait shadowbox makes a thoughtful present for grandparents or for a graduating student. Consider creating one frame to stay in your home and another that your child can take along when they move into a new place.
Turning Everyday Portraits into a Story
A shadowbox school photo display is more than a craft; it is a way to honor the slow, steady changes that often go unnoticed in daily life. By capturing each year in a shared space, you are creating a visual story that will spark memories, laughter, and reflection every time someone walks by.
With a thoughtful layout, a few simple supplies, and a bit of creativity, those stacks of portraits can become a cherished timeline that grows with your child for years to come.