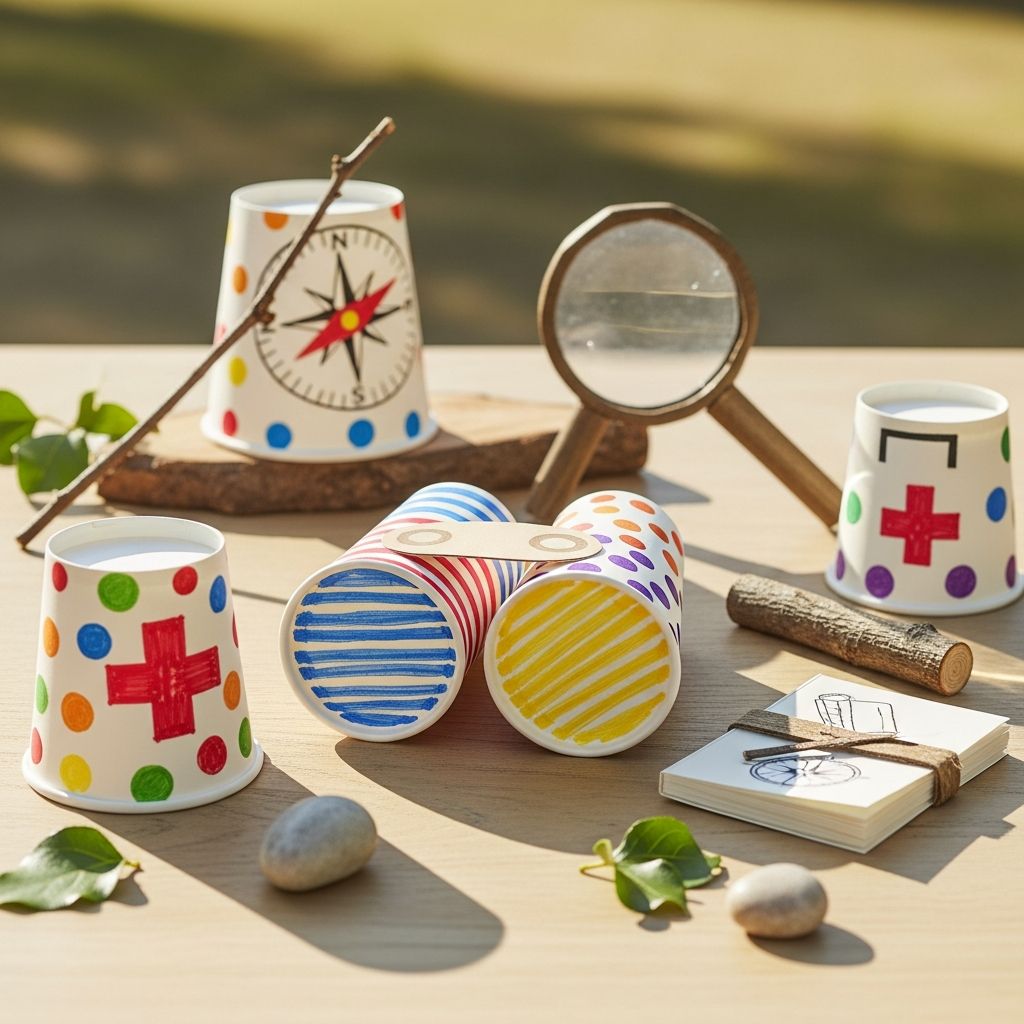
A stack of plain paper coffee cups can become a doorway to adventure when you turn them into a compact explorer kit for kids. This simple project encourages curiosity about nature, strengthens observation skills, and gives children a hands-on way to organize their discoveries.
Why a Paper Cup Explorer Kit Is Brilliant
Unlike bulky plastic boxes, paper coffee cups are lightweight, inexpensive, and easy to customize with markers, tape, or stickers. A tower or cluster of labeled cups can hold everything a young explorer needs: tools, treasures, and field notes.
The project also teaches kids about reuse and sustainability, since many of the materials can come from your recycling bin or leftover craft supplies. Parents and caregivers can adapt the kit for different ages, locations, and interests, from backyard bug hunting to park-based scavenger hunts.
Materials and Tools You Will Need
Gather your materials first so you can set up a simple creation station at the kitchen table or outside on a picnic blanket. Use this list as a starting point and substitute where it makes sense for your family.
- 6–10 sturdy paper coffee cups with lids (8–12 oz size works well)
- Washi tape, duct tape, or masking tape for reinforcement and decoration
- Permanent markers or paint pens in a few bright colors
- String, ribbon, or twine to attach cups together
- Hole punch or sharp pencil (adults should handle sharp tools)
- Small notebook or a folded stack of blank paper
- Short pencils or crayons
- Child-friendly magnifying glass or viewer (optional but fun)
- Lightweight cardboard scraps for dividers or labels
- Stickers, stamps, or colored paper for extra decoration
You can expand the core kit with extra accessories later, such as a small compass, simple field guide, or a laminated mini map of your neighborhood. Start with the basics so the project feels approachable for younger children.
Planning the Layout of Your Explorer Kit
Before kids start decorating every surface, decide how each paper cup will function. Giving each cup a role helps children understand organization and makes it easier to pack up after adventures.
| Cup Name | Purpose | Suggested Contents |
|---|---|---|
| Tool Cup | Holds basic exploration tools. | Magnifying glass, pencil, small flashlight. |
| Treasure Cup | Collects small natural finds. | Rocks, leaves, feathers, seeds. |
| Note Cup | Stores writing supplies. | Mini notebook, pencils, crayons. |
| Sound Cup | Encourages listening activities. | Folded paper with sound prompts. |
| Map Cup | Keeps reference guides handy. | Simple hand-drawn map, small guide pages. |
Step-by-Step: Building the Cup Cluster
The explorer kit can be arranged as a vertical tower, a horizontal cluster, or a circular “belt” of cups. Choose the structure that best fits your child’s age and how they’ll carry it.
1. Reinforce the Cups
Kids handle their gear enthusiastically, so start by strengthening the cups. Wrap tape around the rims and bases of each cup, pressing firmly so the tape bonds with the paper. This step keeps cups from collapsing when filled with rocks or other small treasures.
You can also place a ring of tape around the top outer edge where the lid clicks on. Reinforced lids stay attached during bumpy walks and jostling in backpacks.
2. Punch Holes for Connecting
Decide where the cups will connect. For a tower, you might punch two small holes near the rim of one cup and two holes near the base of the cup that will stack above it. For a belt or cluster, place holes on the sides, opposite one another.
Adults should handle the hole punching, especially if using a sharp pencil or craft awl instead of a standard office hole punch. Keep holes small so the cups remain sturdy but large enough for string or twine to pass through without tearing.
3. Thread and Tie the Structure
Cut lengths of string or twine and pass them through the holes between cups. Tie tight knots on the inside to keep the exterior looking neat. Aim for gentle tension that holds cups together without bending them out of shape.
Once the structure is assembled, gently shake the connected cups. Adjust the knots if anything feels loose, then trim extra string so it doesn’t get tangled during adventures.
4. Add a Handle or Strap
To make the explorer kit easy to carry, create a looped handle. Punch two opposite holes in the top cup or outer cup and tie on a length of twine or ribbon, forming a handle large enough for a child’s hand. For older children, consider a longer strap so the kit can be worn crossbody.
Wrap tape around the sections where the handle meets the cup to spread out the pressure. This reinforcement helps prevent the holes from tearing when the kit is carried for long walks.
Decorating the Explorer Kit
The decorating phase is where the project becomes truly personal. Invite kids to design symbols or patterns that match the purpose of each cup so they can quickly recognize what goes where.
- Draw leafy vines and tiny bugs on the treasure cup.
- Add stars, arrows, or compass roses on the map cup.
- Use bright colors and bold labels for the tool cup so it is easy to find quickly.
- Apply stickers or tape patterns to create color-coding for non-readers.
Encourage children to write their name and perhaps a playful title like “Junior Ranger” or “Backyard Scientist” on one of the lids. This gives them a sense of ownership and responsibility over their new gear.
Filling Each Cup with Kid-Friendly Tools
The contents of the explorer kit should stay lightweight and safe while still feeling exciting. Focus on low-tech, durable items that work well outdoors and can handle dirt and moisture.
Ideas for the Tool Cup
- Small plastic magnifying glass with rounded edges.
- Short, blunt pencil or mechanical pencil with eraser.
- Mini LED flashlight or keychain light.
- Simple whistle for signaling, used with adult guidance.
Ideas for the Treasure Cup
- Empty paper coin envelopes or folded paper packets for fragile items.
- Small piece of cotton cloth to cushion delicate finds.
- Tiny paper labels or stickers for naming each discovery.
Ideas for the Note Cup
- A homemade field notebook (folded printer paper stapled or taped along one edge).
- Crayons or colored pencils for sketching leaves, clouds, and rocks.
- Pre-printed prompt cards, such as “Draw the tallest plant you see” or “List three animal sounds.”
Other Cups to Consider
- Weather Cup: Cards that prompt kids to notice temperature, wind, and sky color.
- Challenge Cup: Outdoor missions such as “Find something rough” or “Spot three different shades of green.”
- Memory Cup: Photos, ticket stubs, or pressed flowers from special trips (with respect for local regulations).
Teaching Safety and Respect for Nature
An explorer kit is more than a toy; it is a tool for learning respectful outdoor behavior. Before heading outside, talk with children about gentle observation and leaving living things unharmed whenever possible.
Explain that some items should only be looked at, not collected, such as nests, eggs, or protected plants. Encourage kids to ask before picking anything, and model simple guidelines like packing out any trash and closing gates or park features behind them.
Simple Activities to Try with the Explorer Kit
Once the kit is packed and ready, it is time to take it into the real world. Short, focused activities help kids experience success and encourage them to use their kit again on future outings.
Backyard Observation Walk
- Walk slowly around the yard or nearby park, stopping at anything that catches your child’s eye.
- Use the magnifying glass to inspect bark, soil, and leaves.
- Collect one or two small, abundant items (like fallen leaves) and record notes or sketches back at home.
Color Hunt Game
- Choose a color for each cup and mark it with tape or a colored dot.
- Challenge kids to find natural objects that match each color and place them inside the right cup.
- Talk together about how many shades of each color exist in nature.
Sound Map Exploration
- Sit quietly in one spot and listen for a few minutes.
- Ask children to draw simple icons in their notebook that represent sounds: a bird, a car, footsteps, or leaves rustling.
- Mark on a simple map where each sound seemed to come from, turning listening into a playful mapping exercise.
Adapting the Project for Different Ages
The same basic paper cup kit can support toddlers, early elementary kids, and older children with a few adjustments. Tailor the details so the experience feels challenging but not frustrating.
- Toddlers: Use fewer cups, large visual labels, and sturdy items such as chunky crayons and fabric scraps.
- Early elementary: Add more specific tools, simple written prompts, and chances to sketch or sort objects.
- Older kids: Include more detailed maps, longer observation challenges, and opportunities to research findings after trips.
Storage, Maintenance, and Reuse
After each adventure, empty the treasure cup and spread finds out to dry on newspaper or a tray. Remove anything damp before storing the kit so the paper cups do not weaken or develop odors.
Over time, cups may become dented or stained, which is a great opportunity to rebuild and redesign the kit. Treat the explorer kit as a living project that can evolve as children gain new skills and interests.
Frequently Asked Questions (FAQ)
How durable is a paper cup explorer kit?
With reinforced rims, bases, and handle points, a paper cup kit can withstand regular backyard use and short outings. It is not as rugged as a metal lunchbox, but its lightweight design makes it ideal for younger children and casual explorations.
Can this project be done in a classroom or group setting?
Yes. The materials are inexpensive and easy to divide into stations, making the project suitable for scouting groups, camps, or classrooms. Provide adults or older helpers for the hole-punching and knot-tying steps, and let kids focus on decorating and filling their cups.
What if we do not have coffee cup lids?
You can still build the kit without lids by storing it upright or using elastic bands around the cup openings when you travel. Another option is to cut circles from lightweight cardboard and tape them on as removable covers.
How can we make the kit more eco-friendly?
Choose uncoated paper cups when possible, repurpose string or ribbon from other packages, and fill the kit with tools that can be reused for many trips. Emphasize collecting only fallen or abundant items and leaving delicate habitats undisturbed.
What learning skills does this activity support?
Building and using an explorer kit fosters fine motor skills, observation, classification, and early scientific thinking. Children practice asking questions, recording data, and drawing conclusions from what they see, feel, and hear outdoors.
Encouraging a Habit of Everyday Exploration
A paper coffee cup explorer kit is easy to store by the door or in the car so it is always ready for a spontaneous walk. Over time, children will begin to grab their kit on their own, signaling that they see themselves as capable, curious explorers.
By turning simple materials into a dedicated tool for discovery, families create a gentle invitation to step outside, slow down, and learn from the world just beyond the front door.