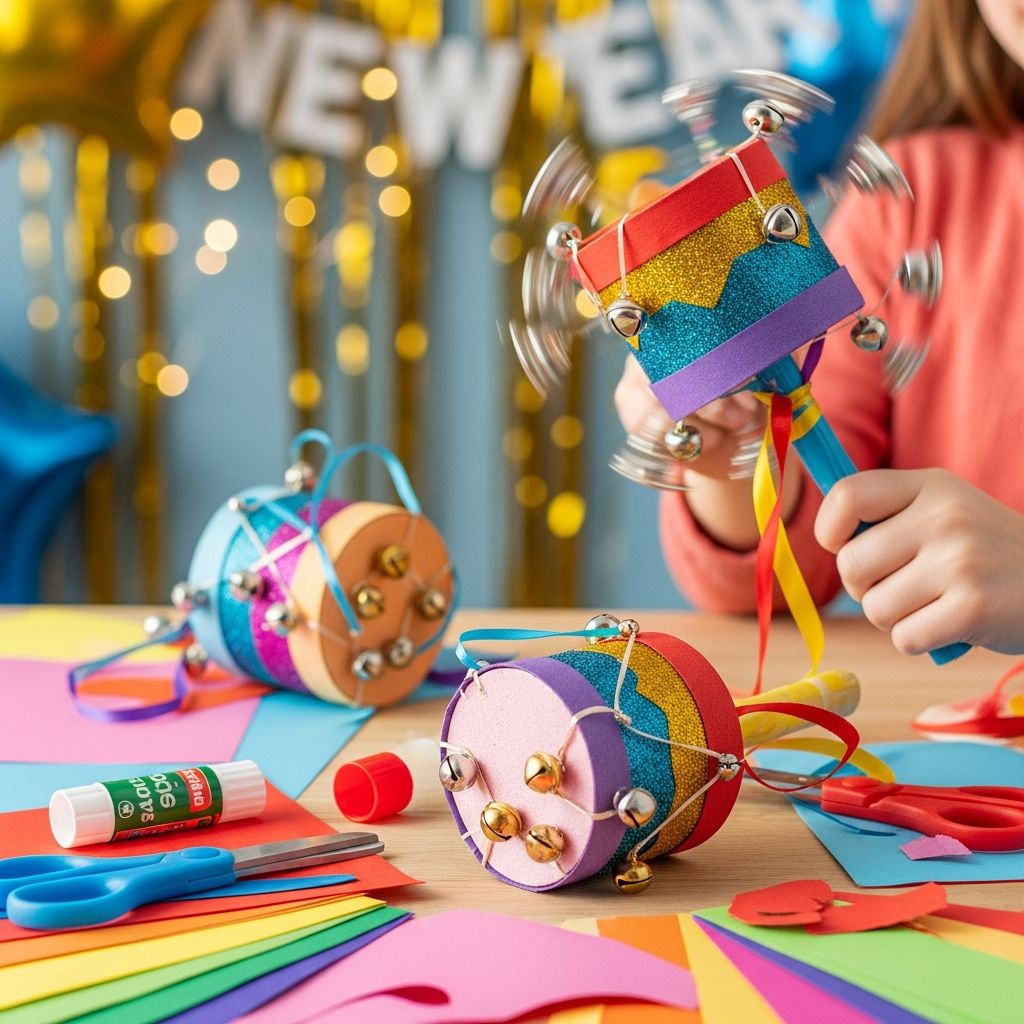
New Year’s Eve is all about fresh starts, sparkling excitement, and of course, making a little noise at midnight. Instead of buying disposable noisemakers, you can invite kids to create their own DIY rattle drums using basic household supplies. This simple craft keeps little hands busy before the countdown and gives them a handmade instrument to shake when the clock strikes twelve.
This guide walks you through how to design, assemble, and decorate New Year’s Eve rattle drums that are colorful, durable, and sized perfectly for small hands. You will also find variations for different ages, ideas for extending the activity into a mini music lesson, and answers to common questions from parents and caregivers.
Why Make Rattle Drums for New Year’s Eve?
Rattle drums (sometimes called spin drums or hand drums) are small percussion instruments with beads or seeds that strike the drum heads when you twist or shake them. They are ideal for family celebrations because they are easy to make, fun to use, and can be customized with colors and patterns that match your New Year’s theme.
- Creative expression: Children can explore color, pattern, and design while decorating their drums.
- Fine motor practice: Cutting, gluing, threading, and painting help build hand-eye coordination and dexterity.
- Music and rhythm: Playing their own instruments introduces kids to tempo, beat, and sound exploration.
- Low-waste option: Reusing cardboard and other recyclables reduces party waste compared to store-bought plastic noisemakers.
Because this project is highly adaptable, you can set it up for one child or a whole group of party guests with only minor adjustments.
Supplies You Will Need
You may already have most of the needed materials at home. Feel free to substitute similar items based on what you have in your craft bin.
Core materials
- Cardboard circles (cut from cereal boxes or shipping boxes)
- Wooden sticks (dowel, chopstick, or sturdy paper straw)
- Strong glue (craft glue or hot glue operated by an adult)
- String, thin yarn, or strong thread
- Small beads, dry beans, or buttons for the rattles
Decorating supplies
- Tempera paint, acrylic paint, or paint sticks
- Markers or crayons
- Stickers, sequins, washi tape, or metallic markers
- Glitter glue (optional, for less mess than loose glitter)
Helpful tools
- Scissors (child-safe scissors for kids, sharper scissors for adults)
- Hole punch or skewer (adult use) to make side holes
- Ruler or small bowl to trace perfect circles
- Paint palette or paper plate for paint
| Item | Budget-Friendly Substitute |
|---|---|
| Wooden dowel | Chopstick, pencil, or sturdy stick from the yard (cleaned) |
| Beads | Dried beans, pasta shapes, or large seeds |
| Cardboard circles | Paper plates or thick cardstock glued together |
| Glitter glue | Metallic markers or aluminum foil shapes |
Step-by-Step: How to Build a New Year’s Rattle Drum
Below is a straightforward process you can adapt to suit the ages and attention spans of your crafters.
1. Prepare the drum circles
- Trace two identical circles for each drum using a cup, jar lid, or small bowl.
- Cut out the circles from cardboard; older kids can cut their own, younger kids may need help.
- For a sturdier drum, glue two layers of cardboard together for each circle and allow to dry.
At this stage, you can lightly draw a guiding line across the middle of each circle where the handle will sit so kids understand how the pieces will line up.
2. Attach the handle
- Place one cardboard circle face down.
- Glue the wooden stick vertically along the center line so that most of the stick extends below the circle as a handle.
- Allow the glue to set until the stick is firmly attached.
You can reinforce the joint by adding an extra small strip of cardboard over the stick where it meets the circle, like a brace.
3. Create side holes for the rattling strings
- Find the left and right edges of the circle at the widest points.
- With a hole punch or skewer (used only by an adult), create a hole on each side of the circle.
- Make sure the holes are aligned with each other so that the strings will swing evenly.
The holes should be close enough to the edge that the beads can hit the drum faces as the drum twists, but not so close that the cardboard tears.
4. Add the rattling beads
- Cut two equal lengths of string, each long enough to hang from the side of the drum and reach the drum faces when swung.
- Thread a bead or bean onto each string and tie several tight knots so it cannot slip off.
- From the inside of the drum circle, thread the other end of each string through the side holes and knot securely.
Test by gently spinning the stick between your fingers. The beads should strike both sides of where the second circle will be attached.
5. Close the drum
- Spread glue over the back of the second cardboard circle.
- Press it firmly onto the first circle, sandwiching the handle and the knots of the strings inside.
- Line up the edges carefully so the two circles match.
- Place a heavy book on top (avoiding the handle) until the glue dries for a smoother finish.
Once dry, you have the basic rattle drum structure ready for decorating.
6. Decorate your drum for New Year’s Eve
Now the fun begins. Encourage kids to decorate both sides of the drum and the handle to make their instruments truly their own.
- Paint the drum in bold New Year colors like gold, silver, black, and bright neon shades.
- Add shapes and symbols such as stars, fireworks, clocks, or the digits of the new year.
- Use stickers or washi tape for quick pops of color without drying time.
- Write short messages like “Cheers” or “Happy New Year” along the rim.
- Wrap the handle with ribbon or yarn for a soft and comfortable grip.
Let all paint and glue dry fully before kids use the drums, especially if younger siblings might put them in their mouths.
Age-Based Adaptations and Safety Tips
With a few small changes, this craft can work smoothly for toddlers, preschoolers, and school-age children.
For toddlers (with close supervision)
- Prepare the drum bases in advance so young children only need to paint and add stickers.
- Skip small beads; instead, use larger wooden beads that are less likely to pose a choking risk, and keep all small parts out of reach when not actively supervised.
- Use chunky crayons, finger paint, or paint sticks that are easier for small hands to grip.
For preschoolers
- Let them help trace and cut circles on thinner cardboard or cardstock.
- Invite them to count how many beads they add and compare string lengths to introduce simple math ideas.
- Demonstrate safe scissor and glue use, then allow them to work more independently.
For school-age kids
- Challenge them to design matching front and back patterns or symmetrical designs.
- Introduce basic rhythm patterns they can play on their drums, such as short and long sequences.
- Encourage them to create a “drum band” with siblings or friends and perform a mini New Year’s parade.
General safety reminders
- Always supervise young children around small beads, beans, or buttons to avoid choking hazards.
- If using hot glue or sharp tools, limit that part of the project to adults or older teens.
- Use washable, non-toxic art materials designed for children.
Turn Craft Time into a Mini Music Session
Once the drums are finished, you can build on kids’ excitement by exploring sound and rhythm together. Early exposure to rhythm and music activities supports language development, listening skills, and self-regulation.
- Experiment with tempo: Have kids play their drums slowly, then quickly, noticing how the sound changes.
- Copycat rhythms: Tap out a short pattern (for example, tap-tap-pause-tap) and ask them to imitate it.
- Volume control game: Call out “whisper,” “talking,” or “shouting” and let kids match their drumming volume to each word.
- Parade practice: March around the room in a circle, drumming in time with your footsteps.
- Countdown rehearsal: Practice a 10-second countdown while everyone shakes their drums, ready for midnight.
New Year’s Eve Activity Ideas Featuring Rattle Drums
Your handmade rattle drums can be the centerpiece of several simple, low-cost New Year’s Eve traditions.
- Drum-led countdown: Instead of shouting alone, have everyone drum on each number from 10 to 1, then shake wildly when the new year arrives.
- Noise parade indoors: Walk from room to room wishing “Happy New Year” to family members or stuffed animals, drumming as you go.
- Memory rhythm: Ask each child to play a short rhythm that represents their favorite moment from the past year, then explain it.
- Gratitude beats: Take turns sharing one thing you are thankful for with each tap of the drum.
- Photo booth prop: Use the colorful drums as props in a DIY New Year’s Eve photo corner.
Simple Variations on the Basic Rattle Drum
If you enjoy the basic version, you can change the shape, sound, or look of the drum for future celebrations.
- Paper plate drums: Glue two small paper plates together with the stick sandwiched inside to save cutting time.
- Jingle bell version: Replace beads with jingle bells for a more bell-like ring instead of a soft rattle.
- Themed decorations: Adapt the design for birthdays, cultural New Year celebrations, or school events by changing colors and symbols.
- Painted patterns: Introduce simple repeating patterns (stripe-dot-stripe-dot) to practice early math skills through art.
- Glow-in-the-dark: Use glow-in-the-dark paint or attach reflective tape for a dramatic effect when the lights are low.
Cleanup and Storage Tips
A bit of planning can keep your craft table manageable and preserve the drums for future use.
- Cover the work area with old newspaper or a reusable tablecloth before painting.
- Set up a drying station where finished drums can rest flat and undisturbed.
- Label each child’s drum with their name on the handle.
- Store the drums upright in a tall box or container to avoid crushing the drum faces.
- Inspect periodically for loose beads or strings and repair with fresh glue if needed.
Frequently Asked Questions (FAQs)
How far in advance can we make the rattle drums?
You can make them several days or even weeks before New Year’s Eve. Just ensure all paint and glue are fully dry before storing them, and keep them in a dry place so the cardboard does not warp.
What if we do not have beads or beans?
You can use buttons, large pasta shapes, or rolled foil balls instead. Test the sound after attaching; you may need to adjust the string length so the pieces hit the drum surfaces effectively.
Are these drums too loud for an apartment?
These rattle drums generally produce a soft to moderate level of sound, especially if you use light beads or beans. If noise is a concern, choose smaller beads and remind kids to play at a “quiet concert” volume.
Can toddlers safely use these drums?
With close adult supervision and larger, securely attached parts, toddlers can enjoy tapping and shaking the drums. Avoid very small beads, check that all knots and glued areas are firm, and put the drums away if they become damaged.
How can we incorporate learning into this craft?
You can add simple counting, pattern-making, and rhythm games. For example, have kids count their beads, create repeating color sequences, or copy short drumming patterns you clap for them, blending creativity with early math and music skills.
References
- Arts Education and Positive Youth Development — U.S. Department of Education. 2012-05-01. https://files.eric.ed.gov/fulltext/ED530822.pdf
- Learning Through Art: The Importance of Art Education for Children — National Art Education Association. 2016-01-01. https://arteducators-prod.s3.amazonaws.com/documents/701/9f6e3a20-0d8f-4d9a-94d1-34f64697edc0.pdf
- Reduce, Reuse, Recycle — U.S. Environmental Protection Agency (EPA). 2023-09-18. https://www.epa.gov/recycle/reducing-waste-what-you-can-do
- Toy Safety — U.S. Consumer Product Safety Commission. 2023-11-01. https://www.cpsc.gov/Safety-Education/Safety-Education-Centers/toy-safety