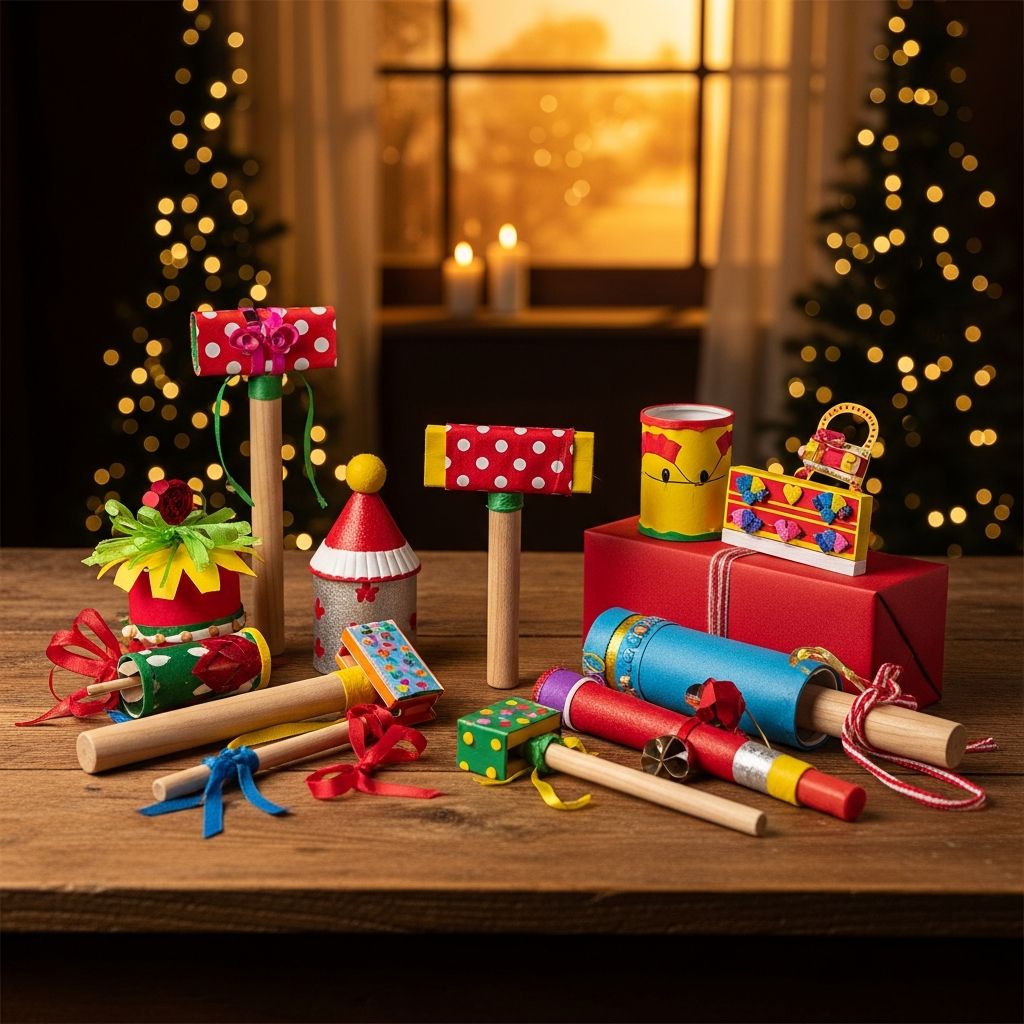
New Year’s Eve doesn’t have to mean crowded parties or late-night events. With a few simple supplies, families can turn their homes into a festive soundscape using handmade noisemakers that kids are proud to shake at midnight (or at an earlier family-friendly countdown). This guide walks through creative, safe and budget-friendly ideas to help celebrate with lots of sound and sparkle.
Why Make Your Own New Year’s Noisemakers?
Store-bought party horns and poppers are fun, but they add up quickly and often break within minutes. Crafting your own noisemakers turns preparation into part of the celebration, giving kids a sense of ownership and excitement. It is also a great way to reuse materials from around the house, keep children entertained, and create lasting memories around creativity instead of just consumption.
- Budget-friendly: Most projects use recyclables and basic craft supplies you probably already own.
- Customizable: Kids can choose colors, patterns and decorations that match your party theme.
- Hands-on fun: Crafting gives children an outlet for their energy before the countdown begins.
- Eco-conscious: Reusing jars, cardboard tubes and leftover ribbon keeps items out of the trash.
Essential Supplies to Have on Hand
You do not need a dedicated craft room to make New Year’s noisemakers. A small collection of basic supplies can be combined in many different ways. Before you start, gather materials in a central spot so kids can see their options and plan their designs.
| Category | Examples | Notes |
|---|---|---|
| Containers | Empty plastic bottles, metal tins, cardboard tubes, small boxes | Clean and dry before use; avoid glass for kids. |
| Fillers | Dried beans, rice, pasta, beads, small bells | Test sound level by shaking before sealing. |
| Decorations | Markers, stickers, washi tape, glitter, sequins, ribbon | Choose no-shed glitter or confine glitter to the outside. |
| Fasteners | Masking tape, duct tape, glue sticks, rubber bands | Ensure lids and openings are fully secured. |
| Extras | Paper plates, craft sticks, paper cups, foil, tissue paper | Useful for handles, flaps and extra shimmer. |
Once the basics are set out, encourage children to experiment. Give them permission to combine materials in unusual ways, such as taping bells to ribbon or wrapping tubes in foil for a metallic shine.
Project 1: Shaker Bottles from Recyclables
Shaker bottles are a simple starting point, ideal for toddlers and younger kids. They are easy to grip, make a satisfying sound, and can be decorated to match any color scheme. Because they are sealed, they also reduce the risk of small parts spilling everywhere during the excitement of the countdown.
Materials
- Clean, dry plastic bottles with lids (single-serve water or juice bottles work well)
- Dried beans, rice, small pasta shapes or pony beads
- Decorative tape, markers and stickers
- Strong tape or hot glue handled by an adult for sealing
Steps
- Place a small amount of filler into the bottle, leaving plenty of space so it can move around.
- Secure the lid very tightly, then add strong tape or a band of hot glue around the seam for extra safety.
- Invite kids to decorate the outside of the bottle with tape, stickers and drawings.
- Test the sound together and adjust by adding or removing filler until it is just right.
To make the activity more educational, ask children to notice how the sound changes when you use rice versus beans or when you fill the bottle halfway instead of just a little. They can describe the sound as soft, loud, crunchy or rattly and learn basic cause-and-effect.
Project 2: Festive Paper Plate Clackers
Paper plate clackers produce a clap-like sound that feels a bit like a mini cymbal crash. Because the materials are light and flat, this is a great project for classrooms, playgroups or larger gatherings where you need an activity that works for many children at once.
Materials
- Two sturdy paper plates per noisemaker
- String or yarn
- Two to four large beads or buttons for each
- Craft sticks or cardboard strips for handles (optional)
- Paint, markers, stickers and glue for decorating
Steps
- Decorate the bottom sides of both plates first and let them dry if paint is used.
- Cut two small holes opposite each other near the rim of one plate.
- Thread a length of yarn through each hole and tie a bead or button at each end so it hangs freely.
- Place the second plate on top, decorative sides facing outward, and staple or tape the rims together to trap the yarn inside.
- Add a handle inside by gluing a craft stick between the plates, if desired.
To play, kids hold the clacker by the handle and twist it between their hands so the beads swing and strike the plates. Encourage them to try slow spins, fast spins and rhythmic patterns to explore different sounds.
Project 3: Ribbon Wands with Jingle Bells
Ribbon wands bring movement and sparkle to your celebration while staying on the quieter side. They are perfect for younger children who love to dance and spin, and they make great photo props. The soft jingling sound feels festive without being overwhelming for sensitive ears.
Materials
- Wooden dowels, chopsticks or sturdy paper straws
- Lengths of ribbon, yarn or fabric strips
- Small craft bells (optional)
- Clear tape or hot glue
Steps
- Cut ribbons into equal lengths so they are long enough to flow but not so long that they trip small feet.
- Tie ribbons securely to one end of the wand, double-knotting them so they do not slide off.
- If using bells, thread one bell onto each ribbon before tying or attach bells where knots are tied.
- Wrap the top of the wand with tape or a bit of glue to cover rough edges and secure everything in place.
Turn on music and let children swirl their wands in circles, draw shapes in the air and parade around the room. Consider having a brief “practice show” earlier in the evening so kids can debut a mini routine during the countdown.
Project 4: Cardboard Tube Party Blasters
Cardboard tubes from paper towels or wrapping paper can be transformed into colorful party blasters that create a satisfying whoosh when shaken or tapped. Although they do not rely on air like traditional horns, they mimic the feeling of waving a giant celebratory baton.
Materials
- Cardboard tubes in different lengths
- Scrap paper, tissue paper or foil for wrapping
- Ribbon, yarn or streamers
- Tape, glue and markers
Steps
- Wrap each tube with colorful paper or foil and secure seams with tape or glue.
- Decorate the outside with drawn patterns, stickers or adhesive gems.
- Attach long strands of ribbon or tissue paper to one end to create a shimmering tail.
- For extra sound, kids can tap the tubes against their hands, legs or each other’s tubes in a gentle rhythmic pattern.
These blasters pair especially well with upbeat background music. Invite children to line up and march around the room, lifting and lowering their tubes in time with a simple beat clapped out by an adult.
Balancing Big Fun with Safety and Quiet Time
Noise is part of the excitement, but it helps to set a few ground rules so everyone has a good time. Before you start crafting, explain which areas of the house are “party zones” and which spaces stay quiet for younger siblings, pets or neighbors.
- Choose soft materials such as plastic and cardboard instead of metal or glass.
- Seal any small filler items securely so they cannot spill or become a choking hazard.
- Have children take “quiet breaks” between loud bursts of shaking or clacking.
- Keep an eye on pets, who may need a calm retreat away from the excitement.
If your family needs to keep things especially low-key, focus on projects like ribbon wands or lightly filled shakers that offer movement and celebration without overwhelming volume.
Turning Crafts into a Mini New Year’s Party
These noisemaker projects can anchor a full evening of at-home festivities. Treat the crafting session like the first “event” of the night, followed by games, a special snack and a family countdown. This structure keeps excitement steady rather than peaking too early.
- Set up a “creation station” with supplies grouped by type so kids can move between projects.
- Play upbeat music while crafting to set a celebratory mood.
- Take photos of each child posing with their finished noisemaker and display them on a bulletin board or digital frame.
- End the crafting segment by having a short practice parade through the living room.
Consider doing an early countdown at a time that suits your family, especially with younger children. At the chosen “midnight,” everyone can grab their favorite noisemaker, shout a group cheer and shake, clack or jingle together.
Fun Variations and Themed Ideas
Once you have tried the basic projects, it is easy to adapt them to different themes or ages. Older kids may enjoy engineering more complex designs, while younger kids may prefer simple, colorful decorations. Matching your noisemakers to a theme can make a small gathering feel like a big event.
- Color themes: Choose two or three party colors (such as gold, silver and white) and invite kids to stick mostly to that palette in their designs.
- Glow-in-the-dark: Use glow sticks alongside shakers or attach reflective tape so the noisemakers shine when the lights dim for the countdown.
- Year markers: Have children write the new year in large numbers on their creations as a keepsake.
- Memory makers: Add small written wishes or goals inside a double-layered decoration, then open and read them next New Year’s Eve.
Encouraging personalization helps children feel seen and heard. They are more likely to treasure their noisemakers when the colors, words and designs reflect their own tastes and hopes for the year ahead.
Frequently Asked Questions
How far in advance can we make the noisemakers?
Most noisemakers can be made several days in advance as long as they are stored in a dry place. If you are using materials like tissue paper or lightweight ribbon, keep them away from curious pets or rough play so they stay looking fresh for the big night.
What if we live in an apartment and need to keep the volume down?
Focus on softer projects such as lightly filled shakers and ribbon wands, and use more music and dancing to convey excitement. You can also plan a short “noisy moment” right at your chosen countdown and agree to keep the rest of the evening at conversation level.
Are these crafts suitable for very young children?
Yes, with careful supervision and some modification. Adults should handle any cutting, small beads or hot glue, while toddlers can help pour rice into bottles, stick on large stickers and choose colors. Always double-check that small parts are fully sealed inside containers.
How can we avoid a big glitter mess?
Look for glitter tape, glitter foam stickers or metallic markers that give a similar sparkle without loose particles. If you do use loose glitter, keep it in one designated area over a tray or large sheet of paper for easier clean-up.
Can these noisemakers be reused next year?
Many of them can, especially shaker bottles and ribbon wands, if they are stored carefully in a labeled box. It can be fun to bring out last year’s favorites and then add one new style each year, building a small collection of family-made party props.
With a table full of recyclables, basic craft supplies and plenty of imagination, families can transform New Year’s Eve into a night of creativity and joyful sound. These homemade noisemakers offer kids a hands-on way to participate in the countdown and create traditions that feel personal, meaningful and fun year after year.