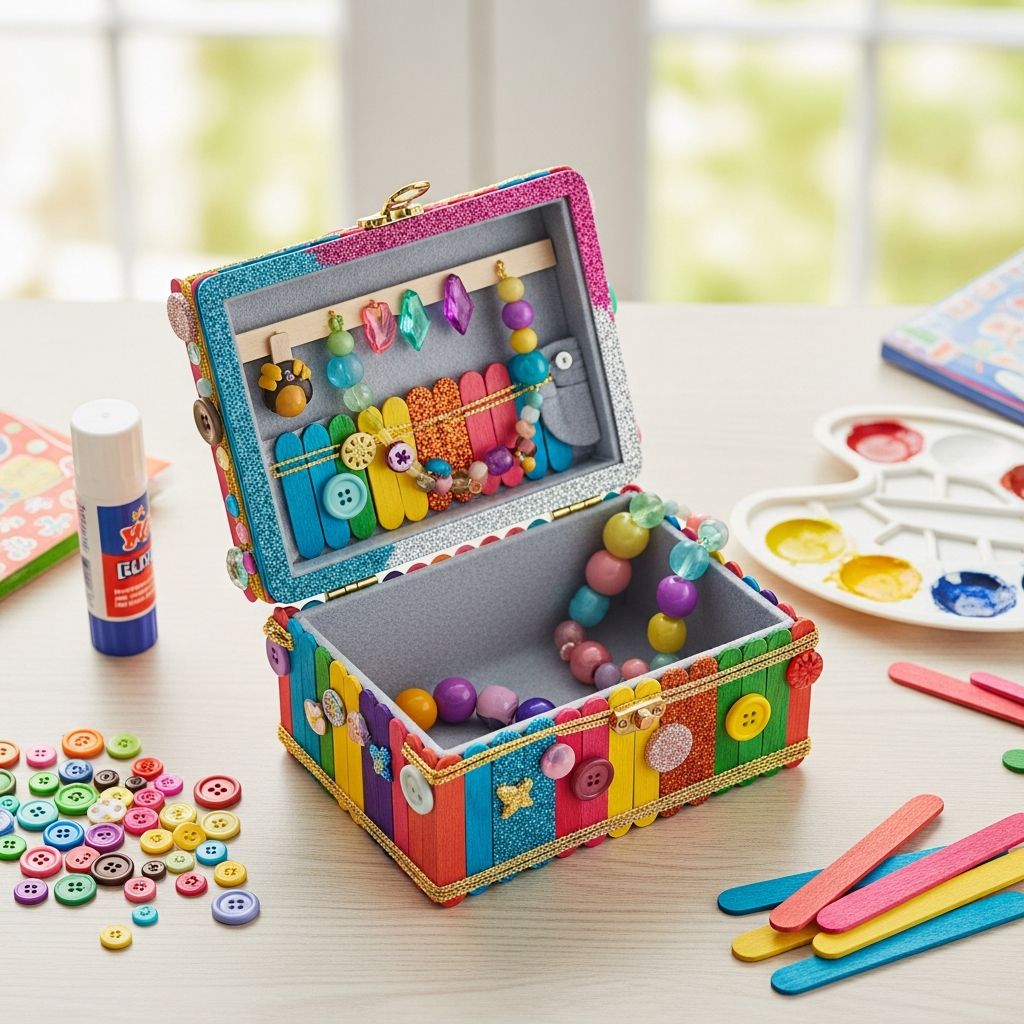
A handmade jewelry box is a thoughtful, budget-friendly gift that children can proudly create for Mother’s Day, birthdays, or any celebration. Instead of buying something ready-made, you can transform everyday materials into a keepsake that feels personal and meaningful.
This guide walks you through planning, building, decorating, and filling a jewelry box with kids in mind. It focuses on low-cost supplies, step-by-step instructions, and easy ways to adapt the project for different ages and skill levels.
Why a DIY Jewelry Box Makes a Meaningful Gift
Store-bought gifts can be beautiful, but a jewelry box designed and decorated by a child carries a different kind of value. It shows time, thought, and effort—which many parents and caregivers say they treasure even more than expensive presents.
- Personal connection: The giver can choose colors, patterns, and decorations that match the recipient’s style.
- Practical use: The finished box holds jewelry, small notes, and mementos, keeping items tidy and easy to find.
- Creative expression: Kids can experiment with paint, paper, and embellishments, building confidence and fine motor skills.
- Memories built in: Every brush stroke and glued gem becomes part of a story about the time spent crafting together.
Choosing a Base: Box Options for Every Household
You do not need specialized woodworking tools to create a charming jewelry box. Start with a ready-made box and customize it. This keeps the project approachable and safer for children.
Common Box Types You Can Repurpose
- Small cardboard gift boxes: Often left over from packaging; lightweight and easy to decorate.
- Plain wooden craft boxes: Available at many craft stores; sturdy, paintable, and long-lasting.
- Tin or metal boxes: Old tea tins or cookie tins can be lined and covered for a unique look.
- Reused product boxes: Empty phone boxes, candle boxes, or stationery boxes become elegant jewelry holders with a little creativity.
| Box Type | Best For | Kid Difficulty Level |
|---|---|---|
| Cardboard gift box | Quick projects, lightweight storage | Easy (great for younger kids with supervision) |
| Plain wooden box | Durable keepsakes, painted designs | Moderate (ideal for school-age kids) |
| Tin or metal box | Recycling project, bold decoration | Moderate (edges should be checked for safety) |
| Reused product box | Budget projects using what you have | Easy to Moderate (depends on box sturdiness) |
Gathering Supplies: Simple & Affordable Materials
Once you have a box, gather a small toolkit of craft supplies. You can substitute based on what you already own; the project is flexible.
Core Craft Supplies
- Non-toxic acrylic paint or washable paint in a few favorite colors
- Paintbrushes (small and medium sizes)
- Craft glue or school glue (non-toxic and child-safe)
- Craft paper, tissue paper, or gift wrap for decoupage
- Child-safe scissors
- Pencil and ruler for simple measurements
Optional Embellishments
- Self-adhesive gems, stickers, or foam shapes
- Buttons, ribbons, lace, or yarn
- Letter stickers or alphabet stamps for names and messages
- Glitter glue pens (less messy than loose glitter)
Soft Interior Lining (Optional but Special)
Adding a soft lining helps protect jewelry from scratches and makes the box feel more luxurious.
- Felt squares or craft felt
- Scrap fabric, such as an old scarf or pillowcase
- Thin foam sheets, cotton batting, or quilt batting
- Double-sided tape or fabric glue
Safety Considerations When Crafting with Kids
Hands-on crafting supports children’s motor coordination and creativity, but adults should manage potential hazards.
- Use age-appropriate tools: Choose blunt-tip scissors and avoid hot glue guns with young children.
- Check labels: Select non-toxic, child-safe paints and adhesives that clearly indicate suitability for kids.
- Avoid small loose parts for children under three due to choking risk (gems, beads, and buttons should be used only with older kids).
- Protect clothing and surfaces: Use smocks, old shirts, and a table covering to make cleanup easier.
- Ventilation: If you use stronger adhesives or sealants, work in a well-ventilated area.
Step-by-Step: Transforming a Plain Box Into a Jewelry Treasure
The following process is designed so kids can participate in every stage with adult guidance. Adjust steps depending on your materials and the child’s age.
1. Plan the Design Together
Before opening the paint, take a few minutes to imagine how the finished box should look.
- Ask what colors remind the child of the person receiving the gift.
- Decide on a “theme,” such as hearts, flowers, stars, or geometric patterns.
- Sketch simple ideas on scrap paper to help kids organize their thoughts.
2. Prepare the Box
- Wipe the box with a dry cloth to remove dust.
- If using a glossy box, gently scuff it with very fine sandpaper (adults only) so paint and glue adhere better.
- Cover hinges or clasps with painter’s tape if you want to keep them unpainted.
3. Paint the Exterior
- Apply a base coat of paint to the outside and let it dry completely.
- Flip the box and paint the underside and any remaining areas.
- For bold colors, add a second coat after the first is fully dry.
Younger children can use broad strokes and simple color blocks, while older kids can experiment with stripes, dots, or patterns.
4. Decorate the Lid and Sides
Once the base paint is dry, decorate the box with extra details:
- Use a smaller brush to add flowers, hearts, or abstract designs.
- Glue on paper shapes or cut-out designs from patterned paper.
- Add self-adhesive gems or stickers as borders along the top and sides.
- Spell out a name or message using letter stickers or stamped letters.
5. Create a Soft Interior
A soft interior helps organize jewelry and adds a surprise when the box is opened.
- Measure the inside bottom of the box using a ruler.
- Cut a piece of felt or fabric slightly smaller than the base.
- Use double-sided tape or fabric glue to attach the lining securely.
For a cushioned effect, place a thin layer of foam or batting underneath the fabric before gluing it down.
6. Add Simple Compartments (Optional)
Dividing the interior keeps rings, bracelets, and earrings separated. You can improvise compartments using lightweight materials.
- Cut strips of cardboard and cover them with matching paper or fabric.
- Glue the strips inside the box to create sections—one for rings, one for bracelets, one for small keepsakes.
- For a ring row, roll a piece of felt around a strip of foam or cotton and glue it into the box so rings can tuck between the rolls.
7. Let Everything Dry
Give the jewelry box enough time to dry fully before wrapping or filling it. This helps prevent smudged paint and loose decorations.
- Place the box in a dry area out of reach of curious hands or pets.
- Follow any drying times on paint or glue labels.
Personalizing the Gift: Ideas to Make It Extra Special
The structure of the box is only the beginning. Small personal touches can make the gift feel even more heartfelt.
Meaningful Details to Add
- A hidden message: Write a short note or draw a small picture inside the lid.
- Favorite colors: Choose colors the recipient wears often or decorates with at home.
- Symbolic designs: Hearts, stars, flowers, or initials that have special meaning in your family.
- Date and signature: Add the child’s name and the year somewhere discreet so the gift becomes a time capsule.
What to Put Inside the Jewelry Box
Presenting the jewelry box with a few surprises inside can make opening it even more exciting.
- Handmade friendship bracelets or simple beaded jewelry (with age-appropriate beads).
- A small handwritten coupon for a hug, a family movie night, or help with a chore.
- A tiny photo or printed quote taped inside the lid.
- Pressed flowers or a decorative keychain.
Teaching Moments Hidden in the Craft
Beyond the final gift, the process of making a jewelry box is full of learning opportunities for children. Art activities can support coordination, problem-solving, and emotional expression.
- Fine motor skills: Painting, cutting, and gluing help strengthen hand muscles and control.
- Planning and sequencing: Kids practice following steps and predicting what comes next.
- Math skills: Measuring the interior, comparing lengths, and counting compartments all involve basic math.
- Emotional development: Crafting a gift encourages empathy as children think about what another person might enjoy.
Adapting the Project for Different Ages
You can scale the jewelry box craft up or down depending on who is helping.
For Preschoolers
- Pre-paint the base of the box so they can focus on decorating.
- Offer large stickers, foam shapes, and big brushes instead of tiny gems.
- Keep the project short and simple, possibly over two brief sessions.
For School-Age Kids
- Let them choose the theme and plan the design sketch.
- Introduce more detailed painting, like stripes or polka dots.
- Show them how to measure and cut felt or cardboard dividers.
For Tweens and Teens
- Experiment with more advanced painting techniques, such as ombré color transitions or stenciling.
- Encourage them to design more complex interior layouts with multiple compartments.
- Invite them to write a longer note or letter to place inside the box.
Simple Care Tips for a Long-Lasting Keepsake
A little care helps the jewelry box last for many years. Encourage the recipient to treat it as a special object.
- Keep the box away from direct sunlight to prevent fading.
- Avoid placing very heavy items on top of cardboard boxes to reduce bending.
- Wipe the outside gently with a dry or slightly damp cloth if dust builds up.
- Check occasionally for any loose decorations and reattach them with glue if needed.
Frequently Asked Questions (FAQs)
What is the easiest box type for kids to decorate?
Lightweight cardboard gift boxes are usually easiest. They take paint well, are simple to cut or divide inside, and do not require special tools. Wooden craft boxes are also a good choice for older children.
How long does it take to make a DIY jewelry box?
The active crafting time is often 45–90 minutes, depending on the level of detail. However, you should also allow extra time for paint and glue to dry, which can extend the project over a day.
Can I make the project mess-friendly for a small space?
Yes. Cover the work surface with old newspaper or a plastic cloth, use washable paints, and keep a damp cloth or wipes nearby. Limiting the number of materials on the table at one time also helps manage clutter.
Do I need special sealant to protect the paint?A: A clear, non-toxic sealer can make the surface more durable, especially for wooden boxes, but it is optional. If you choose to use a sealer, adults should handle the application and ensure proper ventilation.
Q: What if I do not have fabric or felt for the lining?
You can still make the interior look finished by painting it, using colored paper, or gluing in decorative scrapbook paper. Even a simple layer of colored paper at the bottom makes the box feel more complete.
References
- Wood Finishes and Coatings: An Overview — U.S. Forest Service, Forest Products Laboratory. 2010-05-01. https://www.fpl.fs.usda.gov/documnts/fplrn/fpl_rn0322.pdf
- Children’s Involvement in Gift Giving to Parents — Ruth M. A. & John C., Journal of Consumer Research (via Oxford Academic). 2014-02-01. https://academic.oup.com/jcr/article/40/6/1197/1824692
- The Arts in Early Childhood: Social and Emotional Benefits — National Endowment for the Arts. 2015-01-01. https://www.arts.gov/sites/default/files/arts-in-early-childhood-dec2015-rev2016.pdf
- Art Materials for Children: Recommendations for Safety — U.S. Consumer Product Safety Commission. 2013-03-01. https://www.cpsc.gov/s3fs-public/5015.pdf