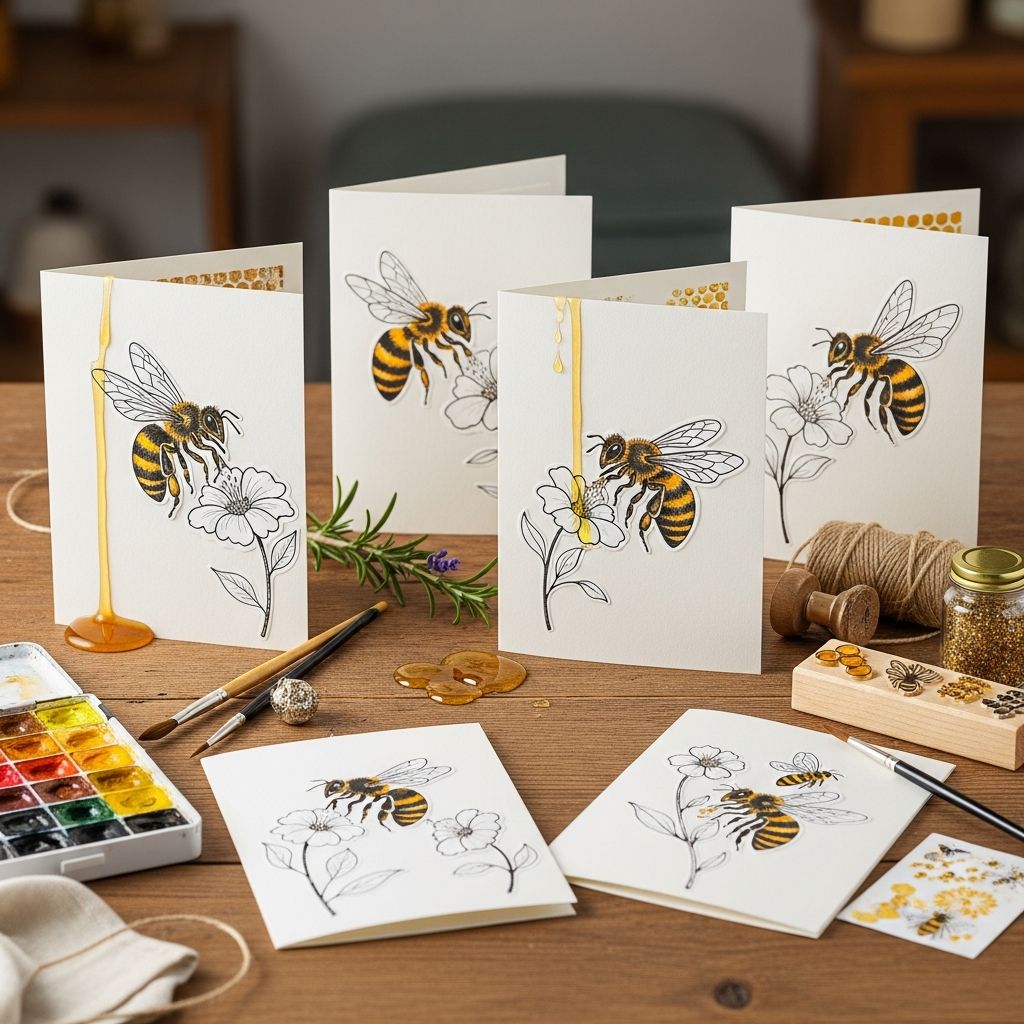
Honey bee cards are a charming way to celebrate Rosh Hashanah, the Jewish New Year, and to wish friends and family a year that is as sweet as honey. These simple, hands-on cards are perfect for children, easy for grown-ups to set up, and flexible enough to adapt for classrooms, synagogues, or at-home holiday gatherings.
This guide takes inspiration from classic honeycomb-and-bee card tutorials and expands them into a full, beginner-friendly project with variations, educational notes, and practical tips for different ages.
Why Honey Bees for Rosh Hashanah?
During Rosh Hashanah, many families eat apples dipped in honey to symbolize a sweet new year. Bees, which produce honey, naturally become a playful symbol of that sweetness.
Making bee-themed cards helps kids:
- Connect with holiday traditions in a concrete, memorable way.
- Express gratitude and good wishes to loved ones.
- Practice fine motor skills like drawing, gluing, and stamping.
- Combine art and learning by talking about bees, nature, and the meaning of the new year.
Project Overview
This project centers on creating a textured honeycomb background and then adding cute little bees on top. Children can personalize each card with their own thumbprint bees, drawings, and messages.
| Feature | Details |
|---|---|
| Recommended age | About 3 and up, with support for younger kids |
| Difficulty | Easy – ideal for beginners and group activities |
| Time per card | 20–30 minutes active time plus drying time |
| Best setting | Home, classroom, synagogue family program, or craft corner at a holiday meal |
Supplies: What You’ll Need
You can complete this project with basic, inexpensive materials. Feel free to substitute what you already have at home.
Card Bases
- Sturdy white or light-colored cardstock, cut into rectangles or folded into cards.
- Envelopes that fit your chosen card size (optional, but helpful if mailing).
Honeycomb Texture
- A piece of bubble wrap that is slightly smaller than your card front (for a honeycomb print effect).
- Yellow paint in two tones: one lighter, one darker. You can mix a light shade by adding white paint to yellow.
Bees and Details
- Non-toxic, water-based acrylic or tempera paint in yellow for thumbprint bees.
- A fine or medium tip black marker for drawing bee stripes, wings, faces, and text.
- A small paintbrush to apply paint to the bubble wrap.
Cleanup and Protection
- Old newspaper, a plastic tablecloth, or craft paper to protect your work surface.
- Smocks or old T-shirts for kids.
- Baby wipes, paper towels, or a damp cloth for quickly cleaning painty fingers.
Step-by-Step Instructions
The directions below are written for a small group of children but can easily be scaled up for a classroom or party.
Step 1: Prepare the Work Area
- Cover the table and set out all materials within easy reach.
- Pour small amounts of each paint color into shallow containers or palettes.
- Show children a sample card (or a quick sketch) so they know what they are making.
- If you are using acrylic paints, keep the room well-ventilated as recommended for art materials.
Step 2: Paint the Honeycomb Background
- Use the brush to coat one side of the bubble wrap with the lighter yellow paint.
- Try to cover the raised bubbles evenly without flooding them with paint.
- Carefully flip the painted side of the bubble wrap onto the front of the card.
- Press gently all over with flat hands to transfer the honeycomb pattern.
- Peel away the bubble wrap to reveal a textured, honeycomb-like print.
Set each card aside to begin drying. If you’re working with several kids, they can take turns stamping their honeycomb while others help with cleanup or start planning their greetings.
Step 3: Add Thumbprint Bees
- Pour a small amount of the darker yellow paint into a fresh dish.
- Ask the child to dip a thumb lightly into the paint, wiping off any excess.
- Have them press their thumb onto the card to make a small oval shape.
- Repeat to add two or three bees on each honeycomb background, leaving space for text.
- Encourage kids to experiment with bee placement: flying in a line, clustered together, or buzzing near the edges.
These thumbprints make each card unique and personal—no two bees will look exactly the same.
Step 4: Let Everything Dry
Allow the paint to dry fully before adding details. This may take an hour or more depending on paint thickness and room conditions.
While waiting, you can:
- Read a short story about Rosh Hashanah.
- Talk about bees and their role in pollination and food production.
- Practice the greetings they might write or say when they give the cards.
Step 5: Draw Bee Details
- Once thumbprints are completely dry, use a black marker to add:
- Stripes across each thumbprint.
- Little wings (simple loops or curved lines work well).
- Smiley faces or tiny antennae, if desired.
Older children may enjoy adding motion lines to show bees flying or tiny hearts and flowers near the honeycomb.
Step 6: Write Your Sweet New Year Message
On the front or inside of the card, invite kids to write or dictate a greeting. Options include:
- Traditional Rosh Hashanah wishes for a sweet or good year.
- Bee-themed wordplay such as “You’re as sweet as honey” or “Hope your year is un-BEE-lievable.”
- Simple friendly notes for younger children who are still learning to write.
Grown-ups can act as scribes for toddlers, writing their words while the child decorates with extra dots, lines, or stickers.
Adapting the Craft for Different Ages
This project can be adapted so that toddlers, preschoolers, and older kids are all engaged at their own level.
For Toddlers (Around Age 2–3)
- Pre-stamp the honeycomb pattern yourself so they can focus on thumbprints.
- Guide their hands to press down on the bubble wrap or to place their thumbprints in specific areas.
- Offer large crayons or washable markers for simple scribbles or dots.
- Use larger cards, giving them more space to explore without crowding.
For Preschoolers and Early Elementary
- Let them handle most of the steps: painting the bubble wrap, stamping, and drawing bee details.
- Encourage them to sign their name or write a short greeting.
- Invite them to count bees, identify shapes, and describe their designs to build vocabulary.
For Older Kids
- Challenge them to create more complex scenes: bees flying over flowers or around an illustrated jar of honey.
- Introduce simple Hebrew words or phrases they can include in the text.
- Have them design a matching envelope or a small coordinating gift tag.
Extensions and Creative Variations
Once you try the basic version, you can easily extend the activity for more variety or to fill a longer program.
Color and Texture Variations
- Use gold or metallic paint mixed with yellow for a sparkling honey effect.
- Experiment with pastel backgrounds instead of white cardstock.
- Add a light wash of watercolor around the honeycomb to create a sky or garden backdrop.
Mixed-Media Ideas
- Glue on tiny pieces of tissue paper or yellow scrapbook paper for extra dimension.
- Add small stickers of apples, flowers, or bees to tie in more Rosh Hashanah imagery.
- Attach a length of ribbon or twine to turn the card into a hanging decoration.
Classroom and Group Adaptations
- Set up stations: one for stamping honeycomb, one for thumbprints, and one for drawing details.
- Prepare name labels so each child’s card doesn’t get mixed up while drying.
- Create a “honeybee wall” display by temporarily hanging finished cards on a bulletin board before sending them home.
Safety and Clean-Up Tips
Crafting with kids can get messy, but a few simple habits make it easier to manage.
- Choose non-toxic, washable paints, especially for younger children.
- Keep a damp cloth or wipes nearby so kids can clean hands before touching clothing or furniture.
- Model how to carry a paint-filled dish with two hands.
- Invite children to help clean up by collecting brushes, putting caps back on markers, and wiping the table.
Making the Cards Meaningful
The creative process is important, but the conversations you have while crafting can make the activity even more memorable.
- Talk about how bees help pollinate plants and support the food we eat, including fruits often served on Rosh Hashanah.
- Ask kids who they want to send a card to and why that person is special to them.
- Discuss what it means to wish someone a “sweet” year—kindness, health, friendship, and learning.
- Encourage gratitude by prompting children to name something they are thankful for from the past year.
Frequently Asked Questions (FAQs)
Q1: Can I do this craft without bubble wrap?
Yes. If you do not have bubble wrap, you can:
- Draw a honeycomb pattern by hand using a ruler and hexagon shapes.
- Use a hexagon-shaped stamp or sponge.
- Cut hexagons from yellow paper and glue them in a cluster to form a honeycomb background.
Q2: How can I adapt this activity for a large group?
For large groups like classrooms or holiday programs:
- Pre-cut all paper and bubble wrap before the event.
- Set up multiple paint stations to reduce waiting time.
- Assign adult volunteers or older kids to help with the paint steps while younger children focus on thumbprints and drawing.
Q3: Which paints are best for kids?
Look for paints labeled non-toxic and washable, such as children’s tempera or water-based acrylics designed for crafts. Health and safety agencies recommend supervising young children closely when using any art materials and following manufacturer guidelines for age and ventilation.
Q4: Can these cards be used for other occasions?
Absolutely. Although they are inspired by Rosh Hashanah honey traditions, bee cards also work for:
- Thank-you notes (“Thanks for BEE-ing so kind”).
- Birthday cards.
- Valentine’s Day or friendship cards.
- General encouragement notes for teachers, grandparents, or friends.
Q5: How can I mail these safely?
Use flat cards and avoid adding thick embellishments that might get crushed in the mail. Let all paint and marker lines dry completely, then place the card in an envelope. If you used heavier cardstock, check postage requirements, as heavier envelopes may need an extra stamp.
Bringing Sweetness into the New Year
DIY honey bee cards are more than a cute craft; they are a hands-on way for children and adults to share blessings, creativity, and joy at the start of a new year. Whether you are making a single card for a grandparent or a whole stack for friends, these little bees can help spread a lot of sweetness.
References
- Honey Bees and Colony Collapse Disorder — United States Environmental Protection Agency (EPA). 2023-04-26. https://www.epa.gov/pollinator-protection/honey-bees-and-colony-collapse-disorder
- Sweet Little DIY Honey Bee Cards for Rosh Hashanah! — Alpha Mom / B. Ponnay. 2014-09-18. https://alphamom.com/family-fun/holidays/rosh-hashanah-craft-sweet-little-diy-honey-bee-cards/
- Rosh Hashanah DIY Honeycomb and Bees Playdough Stamping — With Love, Ima. 2020-08-20. https://withloveima.com/rosh-hashanah-diy-honeycomb-and-bees-playdough-stamping-2/
- The Bee’s Knees Honey Jar — ReformJudaism.org. 2016-09-01. https://reformjudaism.org/bees-knees-honey-jar
- Honey Crafts & Recipes for Rosh Hashanah — Everyday Jewish Mom. 2021-09-16. https://everydayjewishmom.com/2025/09/16/honey-crafts-recipes-for-rosh-hashanah/