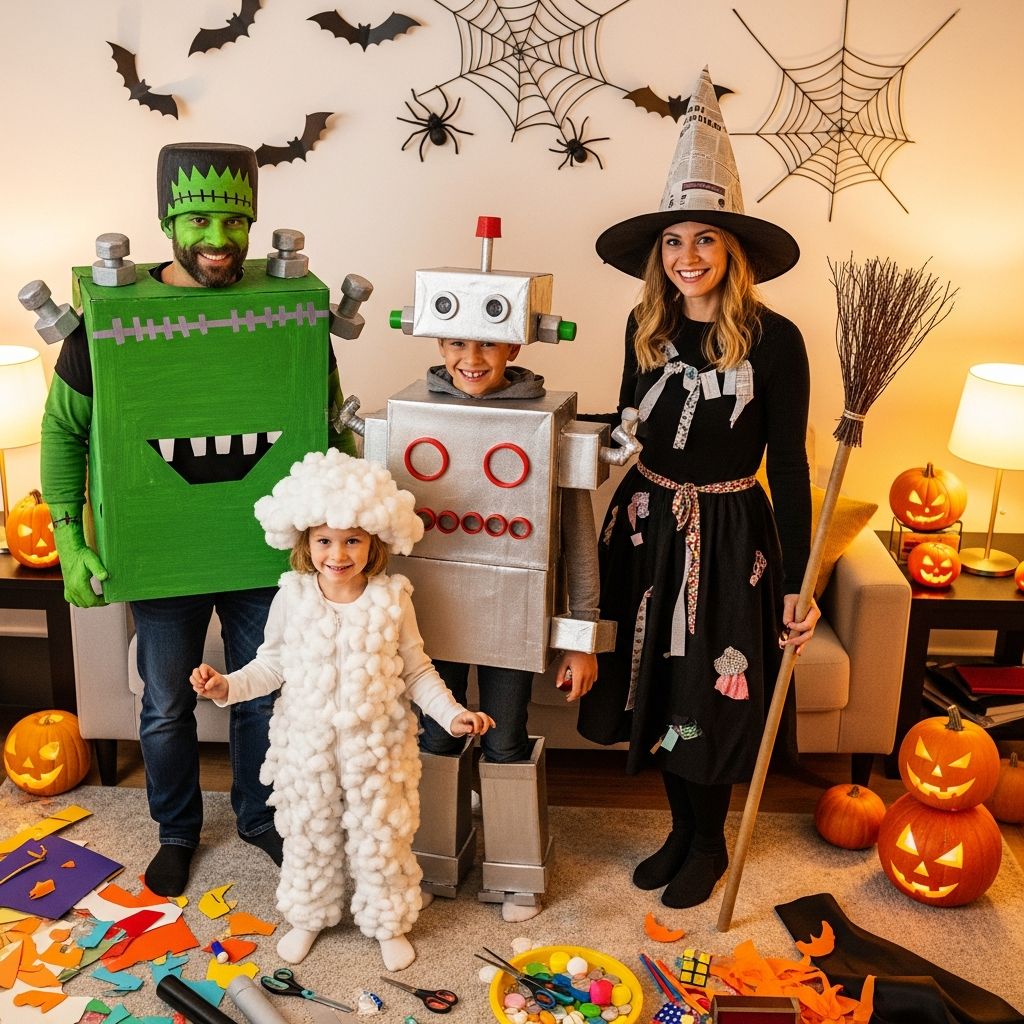
DIY Halloween costumes are more than outfits; they are tiny stories you wear for one enchanted night. When you build costumes from scratch, you turn recycled boxes, thrift-store finds, and craft-drawer leftovers into memories your family will talk about for years.
This guide walks you through planning, designing, and assembling original homemade costumes without copying movie studios or store-bought looks. You will find approachable projects for all ages, tips for using what you already own, and ideas that invite kids to help every step of the way.
Start with a Story, Not a Shopping List
The secret to a memorable costume is the story behind it, not how much it cost. Before anyone reaches for scissors or glue, spend a few minutes imagining what kind of character you want to bring to life.
- Pick a mood: spooky, silly, cute, mysterious, or heroic.
- Choose a simple theme: a place (enchanted library), a job (time-traveling baker), or a feeling (good luck charm).
- Ask guiding questions: Where does this character live? What do they carry? What colors follow them around?
Once you have a tiny backstory, it becomes much easier to raid your closets and recycling bin for pieces that fit the character. This approach keeps your costume original without needing a template to copy.
Gather Materials from Home First
Most of what you need is already in your house. Start with what you own, then fill in small gaps with low-cost craft items or thrift-store treasures.
Household items that become costume gold
- Old T-shirts, button-downs, scarves, and hats
- Cardboard boxes, cereal cartons, and shipping tubes
- Ribbon, yarn, fabric scraps, mismatched socks
- Reusable grocery bags and worn-out backpacks
- Bottle caps, plastic containers, and clean food packaging
Low-cost craft add-ons
- Felt sheets in 3–5 main colors
- Face paint or skin-safe makeup
- Elastic, safety pins, hook-and-loop tape, and hot glue sticks
- Glow-in-the-dark tape or fabric paint for nighttime visibility
Keep everything in a large bin so kids can rummage and test ideas safely. Treat it like a costume pantry that you refill a little each year.
Quick Guide: Costume Complexity Levels
Not every household has the same amount of time or patience for elaborate builds. Use this table to match your project to your schedule and skill level.
| Level | Time Needed | Skills Required | Best For |
|---|---|---|---|
| Beginner | 30–60 minutes | Cutting, gluing, safety pinning | Busy parents, last-minute plans, young kids |
| Intermediate | 1–3 hours | Simple stitching, pattern cutting, layering | Weekend crafters, multi-piece looks |
| Advanced | 3+ hours over several days | Hand sewing, structural cardboard work | Craft lovers, teens, detailed group themes |
Simple Costumes You Can Make in Under an Hour
These ideas keep construction light and focus on recognizable shapes and colors. They are perfect for a school party, a community event, or a laid-back trick-or-treat run.
1. Walking Weather Forecast
Transform a plain outfit into a miniature sky. Each person in the family can represent a different kind of weather.
- Base: Solid-color clothes in blue, gray, yellow, or white.
- Details: Cut out felt raindrops, clouds, suns, or lightning bolts and attach with safety pins or hook-and-loop tape.
- Accessories: Umbrellas, sunglasses, mittens, or a paper windsock on a stick.
Label a cardboard sign with something playful like “Local Forecast” and let kids announce the weather as they walk door to door.
2. Neighborhood Super Helpers
Instead of traditional caped heroes, design characters based on everyday helpers in your community: the neighbor who waters everyone’s plants, the dog walker, or the crossing guard.
- Capes: Cut rectangles from old pillowcases or T-shirts and tie loosely over the shoulders.
- Symbols: Draw or cut simple icons – a leaf, paw print, or heart – and attach to the back.
- Props: A toy watering can, a rolled “map” of the neighborhood, or a pretend whistle.
Have each person introduce themselves with a made-up name like “The Plant Protector” or “Captain Crosswalk” for extra fun.
3. DIY Board Game Pieces
Turn your favorite family board game into a wearable theme without referencing brands. Think of pawns, tokens, and dice as shapes and colors, not products.
- Dice: Square cardboard box painted white with black paper dots, worn over a plain outfit.
- Tokens: Tunics or T-shirts in one bold color for each person, with a matching hat.
- Board: One family member can wear a grid made of fabric or poster board with colored squares.
Use tape or yarn to draw a path down the sidewalk and “move” your pieces as you trick-or-treat.
Cardboard Creations for Bigger Impact
Cardboard adds drama and structure without a big budget. With a little planning, you can build lightweight, comfortable pieces that survive the night.
4. Portable Storybook Doorway
Create a costume that looks like an open doorway into another world. One person wears the doorway; everyone else becomes a character from the world beyond.
- Cut a large rectangle of cardboard slightly wider than the wearer’s shoulders and taller than their torso.
- Cut an interior window to form the “door” and reinforce edges with tape.
- Paint simple details: doorknob, wood grain, and a glimpse of stars or trees inside.
- Attach elastic straps so it can be worn like a backpack on the front.
Other family members can dress as explorers, creatures, or travelers who have just stepped through, using basic clothes and improvised accessories.
5. Living City Skyline
Turn your group into a moving mini city. Each person becomes a different building or landmark.
- Cut rectangles of cardboard in various heights.
- Paint windows as simple squares or rectangles in rows.
- Secure the buildings to belts or suspenders so they sit comfortably over the hips.
- Add a headband with a cardboard moon, star, or small paper airplane for extra flair.
One child can dress as the moon guiding the city, wearing gray or silver clothing with a cardboard crescent attached to a headband.
6. Time Traveler’s Luggage Cart
For kids who love gadgets, design a rolling display of “time travel equipment” using a lightweight wagon or stroller.
- Cover the sides with cardboard panels decorated to look like suitcases and trunks.
- Glue on drawn “stickers” from pretend eras: dinosaur footprints, futuristic city logos, vintage stamps.
- Dress the child as a traveler with layered scarves, goggles, and a hand-drawn passport.
This option gives tired feet a place to rest while still feeling fully in character.
Family Themes that Avoid Overused Tropes
Group costumes do not have to copy famous movies or shows. Using broad ideas keeps your look current year after year and frees you from licensing or trend cycles.
7. Seasons on Parade
Assign each family member a season and build a simple color palette and a few key props.
- Spring: Pastel clothing, paper flowers pinned to a sweater, and a small watering can.
- Summer: Bright T-shirt, sun hat, cardboard sunglasses worn on a headband.
- Autumn: Orange and brown layers, felt leaves attached to a scarf.
- Winter: White or silver outfit, paper snowflakes dangling from a hat or umbrella.
Walk in order around the block, turning your route into a quick trip through the year.
8. Lost & Found Drawer
Everyone becomes an object you might fish out of a chaotic drawer: keys, crayons, notebooks, stray game pieces, or socks that lost their partner.
- Use large cardboard cutouts to create oversized versions of each item.
- Stick paper labels like “Important” or “Who put this here?” onto clothing.
- Carry a box or bag labeled “Lost & Found” filled with soft, unrelated props.
This theme works well for big families or friend groups, because you can keep adding objects without running out of ideas.
9. Traveling Circus of Talents
Instead of copying an actual circus, build a gentle, imaginative version focused on personal talents – juggling socks, telling jokes, drawing chalk art, or reading fortunes from homemade cards.
- Use vests, suspenders, and simple skirts or pants in red, navy, and gold tones.
- Create felt badges that describe each talent: “Balancing Expert,” “Bubble Artist,” “Kindness Coach.”
- Carry a small sign welcoming neighbors to your “traveling show” and offer a quick trick or riddle at each stop.
This concept gently shifts focus from appearance to what each child loves to do.
Makeup, Hair, and Accessories the Safe, Easy Way
Finishing touches make even simple costumes feel intentional. Keep them comfortable and age-appropriate so kids can enjoy the entire evening.
- Use skin-safe, washable products labeled specifically for face or body.
- Test a tiny patch on the inside of the wrist before applying to the face.
- Choose soft headbands over tight hats, and hair chalk or temporary color spray that rinses out easily.
- Swap real metal jewelry for felt or foam versions when possible.
When in doubt, lean on bold shapes rather than full-face coverage: a single star near the eye, a swirl on one cheek, or a trail of dots across the forehead.
Comfort and Safety Checklist for DIY Costumes
Homemade costumes are fun, but they still need to be safe for walking in the dark, climbing steps, and navigating crowded sidewalks. Use this checklist before heading out.
- Can the wearer see clearly in all directions?
- Are there any long pieces dragging on the ground that could cause tripping?
- Is the costume warm enough (or cool enough) for your local climate?
- Are reflective elements or glow sticks visible from front and back?
- Do accessories stay attached securely without sharp edges?
Take a short “test walk” indoors or on your sidewalk to catch problems early. Small adjustments with tape or safety pins can make a big difference.
Involve Kids in Every Step
When children help design and assemble their costumes, they feel more confident wearing them. Give them jobs matched to their age and abilities.
- Young kids can sort materials by color, stick on pre-cut shapes, or help name the character.
- Older kids and tweens can sketch ideas, trace patterns, and handle supervised hot-glue work.
- Teens may enjoy leading an entire build, documenting the process for a class project or social media.
Try to say “yes” to at least one bold idea from each child, even if it means mismatched socks or an unexpected color choice. Those touches often become your favorite part.
Storing, Repurposing, and Donating Costumes
Once the night is over, your work is not wasted. Thoughtful storage and creative reuse stretch your effort into future holidays and dress-up days.
- Disassemble large cardboard pieces so they lie flat and store in a labeled garment bag or box.
- Keep versatile items – capes, vests, hats – in a designated dress-up bin.
- Turn leftover felt and fabric scraps into patches, bookmarks, or doll accessories.
- Offer gently used, intact costumes to schools, community centers, or neighbors.
Taking a quick photo of each costume before you pack it away also creates a small visual history of your family’s creativity over the years.
DIY Halloween Costumes: Frequently Asked Questions
How early should I start planning a homemade costume?
For more detailed builds with cardboard structures or hand sewing, begin brainstorming ideas three to four weeks before Halloween. Simpler projects built mostly from clothing you already own can come together in the final week, especially if you stick to felt accents, face paint, and easy accessories.
What can I do if I run out of time?
Focus on a strong base outfit in a single color, then add two or three bold details that tell the story. A cardboard sign worn on a string, a themed hat, and simple face paint can turn basic clothes into a recognizable character in under an hour.
How do I keep costs down while still being creative?
Reuse as many neutral items as possible – leggings, long-sleeve shirts, and jackets in solid colors. Invest in a small stash of felt, safety pins, and elastic that you can adapt year after year, and rely on cardboard, paper, and fabric scraps for most decorative elements.
Are cardboard costumes safe for rainy or damp weather?
Cardboard can soften or warp if it gets wet, so keep structural pieces small and wearable close to the body. If your forecast looks damp, line the inside of cardboard with packing tape or clear contact paper and carry a lightweight umbrella to protect delicate sections.
What if my child changes their mind at the last minute?
Design flexible base pieces that can support more than one concept, such as a black outfit that could become a magician, bat, or night sky. Keep a small reserve of uncut felt and basic shapes ready so you can quickly swap symbols, accessories, or character names without rebuilding from scratch.