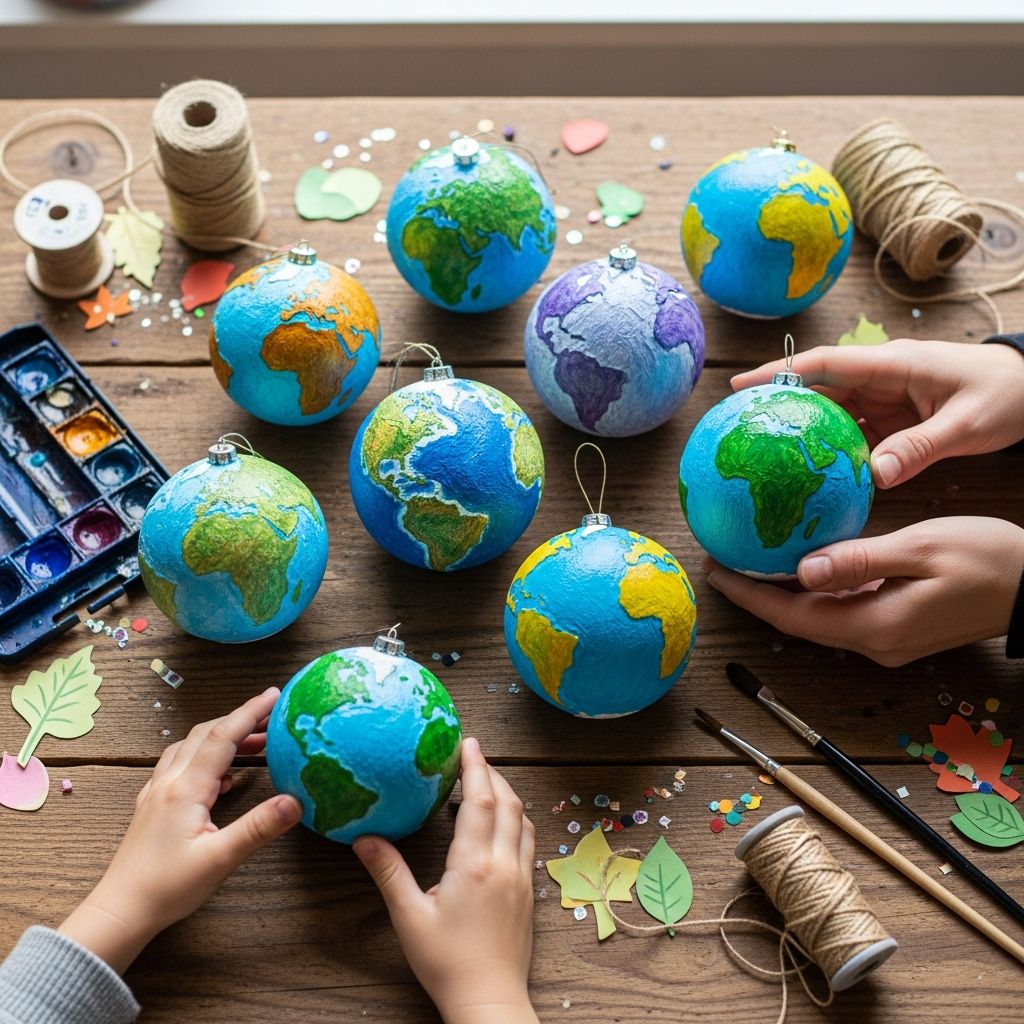
Globe ornaments are a simple, meaningful way to celebrate Earth Day, teach kids about our planet, and decorate your home or classroom with handmade art. Rather than copying any single tutorial, this guide offers a fresh approach to planning, crafting, and displaying globe ornaments inspired by earth-themed projects while remaining fully original in structure and explanation.
Why Globe Ornaments Make the Perfect Earth Day Craft
Earth Day activities often focus on big ideas like conservation and climate, but children connect best when those ideas are paired with something they can touch and create. A globe ornament turns abstract concepts into a tangible, hands-on project that invites questions about continents, oceans, and how to care for our shared home.
These ornaments also work across a wide age range: young kids can enjoy painting, older kids can refine details like land shapes, and adults can experiment with advanced finishes. The result is a collection of keepsakes that can be displayed year after year as a reminder to live more sustainably.
Planning Your Project: Goals, Age Group, and Time
Before gathering supplies, take a moment to decide what you want this project to achieve. Some families focus on creativity, others emphasize learning about geography, and classrooms may use the ornaments to spark conversations about stewardship.
Clarifying your goals helps you choose the right level of detail and the right materials. For example, preschoolers might use simple sponge-dabbed continents, while older children can reference a map and label oceans and countries with fine-tip pens.
Questions to Ask Before You Start
- How many ornaments do you want to make, and how much time do you have?
- Will you focus more on art skills, geography knowledge, or environmental themes?
- Do you need mostly mess-free supplies, or is some paint and water acceptable?
- Will you hang these in a permanent display, give them as gifts, or use them just for a single event?
Core Supplies and Optional Add-Ons
The heart of this project is a round surface that becomes your miniature Earth. The most common choice is a clear or solid-color plastic ornament, but paper and recycled materials can also work beautifully and align with Earth Day values.
The table below outlines a few popular base types with their pros and cons to help you decide what makes sense for your group.
| Ornament Base Type | Best For | Pros | Considerations |
|---|---|---|---|
| Clear plastic fillable ornament | Most families & classrooms | Durable, lightweight, can paint inside or outside | Usually purchased new; not always recycled material |
| Solid-color plastic ornament | Quick projects | Already colored; only add land and details | Less opportunity for see-through or swirling effects |
| Paper-mâché ball | Mess-friendly groups | Uses scrap paper; very eco-conscious | Requires drying time and stronger glue |
| Crumpled paper ball covered in tape | Low-cost crafts | Reuses paper, no special bases needed | Shape may not be perfectly round |
Basic Supply Checklist
- Round base (plastic ornament, paper-mâché ball, or other sphere)
- Acrylic or washable craft paint in blue, green, and white
- Small and medium paintbrushes or sponges
- Palette or disposable plate for mixing colors
- String, ribbon, or twine for hanging
- Protective table covering and aprons or old T-shirts
Optional Enhancements
- Metallic markers for labeling oceans or continents
- Fine-tip permanent marker for adding borders or dates
- Biodegradable glitter for a subtle shimmer
- Small paper tags to write Earth-friendly pledges
- Recycled tissue or shredded paper to fill clear ornaments
Step-by-Step Guide: Painting a Simple Globe Ornament
The following method is geared toward plastic ornaments, but the same basic approach works on most spherical surfaces. Feel free to adapt the steps to match your materials and your group’s age level.
1. Prepare Your Workspace
Start by covering your surface with newspaper, craft paper, or an old tablecloth, then set out small cups or jars of water for rinsing brushes. If your ornaments tend to roll, place them in egg cartons, bottle caps, or rolls of tape to keep them steady while painting.
This stage is a good moment to introduce the theme of the project. You can show a simple world map or globe, point out where you live, and explain that the colors blue and green will represent water and land.
2. Create the Ocean Background
Decide whether you want your oceans painted on the inside or outside of a clear ornament. Painting the inside gives a glossy finish and protects the color from scratches, while painting the outside makes touch-ups and layering easier.
Use a medium brush or sponge to cover the surface with blue paint. For added depth, lightly blend two shades of blue or dab on patches of white to mimic swirling clouds and ocean currents. Allow this base layer to dry thoroughly before adding any land areas.
3. Sketch or Block Out the Continents
For beginners or young children, it is enough to place irregular green shapes representing land without worrying about geographical accuracy. Older kids and adults can lightly sketch continent outlines with a pencil or marker before painting.
Instead of striving for perfection, encourage makers to think about the big picture: large clusters of land surrounded by water and how those shapes might wrap around a sphere. The goal is to build an impression of Earth rather than a strict map.
4. Paint the Land Areas
Using a smaller brush and green paint, fill in your sketched landmasses with gentle, dabbing motions. This prevents the blue base from lifting and also adds subtle texture that looks especially nice when the ornament catches light.
To suggest forests, deserts, or mountains, mix in tiny touches of darker green, brown, or white. Children often enjoy assigning stories to different color patches, such as imagining where animals live or where mountains might be.
5. Add Details and Accents
Once the paint is fully dry, it is time for optional details. You can use fine-tip markers or a very small brush to label oceans, add tiny heart icons, or outline major land shapes. This step works best for older children or adults who enjoy careful work.
If you like a touch of shine, apply minimal eco-friendly glitter or metallic dots around the globe to symbolize stars. Just be selective and use a small amount so the main focus stays on the planet itself.
6. Attach Hangers and Finishing Touches
Thread a piece of ribbon, string, or twine through the ornament’s top and tie a secure knot or bow. Natural fibers like jute or cotton twine emphasize the Earth theme, while satin ribbons provide a more polished look for gift-giving.
For an educational twist, tie a small paper tag to the hanging loop. On each tag, children can write a simple Earth-friendly promise such as “turn off lights when I leave a room” or “use a reusable bottle.” These tags make the ornaments both decorative and motivational.
Teaching Moments: Connecting Craft to Conservation
Globe ornaments are more than a decorative project; they offer a unique opportunity to link art with environmental awareness. While kids are painting, you can weave in short, age-appropriate conversations about why Earth Day exists and how small daily choices add up.
Try asking open-ended questions during the craft session instead of giving a lecture. This encourages children to think for themselves and share what they already know about nature, pollution, and protecting habitats.
Conversation Starters to Use While Crafting
- “What is your favorite place in nature, and where would it be on your globe?”
- “Why do you think there is more blue than green on Earth?”
- “What is one small thing we could do at home to help the planet?”
- “If everyone you know made the same promise that is on your ornament tag, what might change?”
Eco-Friendly Variations and Reuse Ideas
To reinforce the message of sustainability, consider adapting the project to feature reused or low-waste materials. Even small shifts, like repurposing packaging as paint palettes, can spark meaningful discussions about waste reduction.
Below are a few ways to transform the basic concept into greener or more customized projects without losing the charm of a hand-painted globe.
Ideas for Recycled and Low-Waste Versions
- Use paper-mâché made from old newspapers or scrap paper to form the spheres.
- Paint onto lightweight plastic balls or containers that would otherwise be discarded, such as smooth lids or packaging elements.
- Replace plastic glitter with paint splatters, metallic pencil lines, or tiny torn pieces of colored paper.
- Store leftover paint in small jars for future projects instead of rinsing everything down the sink.
Display Ideas for Home, School, and Events
Once finished, your globe ornaments deserve a display that highlights their message. Instead of packing them away immediately after Earth Day, keep them visible as year-round reminders to care for the environment.
Displays can also serve as conversation pieces for visitors, classmates, or community groups, especially when combined with written pledges or research notes about different ecosystems.
Creative Ways to Showcase Your Ornaments
- Hang them from a bare tree branch placed in a vase filled with stones or sand.
- String several ornaments along a piece of twine to create an “orbiting” garland near a window.
- Arrange them in a classroom corner dedicated to geography or science, alongside maps and books.
- Use them as centerpieces for an eco-themed party, pairing each with a small card explaining an Earth-friendly habit.
Safety and Age-Appropriate Modifications
As with any craft, safety and supervision matter. Small ornaments, removable tops, and certain paints may pose risks for very young children, so adjust materials accordingly and always keep potentially hazardous items out of reach.
Choosing non-toxic paints, avoiding loose glitter around toddlers, and pre-cutting tricky elements allows even the youngest crafters to participate safely and successfully.
Tips for Different Age Groups
- Preschool (with close supervision): Let them dab blue and green with large sponges on an already-primed sphere. Skip tiny details and small parts.
- Elementary: Introduce simple continent shapes, talk about oceans and landforms, and allow them to write short words like “Earth” or “home.”
- Teens and adults: Experiment with layered painting techniques, labeled continents, and more advanced color blending or shading.
Frequently Asked Questions (FAQs)
Do I need artistic skill to make these ornaments look good?
No advanced art skills are required. The goal is to capture the feel of our planet with general land and water shapes, not to create a perfectly accurate map. Emphasize the symbolism and the learning experience rather than precision.
How long does this craft take from start to finish?
Expect about 60–90 minutes for painting and basic details, not counting drying time between layers. If you are crafting with a large group, you may want to split the project into two shorter sessions so children do not feel rushed.
Can I adapt this for a classroom without making a big mess?
Yes. Use washable paints, smaller amounts of water, and individual trays or plates for each student. You can also pre-paint the blue background and let students focus only on adding land, labels, and pledge tags to reduce both time and mess.
What can I do if I do not have plastic ornaments or spheres?
You can roll balls of newspaper covered with masking tape, form paper-mâché over balloons, or use lightweight balls from a dollar store. Almost any round form can be turned into a globe as long as it is sturdy enough to handle paint.
Are these ornaments only for Earth Day?
Not at all. They work well for science units, geography lessons, holiday trees decorated with travel themes, or as thoughtful gifts for nature lovers and teachers. Displaying them year-round keeps the spirit of Earth Day alive in your everyday space.
Final Thoughts
Crafting globe ornaments offers a rare combination of creativity, learning, and meaning. With simple supplies and a bit of imagination, families and classrooms can turn a basic sphere into a tiny tribute to our shared planet and a reminder to protect it in small, everyday ways.