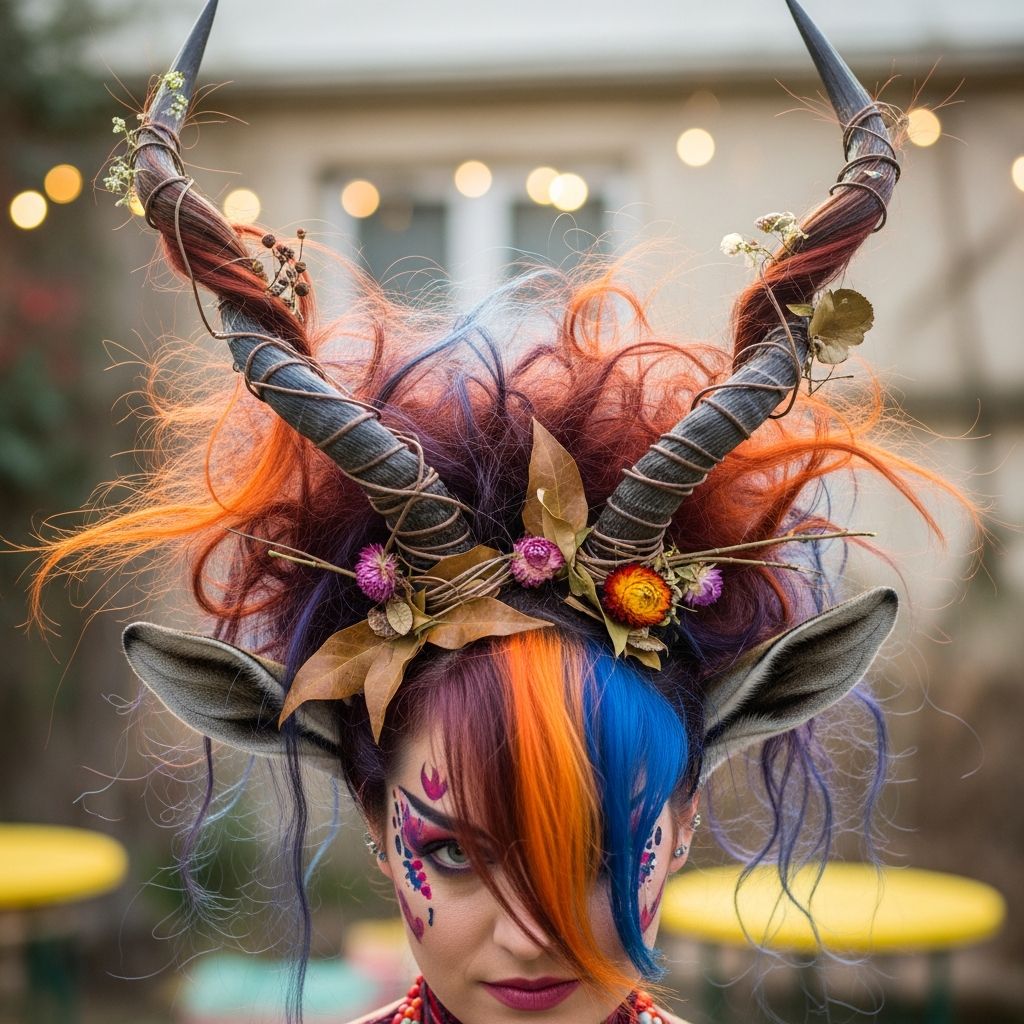
If you want a costume that stands out without sewing, a gazelle horns and crazy hair look is a playful, high-impact option that you can build from simple crafting supplies at home.
Why a Gazelle Costume Works So Well
A gazelle costume is perfect for school spirit days, book weeks, Halloween, and dress-up play because it focuses on dramatic horns and expressive hair instead of a full, complicated outfit. The result looks elaborate but is surprisingly fast to assemble.
Unlike many bulky animal costumes, gazelle horns are light, comfortable, and easy to wear all day, making them ideal for kids who need to move, run, and sit at desks without overheating.
Planning Your Look: Hair Day or Full Costume?
Before you start cutting and gluing, decide whether the horns will be the main event for a themed hair day, or part of a full animal outfit for Halloween or a party. This helps you pick colors and accessories that match the occasion.
For a school hair theme, focus on securing the horns directly into a dramatic hairstyle. For Halloween, you might add a neutral outfit, a tail, and simple makeup to complete the gazelle character.
Materials and Tools Checklist
Most of the items for this project can be found in your home, a basic craft bin, or a general discount store. There is no need for special equipment or advanced tools.
- Heavy paper or light cardstock in beige, tan, or brown
- Scrap paper for templates and testing shapes
- Scissors safe for the child’s age and skill level
- Clear tape or paper glue (quick-dry glue works best)
- Plain headband or a handful of sturdy hair clips or bobby pins
- Markers, crayons, or paint in browns, creams, and black
- Comb, hair elastics, and hair spray or styling gel
- Optional: light brown or gold face paint and a soft makeup brush
Lay everything out on a table before starting so the crafting session feels smooth and relaxed instead of rushed and scattered.
Designing the Perfect Gazelle Horns
Real gazelle horns are tall, slender, and slightly curved, often with gentle ridges running along their length. The goal is not realism but capturing that elegant, upward sweep in a playful, stylized way.
Think of the horns as two long, narrow cones that taper gradually, with dark tips and lighter bases. Keeping the shapes simple makes them stronger, easier to assemble, and more comfortable to wear.
Step-by-Step: Building the Horns
1. Create a Paper Template
Start by drawing a tall, curved triangle on scrap paper. The base should be wide enough to sit securely on the child’s head, while the sides should stretch long enough to create a horn that feels impressive but not heavy.
Cut out this first triangle and roll it loosely into a cone to test the height and width. Adjust the shape as needed until it looks balanced when held above the head.
2. Transfer and Cut the Final Horns
When you are happy with the test triangle, trace it twice onto your heavier paper or cardstock. Place both shapes side by side so the horns will match in size and curve.
Carefully cut out both shapes, keeping the edges smooth to make rolling easier later. Small wobbles will disappear once the cones are taped and decorated.
3. Form the Horn Cones
Gently roll each cut-out into a narrow cone, starting at the tip and working downwards. The goal is a tight, slim shape that narrows to a point and widens just enough at the bottom to sit sturdily on the headband or hair.
Once you are satisfied with the shape, secure the seam using clear tape or a thin line of glue from top to base. Allow any glue to dry fully before moving on.
4. Add Horn Details
Use markers, crayons, or paint to add shading and texture. Darken the tips of the horns and draw subtle curved lines or bands to suggest ridges, keeping the overall look soft and stylized rather than rigid and sharp.
Layering two or three tones of brown can make the horns look more dimensional without adding weight. Allow all color to dry before attaching them to hair accessories.
Attaching Horns to Hair or Headband
There are two main ways to wear the horns: directly clipped into the hair, or mounted on a headband. Choose the method that feels most comfortable and secure for your child.
For younger kids or wiggly wearers, a headband base usually stays put better and is easier to remove if the costume needs to come off quickly.
Method A: Using a Headband
- Place the headband on the child and use a mirror to decide where the horns should sit.
- Mark those spots lightly with a pencil or tiny piece of tape.
- Remove the headband and tape or glue the bases of the horns directly onto it, keeping them close together toward the top center.
- Reinforce the connection by wrapping a narrow strip of paper or tape around the horn base and band.
Method B: Using Clips or Bobby Pins
- Cut two small rectangles of sturdy paper and glue each one to the base of a horn to act as a flat tab.
- When dry, slide bobby pins or small clips over these tabs.
- Part the hair in the center front and insert the clips so the horns sit upright and symmetrical.
- Use extra pins to stabilize each horn if the hair is very smooth or fine.
Creating Wild Gazelle-Inspired Hair
Crazy Hair Day is all about height and surprise, and gazelle horns provide the perfect excuse to build a dramatic, sculpted hairstyle around them. Even simple techniques can make the look feel bold and imaginative.
Pick one main style so the horns remain the focus: either a high mohawk-style ridge, a bundle of mini buns, or a pair of big side poofs that frame the horns like a mane.
Simple Styling Ideas
- Sky-high ponytail: Create a very high ponytail just behind the horns, tease the hair, and spray for volume.
- Messy faux-hawk: Build several short ponytails down the center of the head, fluff them up, and pin the horns at the front.
- Mini “cloud” buns: Make multiple small buns around the horns, giving the impression of wind-blown tufts of fur.
Optional Makeup and Outfit Details
For school events, a tiny bit of face paint is usually enough: a soft line along the eyelids, a small dark spot at the tip of the nose, and perhaps a few subtle freckles across the cheeks. Always check school rules in advance and test any products on the skin the day before.
For Halloween or parties, combine the horns with neutral pants or leggings, a tan or cream top, and a simple felt tail to suggest the rest of the gazelle body without spending hours sewing.
| Event Type | Top & Bottom | Extras |
|---|---|---|
| School Crazy Hair Day | Regular clothes in neutral colors | Horns, wild hairstyle, very light face paint |
| Halloween Night | Brown leggings and tan long-sleeve shirt | Horns, tail, face paint, small fabric ears |
| Costume Party | Gold or cream top with dark pants | Horns, sparkly accessories, subtle animal makeup |
Keeping Everything Safe and Comfortable
Costumes for kids need to feel safe, light, and easy to remove. Avoid sharp points on the horn tips by gently rounding them with scissors, and double-check that no wire or hard edges are exposed.
Secure long hair and loose accessories so they will not block vision or snag on playground equipment. When in doubt, test the outfit by having the child jump, spin, and sit to make sure nothing pinches or falls.
Making the Costume Eco-Friendly
With a bit of planning, this gazelle costume can be almost entirely recyclable or reusable. Choose paper, cardboard, and cloth over plastic where possible, and save leftover horn templates in an envelope for future craft days.
When the horn headpiece has served its purpose, you can peel off any tape, flatten the paper, and place it in the recycling bin or keep it in a dress-up box for pretend play.
Fun Variations on Gazelle Horns
Once you have the basic cone technique mastered, it is easy to transform the project into many other horned animals. Changing the curve, size, and color of the cones creates an entirely new character.
- Shorten and widen the cones for a goat-like look.
- Make the horns twist gently and add gold paint for a fantasy creature.
- Create a second, smaller pair of horns behind the first to suggest a mythical hybrid animal.
Tips for Photographing the Finished Look
Costumes like this are all about height and silhouette, so take photos from slightly below eye level to emphasize the horns. Natural light near a window or outdoors will show off the colors and textures without harsh shadows.
Invite your little gazelle to leap, pose, and “run like the wind” during photos. Action shots often capture the joy of the costume far better than stiff, formal portraits.
Frequently Asked Questions
How long does this costume take to make?
Most families can complete the horns, hair styling, and basic outfit in about one to two hours, depending on how much decorating and face paint you choose to add.
Can this project work for very short hair?
Yes. Choose a secure headband or use clips attached to small paper tabs at the base of the horns. Short hair often holds bobby pins well, and you can add colored hair spray for extra flair.
What if my child has sensitive skin?
Skip face paint or choose products labeled for sensitive skin and test a small area at least a day in advance. Avoid tight elastic bands and opt for soft fabric headbands or well-padded clips.
Can adults use this tutorial too?
Absolutely. Simply scale up the template size and adjust the styling to suit your hair length and personal taste. Adults might enjoy pairing the horns with dressy neutral clothing for a subtle, stylish animal-inspired costume.
How can I store the horns for future use?
Keep the finished horns in a labeled box or plastic container so they are not crushed in a drawer. Storing them upright helps them hold their shape for the next party or hair-day theme.