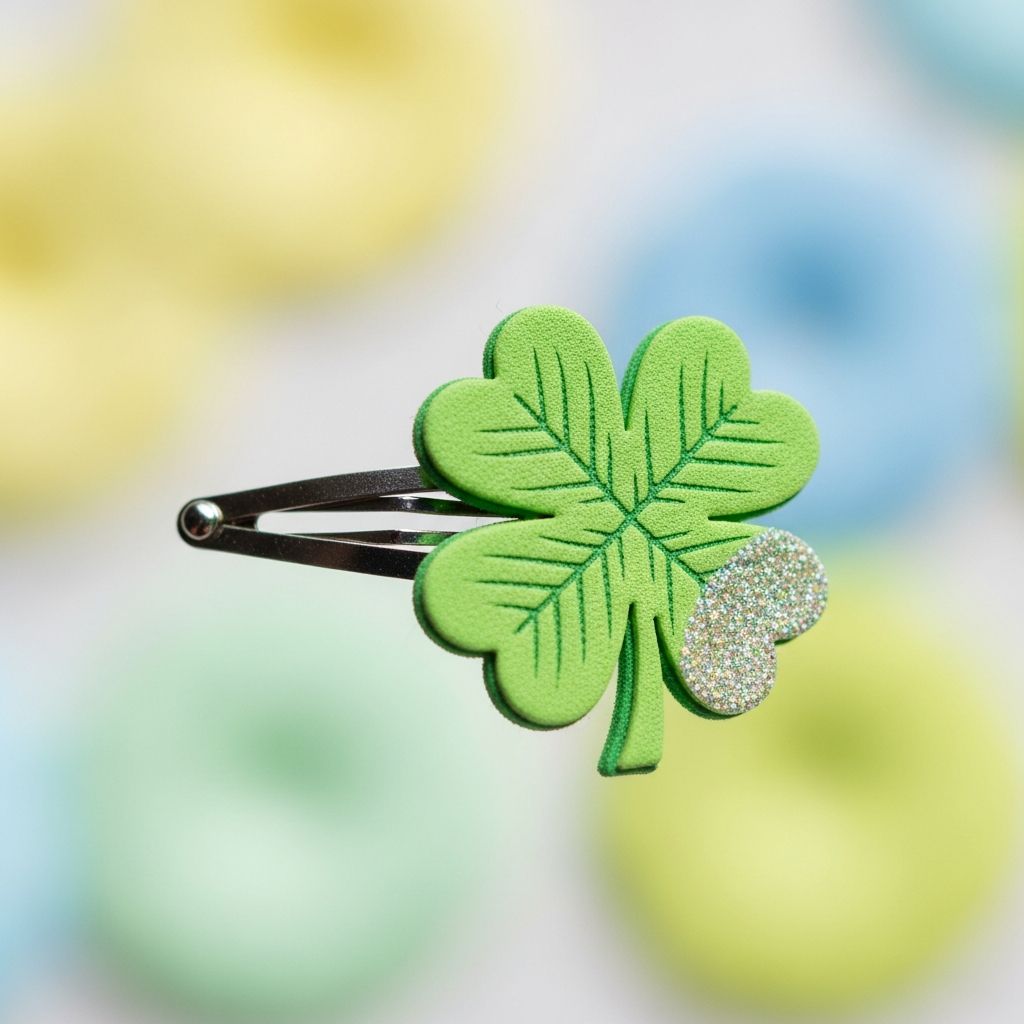
St. Patrick’s Day is the perfect excuse to add a little green, a little glitter, and a lot of imagination to your child’s outfit. Instead of buying another plastic accessory, transform an afternoon at home into a creative session by making a four-leaf clover hair clip from scratch.
This guide walks you through a completely original, easy-to-follow project that turns basic craft supplies into a charming, wearable symbol of luck. You will find step-by-step directions, design variations, styling ideas, and answers to common questions so that you can customize the accessory to match any style.
Why Make Your Own Clover Accessory?
Homemade accessories do more than complete a holiday outfit; they capture a memory. When kids help make what they wear, they feel ownership and pride, and the finished piece often becomes a keepsake rather than clutter. This four-leaf clover clip is simple enough for beginners yet flexible enough for experienced crafters to embellish and personalize.
Crafting also naturally encourages conversation about the traditions behind St. Patrick’s Day, the meaning of symbols like the clover, and the joy of giving. Your child can wear the accessory to school, a parade, or a family dinner, or even gift one to a friend or teacher.
Supplies You Will Need
Before starting, gather all materials in one place. Organizing everything up front keeps the project smooth and stress-free, especially when crafting with young children.
- Green felt or sturdy fabric (one or two shades for depth)
- Card stock or thick paper (for a clover template)
- Scissors (child-safe scissors for younger kids)
- Fabric glue or hot glue gun (adult use only for hot glue)
- Plain hair clip (alligator clip, barrette, or snap clip)
- Green ribbon (optional for wrapping the clip)
- Sequins, beads, or flat gems (for sparkle)
- Pencil or fabric chalk
- Scrap felt in a neutral color for backing (optional)
Feel free to substitute materials. Foam sheets, faux leather, or even layered paper can work if felt is not available, as long as the material retains its shape and does not fray excessively.
Understanding the Four-Leaf Clover Motif
Although three-leaf shamrocks are the traditional Irish symbol, four-leaf clovers are widely associated with good luck. Each leaf is often said to represent faith, hope, love, and luck—making it a fitting emblem for a cheerful holiday accessory. Sharing this story while crafting can deepen children’s appreciation for the symbol.
For this project, the four-leaf clover serves both as decoration and as a compact shape that sits comfortably on a hair clip without becoming too heavy or awkward to wear.
Step-by-Step: Creating the Clover Template
The template acts as the blueprint for your accessory. Making one first ensures consistent, symmetrical leaves, no matter how many clips you decide to create.
- Fold the card stock. Fold a small rectangle of card stock in half to help you draw a symmetrical heart shape.
- Draw a heart. On the fold, sketch half a heart about the size you want each clover leaf to be. When opened, this becomes one complete leaf.
- Cut out the heart. Carefully cut along the line and unfold to reveal a full heart.
- Trace four times. Place the heart on another piece of card stock and trace four hearts in a circle, with points meeting toward the center like a pinwheel.
- Refine the edges. Round or adjust any overlapping lines so that the outline reads clearly as a unified four-leaf clover, then cut it out. This is your reusable template.
Making the template from card stock instead of thin paper allows it to withstand repeated tracing, which is helpful if you are crafting with a group or planning gift sets.
Cutting and Layering the Fabric Clover
Once the template is ready, it is time to move to the felt or fabric. This is the step kids often enjoy most because they can see the clover shape appear in their hands.
- Trace the clover. Lay the template on the green felt and trace carefully with a pencil or fabric chalk.
- Cut the shape. Use sharp scissors for clean edges. For young children, an adult can cut the shape while the child holds the fabric steady.
- Create layers. For a fuller accessory, cut a second clover in a slightly different shade of green or in a slightly smaller size to layer on top.
- Glue the layers. Apply a thin layer of fabric glue between the clovers and press them together, offsetting the top layer slightly if you like a more dimensional look.
Layering is optional but gives the finished clip a more polished, boutique-style appearance. It also allows siblings or friends to choose different color combinations while following the same basic design.
Attaching the Clover to the Hair Clip
The connection between the clover and the clip determines how sturdy the accessory will be. Taking an extra minute at this stage helps the piece hold up through playtime, parades, and years of dress-up.
- Prepare the clip. If you are using ribbon, cut a piece long enough to wrap the top surface of the hair clip. Glue the ribbon in place so that it lies flat and smooth.
- Add a backing circle. Cut a small felt circle or oval slightly smaller than the clover. This will sit between the clover and the clip for added strength.
- Glue the backing. Attach the felt circle to the top of the clip with hot glue (adult only) or strong fabric glue, pressing firmly.
- Attach the clover. Apply glue to the back of the clover and press it onto the felt backing, making sure the clover is centered and the clip opens in the direction you prefer.
- Let it cure. Lay the clip flat and allow the glue to dry completely according to the product instructions before anyone wears it.
Using a small backing piece prevents the clip from pulling free from the clover if a child tugs on it or catches it on clothing or a backpack.
Decorating: Add Sparkle, Texture, and Personality
Once the basic structure is in place, the fun of customization begins. Encourage kids to treat the clover as a miniature canvas and decorate it to match their personality.
- Sequins and beads: Add a few sequins to the center or along one leaf for subtle sparkle without overwhelming the design.
- Stitching details: Older children or adults can use embroidery floss to outline the leaves or stitch a tiny vein pattern for extra texture.
- Glitter accents: Lightly brush glue on the tips of the leaves and sprinkle on fine glitter. Tap off the excess to keep it wearable.
- Button center: A small gold or wooden button in the middle of the clover can suggest the leprechaun’s pot of gold while hiding any glue marks.
Try to limit embellishments that add too much weight, especially for very young children. A balanced clip will stay more secure and feel more comfortable throughout the day.
Simple Variations for Different Ages
Every child has a different level of dexterity and patience. Adapting the project to suit your crafter’s age range makes the experience feel achievable rather than frustrating.
| Age Range | Suggested Role | Recommended Variation |
|---|---|---|
| Toddlers (2–3) | Helper | Adult prepares clip and clover; child chooses colors and places pre-cut sequins or stickers. |
| Preschool (4–5) | Co-creator | Child helps trace the template and press pieces together while adult handles the cutting and hot glue. |
| Early Elementary (6–8) | Primary crafter | Child cuts felt with supervision, glues layers, and designs decorations with minimal help. |
| Older Kids (9+) | Independent maker | Child handles the full project (except hot glue) and may add stitching, layered ribbons, or complex embellishments. |
This kind of flexible approach turns one project into a tradition that can grow with your family. Children can take on more responsibility each year as their skills develop.
How to Style the Clover Hair Clip
Once the accessory is finished, the styling possibilities are nearly endless. Even a simple hairstyle can feel festive with the right placement of a bright green clover.
- Side sweep: Clip the clover just above one ear to hold back a small section of hair for a classic, understated look.
- Ponytail highlight: Attach the clover near the base of a ponytail or bun so the leaves rest on top like a mini crown.
- Headband partner: Clip the clover to a plain elastic or fabric headband to create a larger statement piece.
- Hat accent: For chilly climates, clip the accessory to the brim of a beanie or the side of a cap instead of directly into the hair.
Because the clover is removable, kids can experiment with different placements without committing to a permanent change, which makes the craft ideal for school days, parties, and family photos alike.
Safety and Durability Tips for Families
When crafting for and with children, safety always comes first. A few simple precautions will keep the project fun and the finished accessory safe to wear.
- Use non-toxic glues and paints, and keep hot glue guns strictly in adult hands.
- Avoid very small, loose embellishments for toddlers, as they can pose a choking hazard if they detach.
- Press embellishments firmly into glue and allow generous drying time before letting kids handle the clip.
- Inspect the clip before each wear to ensure nothing has loosened.
To increase durability, store the accessory flat in a small box when not in use. This prevents bending and protects any delicate decorative elements from catching on other items.
Ways to Extend the Craft Into a Family Tradition
One handmade clip can quickly evolve into a seasonal tradition if you treat the craft as the beginning of a ritual rather than a one-time activity. Children often look forward to repeating creative projects yearly, especially when they are tied to a holiday.
- Host a “green accessories” afternoon: Invite cousins or neighbors to make their own clover clips, bow ties, or pins.
- Create a keepsake box: Store each year’s accessory in a labeled box so kids can look back and see how their skills and styles have grown.
- Give handmade gifts: Encourage kids to make an extra clover clip for a teacher, coach, or grandparent as a simple act of appreciation.
- Pair with a story time: After crafting, read age-appropriate books about Ireland, St. Patrick’s Day, or folktales about luck and kindness.
These small traditions build connection and meaning, transforming an inexpensive craft into a cherished shared experience.
Frequently Asked Questions
How long does it take to make one clip?
For a single accessory, active crafting time is usually around 20 to 30 minutes, plus additional drying time for glue. Younger children may take a little longer, especially if they like to experiment with decorations or take breaks between steps.
Can this project be adapted for classrooms or groups?
Yes. For large groups, it helps to pre-cut the clover shapes and backing circles in advance so that children can focus mainly on decorating and assembly. Use fabric glue instead of hot glue for safety, and label each child’s clip with masking tape until the glue dries to avoid mix-ups.
What if I do not have felt?
If felt is unavailable, you can use foam sheets, stiffened fabric, or even several layers of card stock glued together. The key is to choose a material thick enough to hold its shape but light enough not to weigh down the hair clip.
How can I make the accessory more gender-neutral?
Skip glitter and gems in favor of bold stitching, metallic buttons, or layered ribbon in darker greens, golds, or even plaid. The same clover can also be attached to a pin backing, key ring, or backpack tag instead of a hair clip.
Is this accessory reusable after the holiday?
Absolutely. While it is designed for St. Patrick’s Day, the simple clover shape works well for spring outfits, nature-themed dress-up, or any day when your child wants a little extra luck. With careful storage, the clip can often last through multiple seasons.
Bringing a Little Extra Luck to the Day
Handmade holiday pieces do not need to be elaborate to feel special. A simple four-leaf clover hair clip can become a small but meaningful symbol of creativity, tradition, and togetherness. Whether you craft one accessory or a whole collection, the real treasure is the time spent side by side, talking, laughing, and making something beautiful from everyday materials.
This St. Patrick’s Day, invite your kids to roll up their sleeves, choose their favorite shade of green, and build a lucky accessory they will be proud to wear—and just maybe, to pass along someday to someone else in need of a little extra luck.