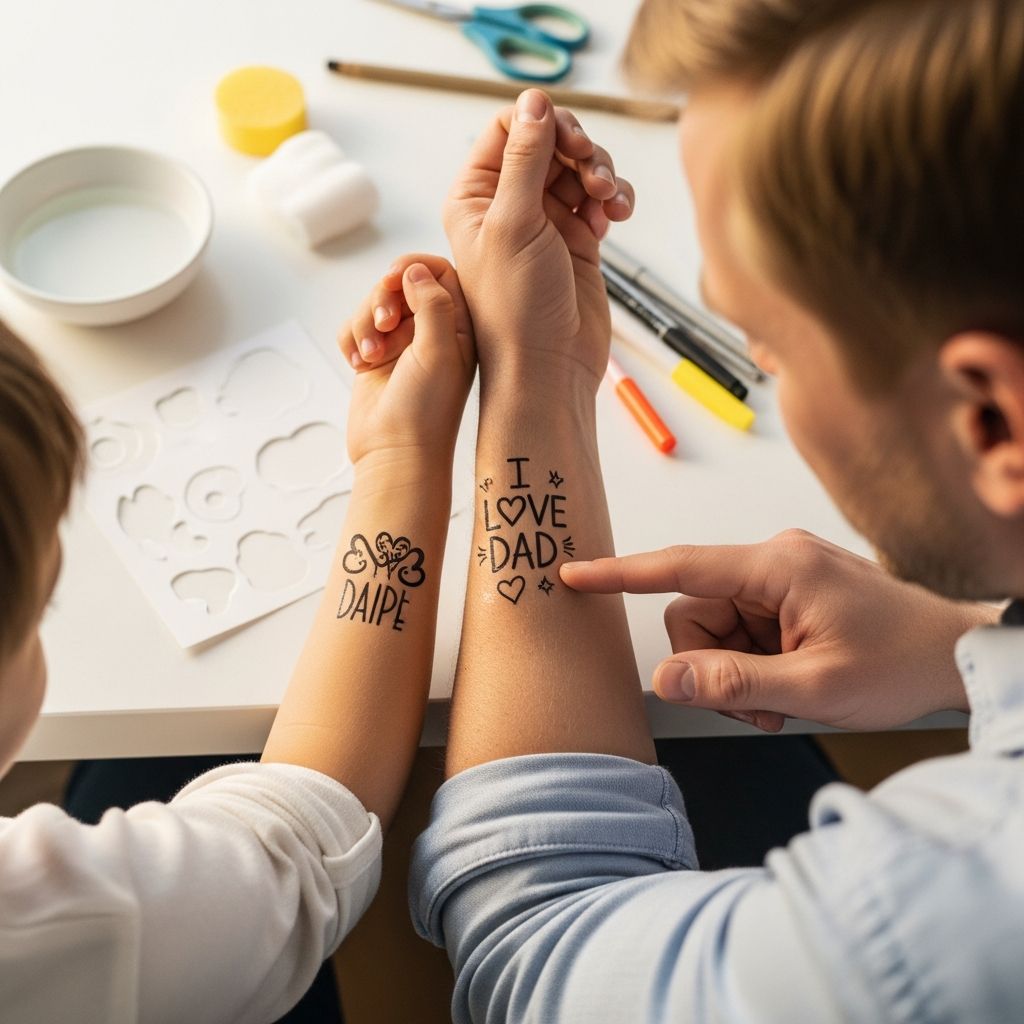
Father’s Day gifts feel extra special when they come from tiny hands and big imaginations. Temporary tattoos that say “I love Dad” (or anything else your family dreams up) are a fun, low-pressure way for kids to show affection and for dads to proudly wear their love on their skin—at least for a few days.
This guide walks you through designing and making your own Father’s Day temporary tattoos at home, using simple materials and an easy process that even young children can help with.
Why Temporary Tattoos Make a Fantastic Father’s Day Gift
Temporary tattoos are a playful alternative to traditional gifts like ties and mugs, and they invite dads to literally wear their heart (and their kids’ art) on their sleeves.
Because they wash off, even the most tattoo-skeptical parent can embrace the fun, making this project perfect for all kinds of families and comfort levels.
Planning Your Tattoo Project With Kids
A little planning helps turn this craft into a meaningful memory, not just a last-minute scramble. Involve the kids early so they can think about what they love most about Dad and how to show it visually.
Encourage them to brainstorm drawings, short messages, and symbols that feel personal, such as Dad’s favorite hobby, his silly catchphrase, or a shared inside joke.
Questions to Spark Kid Creativity
- “What is one thing Dad always does that makes you laugh?”
- “If Dad were a superhero, what would his logo look like?”
- “What pictures make you think of time with Dad—sports, snacks, bedtime stories?”
- “If you could write one short message on Dad’s arm, what would it say?”
Supplies You’ll Need
Creating professional-looking DIY temporary tattoos at home is surprisingly achievable with just a handful of materials, many of which you may already own.
Look for temporary tattoo paper specifically designed for inkjet or laser printers, and always follow the instructions that come with your particular brand.
| Item | Purpose | Notes |
|---|---|---|
| Temporary tattoo paper | Holds and transfers the design to skin | Choose inkjet or laser-compatible paper to match your printer. |
| Home printer | Prints the designs onto tattoo paper | Inkjet printers are commonly recommended for DIY tattoos. |
| Plain paper | Test prints and layout checks | Helps avoid wasting tattoo paper on mistakes. |
| Scissors | Cuts out individual tattoos | Smaller scissors help with detailed shapes. |
| Drawing tools or design software | Creates the artwork and text | Markers, crayons, or digital drawing tools all work well. |
| Soft cloth or sponge | Helps apply tattoos with water | Use clean, lukewarm water for best results. |
Designing Heartfelt “I Love Dad” Tattoos
Great designs for Father’s Day tattoos are simple, bold, and easy to recognize at a glance, especially on small areas of skin. Kids’ drawings are ideal because their lines are naturally expressive and full of personality.
When adding text like “I love Dad,” keep letters thick and clear, and avoid very tiny fonts that might blur when transferred.
Kid-Friendly Design Ideas
- Mini portraits of Dad with his favorite hat, glasses, or hairstyle.
- Symbols of shared activities, such as a soccer ball, book, guitar, or toolbox.
- Short phrases like “World’s Best Dad,” “Dad = Hero,” or “Snack Time Sidekick.”
- Matching designs kids and Dad can wear together, such as puzzle pieces or superhero emblems.
Analog vs. Digital Artwork
Families can start with hand-drawn images on white paper, then scan or photograph them for printing, or design directly in a simple graphic program if older kids prefer working digitally.
Whichever method you choose, keep backgrounds clean and high-contrast to ensure the final tattoo looks crisp and vibrant on skin.
Step-by-Step: From Sketch to Skin
The process for making DIY temporary tattoos follows a logical sequence: create the art, prepare the digital layout, print on specialized paper, and finally apply the tattoos on Father’s Day.
Breaking the project into phases makes it easier for younger children to participate without feeling rushed or overwhelmed.
1. Create and Capture the Artwork
- Have kids draw their designs on unlined white paper with bold markers or crayons.
- Scan the finished drawings or take clear, well-lit photos against a flat background.
- Crop each drawing to remove extra space and keep only what will become the tattoo.
2. Arrange Your Tattoo Sheet
Open a word processor or simple design program and insert each cropped image onto a single page, resizing as needed for wrists, forearms, or hands.
Fill the page with as many designs as you can reasonably fit, leaving enough room between each one for cutting them out individually.
3. Check Orientation and Mirroring
Any design that includes words, such as “I love Dad,” should be mirrored before printing, so the text appears correctly when transferred onto skin.
Many basic image editors include a “flip horizontal” tool; use this on each text-based image or on the entire page, depending on your workflow.
4. Test Print on Regular Paper
- Print a copy of your layout on plain paper to confirm size, spacing, and orientation.
- Hold the test sheet against arms or hands to make sure designs are not too big or too small.
- Make any necessary adjustments before moving on to the tattoo paper.
5. Print on Temporary Tattoo Paper
Load the tattoo paper according to the manufacturer’s instructions, paying attention to which side should receive the ink.
Use a high-quality print setting so lines and colors transfer clearly, and allow the sheet to dry completely before handling.
6. Cut and Store the Tattoos
- Cut around each design, trimming close to the artwork to minimize clear edges.
- Store finished tattoos in a cool, dry place, away from direct sunlight, until Father’s Day.
- Consider bundling them in a small envelope or gift box so kids can “present” the collection to Dad.
7. Apply the Tattoos on Father’s Day
On the big day, choose a clean, dry area of skin, remove any protective backing from the tattoo, and place the design ink-side down.
Press a damp cloth or sponge against the paper for the recommended time, then gently peel back the paper to reveal the finished tattoo, letting kids admire their work on Dad’s arm.
Safety, Skin Comfort, and Clean-Up
Most commercial tattoo papers are designed for temporary skin contact, but it is wise to read all packaging, follow directions exactly, and perform a small patch test on Dad or an adult before using them widely on children.
Avoid applying tattoos to broken, irritated, or very sensitive skin, and gently remove them with baby oil or mild soap and water when the fun is over.
Quick Safety Checklist
- Check that the paper is specifically labeled for cosmetic or skin use.
- Patch test on a small area 24 hours in advance if anyone has sensitive skin.
- Keep scissors and any heating tools or appliances out of young children’s reach.
- Supervise kids during application to prevent tattoos from getting too close to eyes or mouth.
Fun Ways to Present the Tattoos to Dad
How the tattoos are gifted can be as delightful as the designs themselves, turning a simple sheet of transfers into a memorable Father’s Day ritual.
You can stage a mini “tattoo parlor” at home or create a booklet of tattoos that Dad can choose from over the weekend.
Presentation Ideas Kids Will Love
- Set up a “Dad Tattoo Station” sign and let kids take turns being pretend tattoo artists.
- Organize designs into themed sets, such as “Superhero Dad,” “Chef Dad,” or “Coach Dad.”
- Include a handwritten “menu” of designs with short explanations from each child.
- Capture photos of Dad showing off each tattoo for a future scrapbook or digital album.
Variations and Creative Twists
Once you master the basic method, DIY temporary tattoos can become a go-to project for birthdays, holidays, and family celebrations beyond Father’s Day.
The same technique can be adapted for matching family tattoos at reunions, party favors at kids’ events, or holiday-specific designs like hearts, pumpkins, or snowflakes.
Ideas Beyond Father’s Day
- Grandparent appreciation tattoos featuring “Best Grandpa” or “Grandma Rocks.”
- Birthday party designs matching the theme, like dinosaurs, space, or fairy tales.
- First-day-of-school confidence tattoos with encouraging words or mascots.
- Team spirit tattoos for game days, showing off school colors or logos.
Simple FAQ About DIY Father’s Day Tattoos
How long do homemade temporary tattoos usually last?
Most DIY tattoos made with quality paper last a few days, depending on how often the area is washed, rubbed, or exposed to lotions and sunscreen.
Areas with less friction, such as upper arms or shoulders, tend to keep the tattoo visible longer than hands or wrists.
Are DIY tattoos safe for young children?
Temporary tattoos made with skin-safe materials are generally suitable for children when used as directed, but families should always check labels and consider any known skin sensitivities.
If in doubt, test the tattoo on an adult first and avoid very young children or those with allergies whenever there is uncertainty.
What if we don’t have a printer?
Families without home printers can often use a local print shop that supports custom printing on specialty papers, provided the staff are willing to handle tattoo paper.
As an alternative, kids can still enjoy the concept by drawing directly on Dad’s arm with washable markers approved for skin, treating it as a one-day “tattoo.”
Can we make black-and-white tattoos instead of color?
Black-and-white designs work very well for temporary tattoos and can even appear more graphic and bold than colored images, especially for line art and simple icons.
High-contrast black lines are easy for kids to draw and usually transfer clearly on most skin tones.
How do we remove the tattoos without irritating skin?
Gentle removal typically involves rubbing the tattoo with a cotton pad soaked in baby oil, makeup remover, or mild soap and warm water until the design loosens and washes away.
Avoid harsh scrubbing; patience and a soft touch reduce redness and keep the experience pleasant for both kids and adults.
Making Father’s Day Memories That Stick (For a While)
DIY “I Love Dad” temporary tattoos invite kids to celebrate their father with creativity, humor, and heartfelt messages that literally cling to him throughout the day.
Long after the ink has washed away, the memory of laughing around the kitchen table, designing silly and sweet tattoos together, is what truly lasts—and that is the real gift of this simple project.