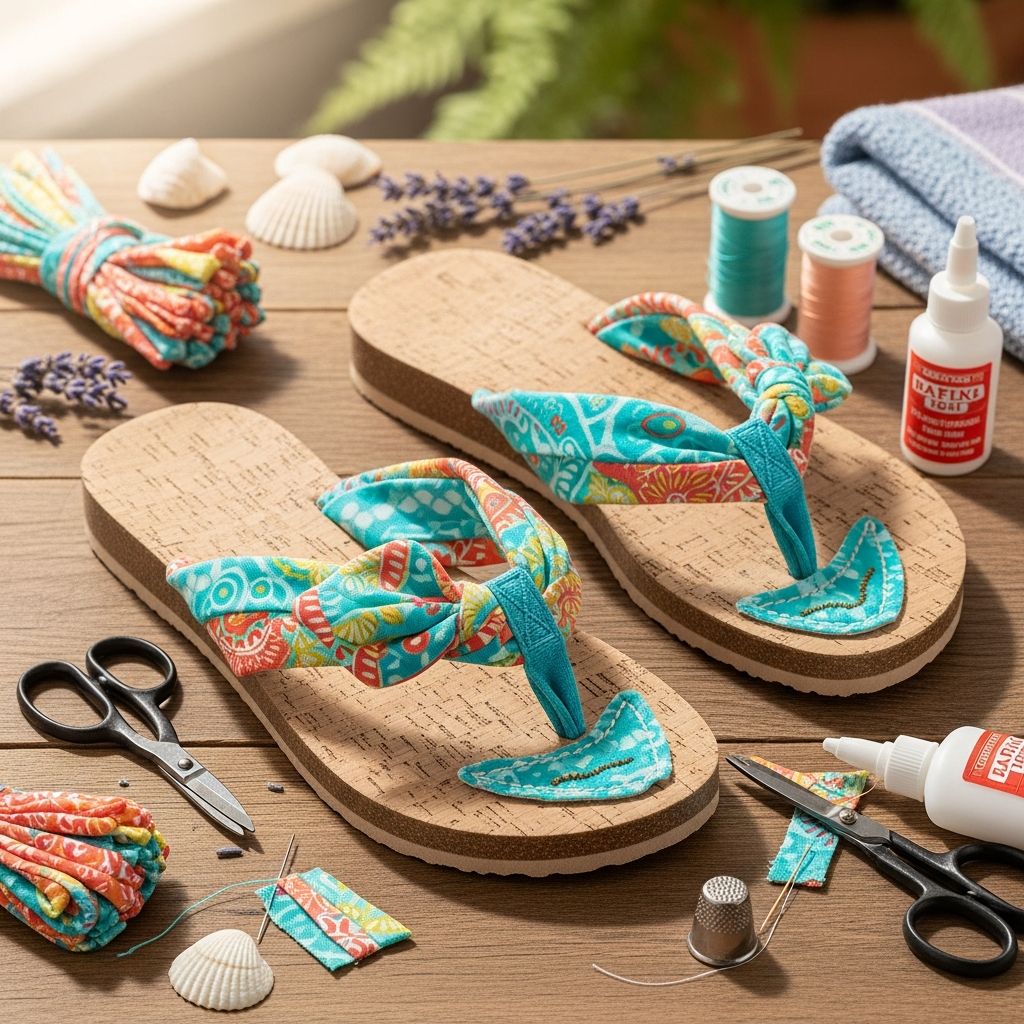
Plain rubber flip-flops are inexpensive and practical, but they rarely feel special. With a few strips of fabric and a little creativity, you can turn them into colorful, custom sandals that perfectly match your style, your kid’s favorite colors, or even a party theme.
This guide walks you through everything you need to know: from choosing the right flip-flops and fabric to decorating, styling, and caring for your finished pair. Whether you are crafting with kids, preparing for a beach vacation, or planning a summer party activity, these DIY fabric flip-flops are a fun and budget-friendly project.
Why Fabric Flip-Flops Make the Perfect Summer Craft
Decorating flip-flops with fabric is simple enough for beginners yet flexible enough for experienced crafters to experiment with patterns, textures, and embellishments. It is a low-risk, low-cost project with big visual impact, making it ideal for groups, camps, and lazy afternoons at home.
Unlike paint or heavy embellishments, fabric is soft and lightweight, so it adds comfort and style without weighing down your sandals. The project also uses small pieces of fabric, which makes it a great way to use up leftover scraps from other sewing or craft projects.
Materials and Tools You Will Need
Before you begin, gather a small collection of supplies. Most of these can be found at discount stores, craft shops, or in your own stash of extra fabric and ribbons.
- 1 pair of basic flip-flops (foam or rubber base)
- Cotton fabric, quilting cotton, or light canvas (scraps or fat quarters work well)
- Sharp scissors or rotary cutter
- Measuring tape or ruler
- Fabric glue or hot glue gun (optional, for extra security)
- Fabric marker or chalk (optional for measuring strips)
- Needle and thread (optional for hand-finishing details)
You can adapt the list to match your specific design. For example, add ribbons, lace, or small fabric flowers if you want a more decorative look, or keep things minimal with just one fabric pattern for a clean, modern style.
Choosing the Best Flip-Flops and Fabric
Not all flip-flops and fabrics behave the same way. A little attention at the selection stage will make the crafting process smoother and the final result more comfortable and durable.
How to Select Flip-Flops
- Base material: Soft foam or rubber feels gentler on the feet and allows knots and glue to grip more securely.
- Strap width: Wider straps give you more space to wrap or tie fabric, while thinner straps suit narrow ribbons or braids.
- Size and fit: Always start with a pair that fits comfortably before decorating. Fabric will not fix poor sizing.
- Color: Neutral bases (white, black, tan) work with any fabric, while bright soles can be coordinated for a bold, monochrome look.
Best Fabrics for This Project
Choose fabrics that are flexible, soft against the skin, and not too thick. Medium-weight cottons are convenient because they cut easily and tie into secure knots without bulk.
- Quilting cottons for crisp edges and clean prints
- Lightweight denim or chambray for a casual, beachy feel
- Rayon blends for softer, drapier knots and fringe
- Old shirts, pillowcases, or skirts as eco-friendly upcycling material
Design Styles for Fabric Flip-Flops
There is no single right way to decorate flip-flops with fabric. Below are a few popular approaches you can mix, match, and customize.
| Style | Look | Best For |
|---|---|---|
| Knotted fringe straps | Rows of short fabric strips tied along the straps, creating a fluffy, textured effect. | Kids, parties, bright summer prints. |
| Wrapped straps | Smooth strips spiraled around each strap for a sleek, continuous band of color. | Adults, minimalist styles, coordinated outfits. |
| Braided fabric straps | Three or more strips braided together and attached to the sole as replacement straps. | Intermediate crafters, boho or beachy looks. |
| Accent knots and bows | Mostly plain straps with a single bow, rosette, or knot near the toes. | Quick gifts, subtle customization, matching bridesmaid or party sets. |
Step-by-Step: Simple Knotted Fabric Flip-Flops
This straightforward method uses small fabric strips tied directly onto the existing straps, creating a playful, full fringe effect. It is a great starting project, especially for children or groups.
Step 1: Prepare the Fabric Strips
- Cut fabric into strips about 1–1.5 cm wide and 15–20 cm long.
- Use at least two coordinating prints for more visual interest, or stick to a single color for a classic look.
- Plan on cutting a generous pile; you can always trim away extra later.
Step 2: Test the First Knot
- Take one strip, fold it roughly in half, and tie it tightly around the flip-flop strap using a double knot.
- Slide it into place and tug on the ends to make sure it will not slip off.
- Adjust the length and width of the strip if it feels too bulky or too short.
Step 3: Fill the Strap with Knots
- Continue adding strips along the strap, pushing them close together as you go.
- Alternate colors or prints in a pattern (for example, blue–floral–white) or place them randomly for a more spontaneous effect.
- Stop periodically and hold the flip-flop up to check fullness; you can make it slightly sparse for a delicate look or very dense for dramatic volume.
Step 4: Trim and Finish
- Once both straps are fully covered, gently fluff the strips with your fingers.
- Trim any uneven or overly long pieces so the fringe does not drag on the ground or tickle between the toes.
- If desired, add a small dot of fabric or hot glue to the underside of a few knots for extra security, being careful not to get glue on the top of the footbed.
Step-by-Step: Sleek Wrapped Fabric Straps
If you prefer a smoother, slightly more polished appearance, wrapping the straps with longer strips of fabric is an excellent alternative. This method works especially well with adult sizes or neutral, sophisticated fabric prints.
Step 1: Create Long Fabric Strips
- Cut one or two long strips of fabric, each about 3–4 cm wide and long enough to wrap from one side of the flip-flop, across the top, and down the other side with overlap.
- If your fabric is not long enough, sew or knot two pieces together at the center, positioning the join where it will be hidden under the foot.
Step 2: Start at the Base of the Strap
- Secure one end of the strip at the base of the strap, near where it meets the sole, using a small knot or a dab of glue on the underside.
- Begin wrapping the fabric tightly around the strap, overlapping slightly with each turn.
Step 3: Wrap to the Toe Post and Back
- Continue wrapping toward the toe post, keeping the fabric flat and smooth.
- When you reach the center, either cross over and move down the opposite side, or cut and start a second strip for the other strap.
- Tuck the final end under the last few wraps and secure it with a small amount of glue or a few hand stitches.
Extra Embellishments and Creative Variations
Once you have mastered basic knots and wraps, you can enhance your flip-flops with decorative elements. These details make each pair unique and allow you to tailor sandals to specific events or personalities.
- Fabric flowers: Roll long, thin strips into spirals and hand-stitch or glue them at the center of each strap for a floral accent.
- Bows and tails: Tie a large bow at the point where the straps meet between the toes for a playful, gift-like look.
- Lace layers: Combine cotton fabric with lace trim to create a soft, romantic style suitable for garden parties or bridesmaid gifts.
- Beads and charms: Thread beads onto narrow fabric or ribbon and secure them in place along wrapped straps, taking care to position them where they will not rub the skin.
Making Fabric Flip-Flops with Kids
Fabric-decorated flip-flops are a hit with children because they offer instant gratification and a clear before-and-after transformation. Kids love choosing their own colors and patterns, and the repetitive tying or wrapping can even be soothing.
For group settings like birthday parties, summer camps, or youth groups, pre-cut the fabric strips in advance and sort them into containers by color or pattern. This keeps the activity organized and ensures everyone has enough material to complete a pair.
Safety and Age Tips
- Use child-safe scissors and supervise cutting for younger kids.
- Reserve hot glue guns for adults or older teens; younger children can simply tie knots without glue.
- Encourage kids to stop and try on their flip-flops during the process to check comfort and strap fit.
Care, Cleaning, and Longevity
Fabric flip-flops are sturdy enough for regular summer wear, but they do require a bit more care than plain rubber sandals. Keeping them clean and dry will help your handmade creation last longer and look better over time.
- Spot cleaning: Use a damp cloth with mild soap to gently clean the fabric areas. Avoid soaking the entire shoe.
- Drying: Always air-dry your flip-flops out of direct sun to minimize fading or warping of the sole.
- Storage: Store them in a cool, dry place. If you have several pairs, hang them by clothespins or place them in a labeled box.
- Reinforcement: If you notice any loosening knots or lifted wraps, secure them with a few stitches or a tiny amount of fabric glue.
Fun Themes and Gift Ideas
Once you start making fabric flip-flops, it is hard to stop at one pair. Because they are so customizable, they make excellent, thoughtful gifts and coordinated accessories for special occasions.
- Beach vacation bundles: Create matching flip-flops for family members using different color schemes from the same fabric collection.
- Party favors: Provide plain sandals and pre-cut strips in several palettes (tropical, pastel, neon) and let guests decorate their own pair.
- Bridal or spa nights: Make soft, pastel pairs as part of a home spa kit with lotion, nail polish, and a cozy robe.
- Team spirit: Use school or team colors and gift them to sports teams, cheer squads, or club groups.
Frequently Asked Questions
Do the fabric knots come undone easily?
When tied firmly with double knots, fabric strips hold surprisingly well in everyday wear. If you want extra peace of mind, add a tiny bit of fabric glue on the underside of a few key knots after you are happy with the placement.
Can I wash my fabric flip-flops in the washing machine?
Machine washing is not recommended because the twisting and spinning can loosen knots and warp the sole. Instead, gently wipe the straps and footbed with a damp cloth and mild detergent, and allow them to air-dry completely.
What if the straps feel too tight after adding fabric?
If the straps feel snug, try trimming some of the fringe to reduce bulk or concentrate knots slightly farther from the area that presses across the top of your foot. For wrapped styles, you can unwrap and rewrap with less overlap to create a bit more room.
Are there no-sew, no-glue options?
Yes. The simplest version is made entirely from tightly tied fabric strips with no sewing and no adhesive. As long as the knots are secure and the fabric is not too slippery, the design will stay intact for regular, light use.
How long does it take to make a pair?
Time depends on the design and your experience, but most people can complete a basic knotted or wrapped pair in about 30–60 minutes. Group projects may take a bit longer because of shared tools and decision-making about colors.
DIY fabric flip-flops combine creativity, comfort, and practicality in one simple project. With a bit of imagination, a handful of fabric scraps, and an ordinary pair of sandals, you can create footwear that feels uniquely yours and turns every step into a small expression of personal style.