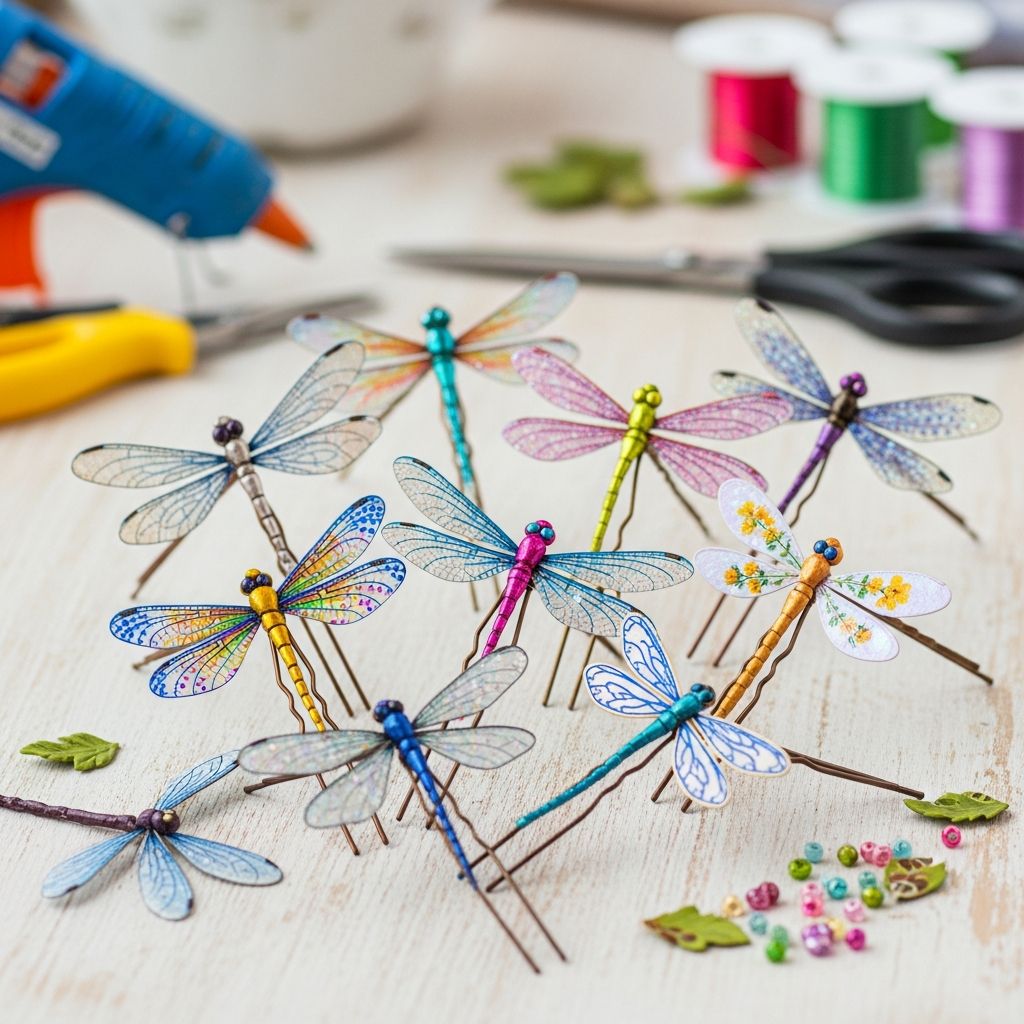
Dragonfly hairpins are a charming way to add sparkle, texture, and a touch of nature to everyday hairstyles without spending a fortune on boutique accessories.
Why Dragonfly Hairpins Are Worth Making
Designing your own dragonfly hairpins lets you customize colors, shapes, and finishes to match outfits, seasons, or special events. They are quick to assemble, budget-friendly, and accessible even to beginners with no prior crafting experience.
Because the basic structure relies on common items like simple hairpins, beads, and small decorative elements, this project is perfect for family craft days, party favors, or thoughtful handmade gifts.
Essential Materials and Tools
Before starting, gather all necessary materials in one place so you can assemble your dragonfly hairpins efficiently and safely.
Core Materials
- Standard bobby pins or small hair clips (preferably with a flat surface on one side).
- Small feathers, fabric scraps, or ribbon to create wings.
- Pony beads or medium-sized round beads for the head.
- Small flat-backed gems, craft pearls, or seed beads for the tail and decorative details.
- Embroidery floss, thin cord, or narrow ribbon to wrap the hairpin body.
Adhesives and Tools
- Hot glue gun and glue sticks, or strong craft adhesive.
- Sharp scissors dedicated to craft use.
- Fine-tipped tweezers for placing tiny embellishments.
- Optional: clear-drying craft sealant or nail polish for added durability.
Optional Decorative Elements
- Glitter glue or metallic paint pens for accents.
- Micro-sequins or tiny star-shaped confetti.
- Metal charms or tiny bells for a subtle jingle.
Planning Your Dragonfly Design
Spending a few minutes planning your design will help you create a balanced, attractive dragonfly that looks intentional rather than accidental.
Choosing a Color Palette
- Soft and dreamy: Pastels like mint, lilac, and blush combined with pearl accents.
- Bold and vibrant: Jewel tones such as emerald, sapphire, and fuchsia with metallic beads.
- Nature-inspired: Greens, browns, and bronzes that mimic real dragonflies.
- Monochrome chic: A single color family (all blues, all reds) in varied textures for a modern look.
Balancing Size and Proportion
The dragonfly shape looks most appealing when the wings and body are in proportion.
- Keep the wings slightly longer than the bead body for a graceful silhouette.
- Use one larger bead for the head and several smaller beads or gems for the abdomen to suggest a tapered tail.
- Avoid oversized wings on very small hairpins, which can make the accessory flop or twist out of place.
Quick Reference Design Table
| Style Goal | Recommended Colors | Wing Material | Ideal Occasion |
|---|---|---|---|
| Everyday casual | Muted blues, grays, soft greens | Short feathers or matte ribbon | School, work, errands |
| Party sparkle | Gold, silver, hot pink, teal | Glittery fabric or shiny feathers | Birthdays, celebrations |
| Nature theme | Olive, brown, copper, deep green | Natural-colored feathers or burlap-style ribbon | Outdoor events, picnics |
| Formal elegance | Ivory, navy, black, antique gold | Sheer organza or satin ribbon | Weddings, recitals, dinners |
Step-by-Step: Building the Dragonfly Body
The body is the structural base of your hairpin, so take your time wrapping and securing it before adding decorative elements.
Wrapping the Hairpin
- Secure one end of your embroidery floss or thin ribbon to the base of the pin with a tiny dot of adhesive.
- Hold the free end against the pin and begin wrapping tightly toward the outer tip, covering the metal evenly.
- Pause occasionally to press the wraps together so no metal shows through.
- When you reach your desired length, add another small dot of adhesive and trim the excess thread.
- Allow the adhesive to dry for a moment before handling further.
Adding the Dragonfly Head
- Select a bead slightly wider than the wrapped portion of the pin to serve as the head.
- Place a small amount of glue either inside the bead opening or on the wrapped section where the head will sit.
- Slide or press the bead into position at the front of the wrapped area, aligning it so it points in the same direction as the hairpin opening.
- Hold it gently until the adhesive begins to set and the bead no longer wobbles.
At this stage, your project should resemble a simple, decorated hairpin with a single bead at one end. The wings and details will transform it into a recognizable dragonfly.
Creating and Attaching the Wings
The wings are the most eye-catching part of the dragonfly, so think about symmetry and direction as you place them.
Preparing Feather or Fabric Wings
- If using feathers, choose four that are similar in size and shape. Trim the quills if they are bulky.
- If using ribbon or fabric, cut four petal-like shapes for the wings, tapering them to points at one end.
- Arrange your four pieces on the table first—two for the top wings and two slightly shorter for the lower wings—to visualize the final layout.
Attaching Wings to the Body
- Apply a small line or dot of glue just behind the head bead on one side of the wrapped pin.
- Press the first wing piece into the glue, angling it slightly upward.
- Repeat on the opposite side to create a symmetrical pair of upper wings.
- For the lower wings, place them slightly farther back along the wrapped area and angle them slightly downward.
- Hold each piece in place briefly until secure, then check that all four wings look balanced when viewed from the top.
Use small amounts of glue to avoid visible clumps and stray glue strands. Neat adhesive work helps the finished hairpin look polished and professional.
Decorative Details: Tail, Eyes, and Sparkle
Once the basic structure is complete, details like eyes and a beaded tail bring personality to each dragonfly hairpin.
Designing the Tail
- Choose three to six small beads, flat-backed gems, or pearls in a gradient of sizes.
- Starting near the head bead, glue them in a straight line along the wrapped portion, creating a gentle taper toward the end.
- Alternate colors or finishes if desired, such as matte–shiny–matte, for added interest.
Adding Eyes and Accents
- Attach two tiny gems or beads on the front or sides of the head bead to suggest eyes.
- Outline the base of the wings with a thin line of glitter glue or metallic paint pen for subtle shimmer.
- Add micro-sequins sparingly along the wings for extra sparkle without overwhelming the design.
Finishing Touches
- Inspect the hairpin for any exposed glue threads or uneven edges and trim them carefully.
- If desired, brush a light layer of clear-drying sealant over the wrapped body and tail to increase durability.
- Set the complete piece aside on a flat, protected surface until everything is fully dry and firm to the touch.
Safety Tips and Kid-Friendly Adaptations
Dragonfly hairpins can be an excellent craft for children, but adult supervision is essential when using strong adhesives or sharp tools.
Crafting Safely with Children
- Let children choose colors, arrange wings, and place larger beads while an adult handles any hot glue.
- Switch to non-toxic, child-safe craft glue for younger crafters, understanding that drying times will be longer.
- Pre-cut feathers, ribbon, and fabric shapes so children do not need to use sharp scissors.
Choosing Age-Appropriate Hardware
- Use soft, flexible hairbands or clips with rounded edges for toddlers and small children.
- Avoid very small loose beads for children who might still put things in their mouths.
- Check finished hairpins regularly for loose components before allowing kids to wear them.
Styling Ideas and Creative Variations
Once you master the basic dragonfly design, you can adapt the concept for different hairstyles, seasons, and events.
Ways to Wear Dragonfly Hairpins
- Slide a single dragonfly into a low bun for a minimalist, nature-inspired accent.
- Cluster several pins together near a side braid to create the illusion of a small swarm in flight.
- Use matching pairs on pigtails or half-up styles for coordinated looks on siblings or friends.
Seasonal Themes
- Spring: Soft pastels with floral beads and sheer wings.
- Summer: Bright neons and glitter for beach parties or festivals.
- Autumn: Rust, gold, and deep green with metallic accents.
- Winter: Icy blues, silver, and crystal-clear beads for a frosty effect.
Alternative Materials to Try
- Replace feathers with lace scraps for romantic, vintage-style wings.
- Use thin craft foam cut into wing shapes and decorated with markers for a more durable, kid-proof option.
- Create a monochrome metallic look with all-gold or all-silver components for a sleek, modern accessory.
Care, Storage, and Gift Ideas
Proper care helps your handmade dragonfly hairpins stay beautiful for as long as possible, especially if you plan to give them as gifts.
How to Protect Your Hairpins
- Store them flat in a shallow box or on a strip of cardstock to keep wings from bending.
- Keep them away from moisture, heavy perfumes, or hair sprays that might weaken adhesive or dull metallic finishes.
- Avoid tossing them loose into bags or drawers where they can snag on other items.
Turning Dragonfly Hairpins into Gifts
- Mount a pair of hairpins on a decorative card and slip them into a small envelope as a party favor.
- Create themed sets in coordinated colors for bridesmaids, dance recitals, or holiday stockings.
- Personalize each dragonfly with the recipient’s favorite colors or small initial charms.
Frequently Asked Questions
How long does it take to make one dragonfly hairpin?
For a first attempt, expect to spend around 20 to 30 minutes from gathering materials to final drying time. As you become more familiar with the steps, you can often finish a single hairpin in about 10 to 15 minutes.
Can I make these without a hot glue gun?
Yes. Strong liquid craft adhesive or fabric glue can work, especially for fabric or ribbon wings, though drying will take longer. If you are crafting with children, slower-drying, non-toxic glues can be a safer choice.
What if I cannot find feathers?
You can cut wing shapes from scrap fabric, ribbon, craft foam, or even thick decorative paper. As long as the pieces are lightweight and roughly symmetrical, they can create a convincing dragonfly wing effect.
Will the hairpins hold up with regular use?
With careful gluing and occasional touch-ups, dragonfly hairpins can last through many wears. Adding a thin coat of clear sealant to the wrapped body and bead tail improves durability, especially if the accessory will be used frequently.
Can I wash the hairpins if they get dirty?
Fully submerging handmade accessories is not recommended, since water can weaken adhesives and damage delicate materials. Instead, gently wipe dirty areas with a slightly damp cloth and allow the piece to air dry completely before wearing again.
With simple materials and a bit of imagination, anyone can transform plain hairpins into whimsical dragonfly accessories that feel personal and unique. Experiment with colors, textures, and layouts, and soon you will have a whole garden of wearable mini dragonflies ready to brighten hairstyles, outfits, and special occasions.