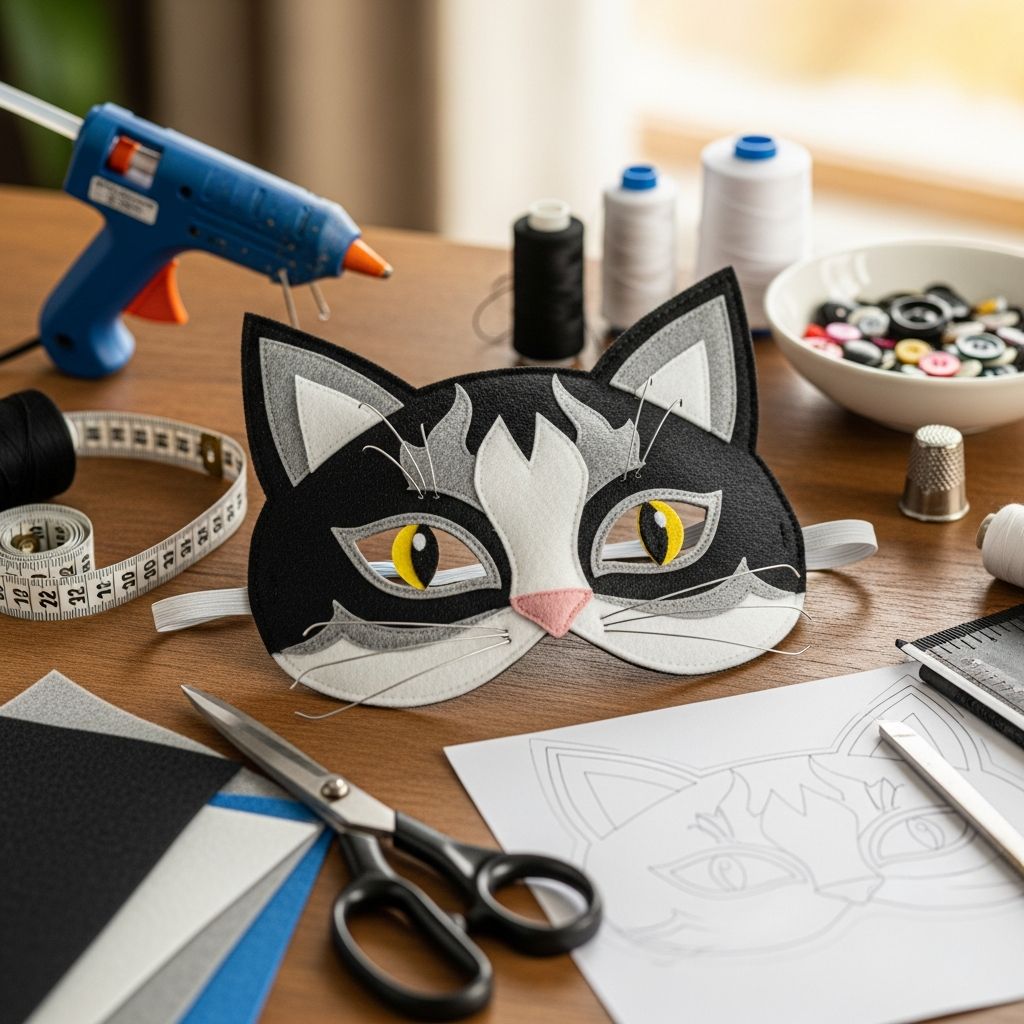
Transform a basic mask and a few craft supplies into a charming cat costume that is comfortable, easy to wear, and fun to customize.
Why Make Your Own Cat Mask Costume?
A homemade cat mask costume lets you control comfort, fit, and style while keeping costs low and encouraging kids to express their creativity.
Unlike store-bought sets, a DIY approach allows you to adjust materials, colors, and details so the costume works with existing clothing and fits any age.
- Budget-friendly and uses materials you may already own.
- Customizable for toddlers, older kids, teens, and adults.
- Great afternoon craft project for families or classrooms.
Materials and Tools You Will Need
Gather all supplies before you begin so the process feels smooth and enjoyable, especially when crafting with children.
You can substitute colors and fabrics to match your child’s preferences or to coordinate with clothing already in the closet.
Core Mask Materials
- Plain cloth or paper mask (preferably black or a dark color).
- Black felt sheet for ears and nose details.
- Pink felt sheet for inner ears and small accents.
- Sturdy craft wire or chenille stems (pipe cleaners) for whiskers.
- Non-toxic craft glue or low-temperature hot glue gun (for adults to use).
- Scissors suitable for fabric and paper.
- Pencil or fabric marker for tracing shapes.
Optional Costume Add-Ons
- Plain black T-shirt or leggings to create a quick cat outfit.
- Felt scraps or fabric paint for paw prints on shirts or knees.
- Ribbon or elastic for a simple tail.
- Headband if you prefer stand-alone ears instead of ear pieces on the mask.
Safety and Comfort Extras
- Child-safe fabric glue when working with young kids.
- Soft felt or fleece scraps for padding where the mask touches the nose or cheeks.
- Extra elastic or ribbon to adjust mask fit.
Planning the Look: Choosing Colors and Style
Before cutting any pieces, decide what type of cat you want to create so the color choices and decorations all work together.
Consider how the mask will coordinate with clothing your child already owns to avoid buying a separate full costume.
| Cat Style | Main Mask Color | Ear & Nose Colors | Suggested Extras |
|---|---|---|---|
| Classic black cat | Black mask or dark gray | Black outer ear, pink inner ear, pink nose | Silver or white whiskers, glitter accents |
| Tabby cat | Brown or tan mask | Brown outer ear, cream inner ear | Painted stripes and darker whiskers |
| White kitten | White or very light gray mask | White outer ear, soft pink inner ear | Pastel bow or small felt heart on one side |
| Colorful fantasy cat | Any bright color mask | Contrasting bright felt for ears | Metallic whiskers, rhinestones, or stars |
Step-by-Step Instructions: Crafting the Cat Face Mask
The following steps assume you have a plain mask as a starting point; adapt the process slightly depending on whether it is cloth, paper, or foam.
Read through all steps once before you begin so you can decide which options and embellishments you want to include.
Step 1: Prepare the Base Mask
If you are using a cloth mask, make sure it is clean and dry so glue adheres properly and no dust gets trapped under decorative pieces.
- Lay the mask flat on a protected work surface.
- Check that the eye openings (if any) and breathing area are comfortable for the intended wearer.
- Plan where the nose, whiskers, and ears will sit without blocking visibility.
Step 2: Create and Attach the Ears
Cat ears give the mask its unmistakable feline look, so take your time shaping and positioning them symmetrically.
- Draw two tall triangles on black felt for outer ears and two smaller triangles on pink felt for inner ears.
- Cut out all triangles carefully and glue the smaller pink pieces centered on the black ones.
- Decide whether ears will attach directly to the top edge of the mask or to a separate headband.
- Glue ears in place, holding them for several seconds to help the bond set.
Step 3: Add the Cat Nose
A small nose shape instantly reads as “cat” and works especially well when placed near the center of the mask.
- Cut a small rounded triangle or heart shape from pink felt.
- Test the placement by holding it against the mask in front of a mirror or on the wearer’s face.
- Glue the nose slightly above the area where the upper lip would be, allowing enough room for whiskers on each side.
Step 4: Attach Whiskers Safely
Whiskers add dimension and personality, but they should be flexible and lightweight so they do not poke the wearer.
- Cut three to six equal lengths of craft wire or chenille stems.
- Gently curve the ends away from the face, rounding off any sharp cut points.
- Arrange the whiskers in a fan shape on each side of the nose.
- Glue the center of each whisker in place, pressing them gently into the mask material until secure.
Step 5: Draw or Attach Facial Details
Small details like a mouth line, freckles, or subtle stripes complete the design without much extra effort.
- Use a fabric marker or paint pen to draw a simple curved mouth under the nose.
- Add small dots above the whiskers to mimic where real whiskers emerge.
- Optional: Paint light stripes on the forehead or cheeks for a tabby effect.
Step 6: Adjust the Fit
A great-looking mask is only useful if it is comfortable enough to wear for trick-or-treating or parties.
- Try the mask on and note any places that feel too tight or loose.
- Shorten or lengthen the elastic by tying small knots or adding extra ribbon.
- Glue small pieces of soft felt inside areas that press against the nose or cheeks.
Building the Rest of the Cat Costume
Once the mask is complete, the costume can be finished with a few simple clothing and accessory choices.
Many of these items are likely already in your home, which reduces waste and saves a last-minute trip to the store.
Easy Cat Outfit from Closet Staples
- Pair the mask with a plain black or dark-colored T-shirt and leggings.
- Add socks or shoes that match the shirt for a more unified look.
- For younger kids, a long-sleeve shirt adds warmth on cool Halloween nights.
Simple DIY Tail
A tail is optional but adds movement and makes the costume feel more complete.
- Cut a long strip of felt or fabric, then roll and glue it into a tube.
- Stuff the tube lightly with fabric scraps or cotton to give it shape.
- Attach the tail to the back of pants using a safety pin through a sturdy belt loop or sew it onto a ribbon belt.
Paw-Inspired Accessories
- Cut four small felt ovals and four larger circles to create paw print appliqués for elbows and knees.
- Glue or sew paw prints onto sleeves or leggings for extra detail.
- Use fingerless gloves and add felt pads to the palms to imitate cat paws.
Customization Ideas for Different Ages
The same basic mask design can be simplified for toddlers or upgraded with more dramatic details for teens and adults.
Planning around the wearer’s age ensures the project stays fun and the final costume feels age-appropriate.
For Toddlers and Young Kids
- Use soft, lightweight materials and keep whiskers flexible and short.
- Skip small embellishments like rhinestones that could come loose.
- Allow kids to choose colors and help with safe tasks such as placing felt pieces.
For Older Kids and Tweens
- Invite them to design unique patterns such as galaxy cats, neon cats, or glow-in-the-dark accents.
- Add layered stripes, metallic whiskers, or a small felt bow on one ear.
- Encourage them to sketch their idea before crafting to practice planning and design skills.
For Teens and Adults
- Experiment with dramatic eyeliner-style designs painted onto the mask.
- Use subtle colors and clean shapes for a sleek, minimalist cat look.
- Integrate the mask with dressier clothing for costume parties or themed events.
Safety Tips for Halloween and Dress-Up
Comfort and safety matter more than elaborate decoration, especially for kids who will wear the mask for extended periods.
Check the costume in bright light and low light before going out to ensure good visibility and ease of movement.
- Ensure that vision is not blocked; adjust or enlarge eye openings if needed.
- Keep whiskers and ears flexible and avoid sharp wire ends.
- Use non-toxic glues and paints, and let everything dry fully before wearing.
- Secure tails and accessories so they do not drag on the ground or become tripping hazards.
- Layer warm clothing under the outfit if Halloween night is chilly.
Cleanup, Storage, and Reuse
With a little care, the cat mask can be reused for school plays, pretend play at home, or next year’s Halloween festivities.
Proper storage also keeps glitter and small pieces from shedding onto other items in your costume box.
- Wipe the inside of a cloth mask gently with a damp cloth and mild soap if needed, then air dry completely.
- Store the mask in a box with enough room so ears and whiskers do not get crushed.
- Label the box with the wearer’s name and size for easy finding next season.
Frequently Asked Questions
Can this project be done in a classroom or group setting?
Yes, the cat mask costume works well for classrooms, scout groups, or birthday parties when materials are prepared in advance. Pre-cutting ears and noses speeds up the activity and allows kids to focus on arranging and gluing pieces.
What if I don’t have a ready-made mask?
You can trace a simple mask shape onto cardstock or craft foam, cut it out, and punch holes for elastic. The rest of the steps stay almost the same, though you may need stronger glue for foam or paper.
How long does it take to make one mask?
Most people can complete a basic cat mask in 30 to 60 minutes, depending on the level of detail and whether pieces are pre-cut. Allow extra drying time for glue and paint before anyone wears the mask.
Is this suitable for very young children?
The craft can be adapted for young children by using large, soft felt pieces and avoiding wire whiskers or small decorations. Adults should handle all cutting and hot-gluing while little helpers choose colors and place pieces.
Can the costume be washed?
Clothing pieces like shirts and leggings can usually be machine washed according to their care labels, especially if decorations are sewn rather than glued. The mask itself is best spot-cleaned to protect glued-on ears and whiskers.