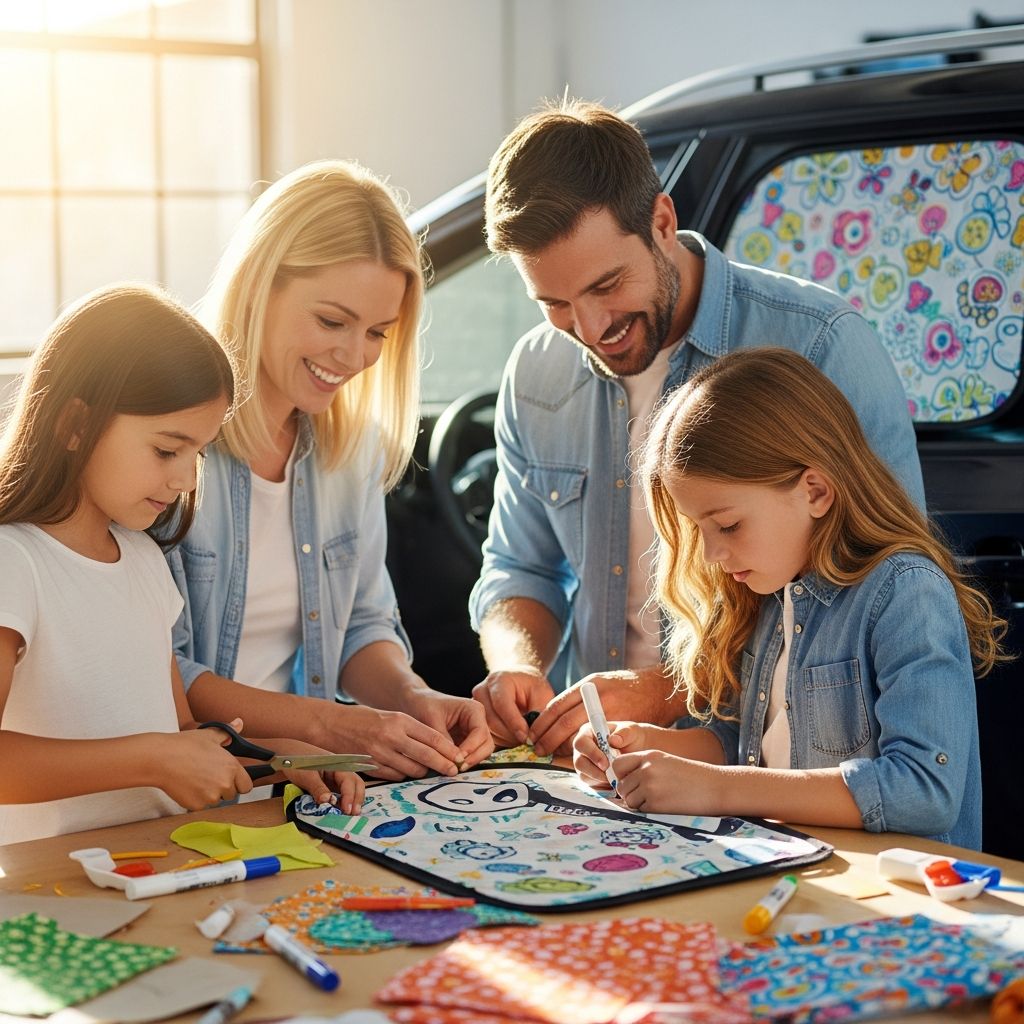
Spending time in a hot car is nobody’s idea of fun, especially for kids stuck in the back seat. A homemade car window sunshade turns that problem into a creative opportunity: you protect your car from heat and give your children a colorful design they can help build.
This guide walks you through designing, building, and decorating a DIY car window sunshade that fits your vehicle, reflects heat, and showcases your family’s creativity.
Why Make Your Own Car Sunshade?
Store-bought shades are usually generic rectangles that rarely fit well. A custom sunshade can be cut to your exact window shape, decorated to match your child’s interests, and made from materials that suit your climate and budget.
- Better fit: Custom edges reduce light leaks and help the shade stay in place.
- More personality: Kids can choose colors, characters, or themes for a unique look.
- Budget-friendly: Simple materials often cost less than premium retail shades.
- Eco-conscious: Reusing cardboard and fabric keeps more material out of the trash.
Planning Your Project
Before diving into cutting and decorating, spend a few minutes planning. Decide which window (or windows) you want to cover, who will use the shade, and what kind of design will keep your car cheerful without being distracting for the driver.
- Target windows: Front windshield, back window, or side windows for kids’ seats.
- Primary purpose: Cooling the car, blocking glare, entertaining kids, or all three.
- Design theme: Animals, outer space, abstract patterns, or simple bold colors.
- Time commitment: A quick one-evening project or a more detailed weekend craft.
Suggested Materials and Tools
You can build a durable sunshade with a small collection of craft and household materials. Feel free to substitute items you already have at home.
| Component | Budget Option | Upgraded Option | Purpose |
|---|---|---|---|
| Base layer | Large cardboard pieces | Foam board or corrugated plastic | Gives the sunshade structure and rigidity |
| Reflective layer | Aluminum foil | Reflective insulation roll | Reflects sunlight and reduces heat |
| Covering | Old pillowcase or cotton fabric | Patterned fabric or vinyl | Provides a smooth, decorative surface |
| Adhesive | White glue or glue stick | Spray adhesive or fabric glue | Bonds layers together securely |
| Fasteners | Elastic loops or ribbon ties | Suction cups or magnetic strips | Keeps shade on the window or sun visors |
Basic tools include scissors, a craft knife, a marker, measuring tape, and painter’s tape. Painter’s tape is particularly helpful for temporary placement while you measure and trace around the window.
Step 1: Measure Your Car Window
Start by creating a rough template of your window. This template helps you avoid mistakes before cutting into your main materials.
- Clean the inside of the window quickly so tape and suction cups will stick later.
- Hold sheets of scrap paper or newspaper against the glass and tape them together until you cover the entire window.
- Use your fingers to press along the edges of the glass and trace the outline with a marker.
- Take the paper down and cut around your traced line, leaving a small margin that you can trim later.
Test the paper template on the window. It should sit within the frame without bunching or bending. Trim gradually until it sits flat, leaving no big gaps for sunlight to sneak through.
Step 2: Cut the Structural Base
Once your template fits well, transfer it onto a sturdier base material. The base is what keeps the shade from sagging as you use it.
- Lay the template on cardboard, foam board, or corrugated plastic.
- Trace around the template with a marker, keeping your line smooth and continuous.
- Cut the shape with scissors or a craft knife, using a cutting mat if you have one.
- Test the fit in the window and shave off small sections if needed.
If your window is large, you may want to cut the base into two or three panels that fold. You can rejoin panels with duct tape “hinges” so the shade folds for easy storage.
Step 3: Add a Reflective Heat-Blocking Layer
The reflective layer is what keeps the temperature down inside your car. Even a thin layer of aluminum foil can make a noticeable difference on hot days.
- Spread your base piece on a flat surface.
- Cut aluminum foil or reflective insulation slightly larger than the base.
- Apply glue or spray adhesive evenly across the base.
- Press the reflective material onto the base, smoothing out wrinkles from the center outward.
- Trim the excess material around the edges once the adhesive has set.
For a double-sided shade, repeat this process on both sides of the base so that the sunshade works no matter which way you place it.
Step 4: Cover and Finish the Surface
A fabric or paper covering makes the shade more durable and much more fun to look at. Kids will appreciate a smooth surface that accepts markers, paint, or glued-on decorations.
- Choose a light-colored fabric if you want to reflect more heat.
- Select a patterned fabric or a plain white base if children will be decorating later.
- Lay the fabric face down, with the good side touching the table.
- Place the base on top and trace a shape that is about 2–3 cm larger on every side.
- Cut the fabric along your trace line.
- Fold the extra fabric over the edge of the base and glue it down on the back.
- Clip small notches at curves and corners so the fabric can fold smoothly.
If you plan to use markers or paints on the shade, choose a fabric that absorbs color well, such as cotton or a cotton blend.
Step 5: Create a Kid-Friendly Design
This is the stage that turns your sunshade from a plain panel into a rolling piece of artwork. Involve kids as much as possible, but keep safety in mind with permanent markers and paint.
Theme Ideas for Your Sunshade
- Cartoon eyes or faces: Turn the front of your car into a friendly character with big eyes or silly expressions.
- Underwater scene: Fish, seaweed, bubbles, and a smiling octopus stretching across the shade.
- Space adventure: Rockets, planets, comets, and astronauts floating in space.
- Nature motifs: Mountains, clouds, trees, and a colorful sun on the horizon.
- Abstract art: Geometric shapes, bold stripes, and dots for a modern look.
Lightly sketch designs in pencil first. Then fill in with fabric markers, acrylic paint, or glued-on paper shapes. Avoid adding very heavy objects that might fall off or scratch your car interior.
Step 6: Add Attachment Points
To keep your sunshade in place, you need a simple, reliable attachment method that does not damage your car. The best approach depends on which window you are covering.
- Front windshield: Make the shade wide enough to pinch between the dashboard and sun visors when they are flipped down.
- Side windows: Sew or glue small loops of ribbon at the corners and attach them to suction cups that stick to the glass.
- Back window: Use a combination of snug fit at the edges and a few discreet suction cups for support.
Avoid permanent adhesives or anything that may leave a residue on glass or fabric upholstery. Suction cups, elastic loops, and gentle pressure from the sun visors are usually enough.
Safety Tips and Best Practices
A decorative sunshade should never compromise safety or visibility. Keep these guidelines in mind before heading out on the road.
- Do not block any part of the windshield or window that the driver needs for clear vision while the car is in motion.
- Reserve large, fully covered shades for when the car is parked.
- Ensure that no sharp edges or hard decorations can become projectiles in a sudden stop.
- Check local regulations before using shades while driving, especially on front windows.
Explain to kids that the shade is not a toy while the car is moving. Encourage them to help install and remove it only when the vehicle is safely parked.
Care, Cleaning, and Storage
A little routine maintenance will keep your sunshade looking bright and working well through many summer seasons. Cleaning also gives you a chance to inspect for loose edges or decorations.
- Dust the surface with a soft cloth or handheld vacuum.
- Spot-clean fabric with a damp cloth and mild soap, testing in a corner first.
- Avoid soaking the shade; excess moisture can warp cardboard or foam board.
For storage, slide the shade behind a seat, under the trunk floor if space allows, or hang it on hooks in your garage. If you built a folding version, keep hinges loosely folded so the material does not crease sharply.
Variations and Upgrades
Once you have mastered a basic sunshade, you can experiment with more advanced ideas. These variations can make your project more durable, more interactive for kids, or more suitable for extreme climates.
- Interchangeable panels: Create multiple decorative fronts that Velcro onto a single base layer, letting kids swap themes with the seasons.
- Pocket panel: Sew clear plastic pockets to hold postcards, photos, or small laminated drawings.
- Chalkboard surface: Use chalkboard paint on one side so kids can redraw designs whenever they like.
- Double-layer insulation: Sandwich two reflective layers with a thin air gap for extra heat protection in very hot climates.
Keep any moving or removable pieces firmly attached while driving, or limit these interactive features to shades used only when the car is parked.
Example Project Flow for Families
If you are doing this as a family craft day, it helps to organize the project into clear segments. That way children stay engaged and you avoid rushing delicate steps like cutting and gluing.
- Morning: Measure the window together and cut the base.
- Late morning: Attach reflective layer and fabric covering; let everything dry.
- Afternoon: Draw and color designs, add details, and let any paint cure.
- Evening: Add suction cups or loops, test the fit, and celebrate with a short car ride or driveway “reveal.”
Splitting the work into stages also makes it easier to stop and clean up if younger children lose focus.
Frequently Asked Questions
Can I use this sunshade while driving?
Use full-coverage shades only when the vehicle is parked. For driving, limit shades to back and rear side windows, and verify that the driver still has an unobstructed view in all necessary directions and that local laws allow such coverings.
Which material is best if I live in a very hot climate?
In hot, sunny areas, a stiff base combined with reflective insulation works well. Look for materials marketed as radiant barriers or reflective insulation, and pair them with a light-colored or white fabric to reduce heat absorption.
Is cardboard durable enough for long-term use?
Cardboard can work for at least a season if it stays dry and is handled gently. For a long-term shade, consider foam board or corrugated plastic, which are less likely to warp or weaken over time.
How can I make the sunshade easy to store?
Design the shade in folding sections connected with tape or fabric hinges. Measure your storage space first—such as behind the front seats or in the trunk—to decide how many folds you need.
What if I want a design but cannot draw?
Trace simple shapes from coloring books, stencils, or printed outlines. You can also cut out colored paper shapes, letters, or stickers and arrange them into a collage rather than drawing freehand.
Final Thoughts
A DIY car window sunshade is both a practical upgrade and a memorable craft activity. With a bit of planning, some basic materials, and help from your kids, you can transform a plain car window into a custom shield that blocks harsh sunlight and adds a playful touch to every trip.
Once you finish one shade, you may find yourself designing a matching set for every window in the car—and enjoying a cooler, more colorful ride all year long.