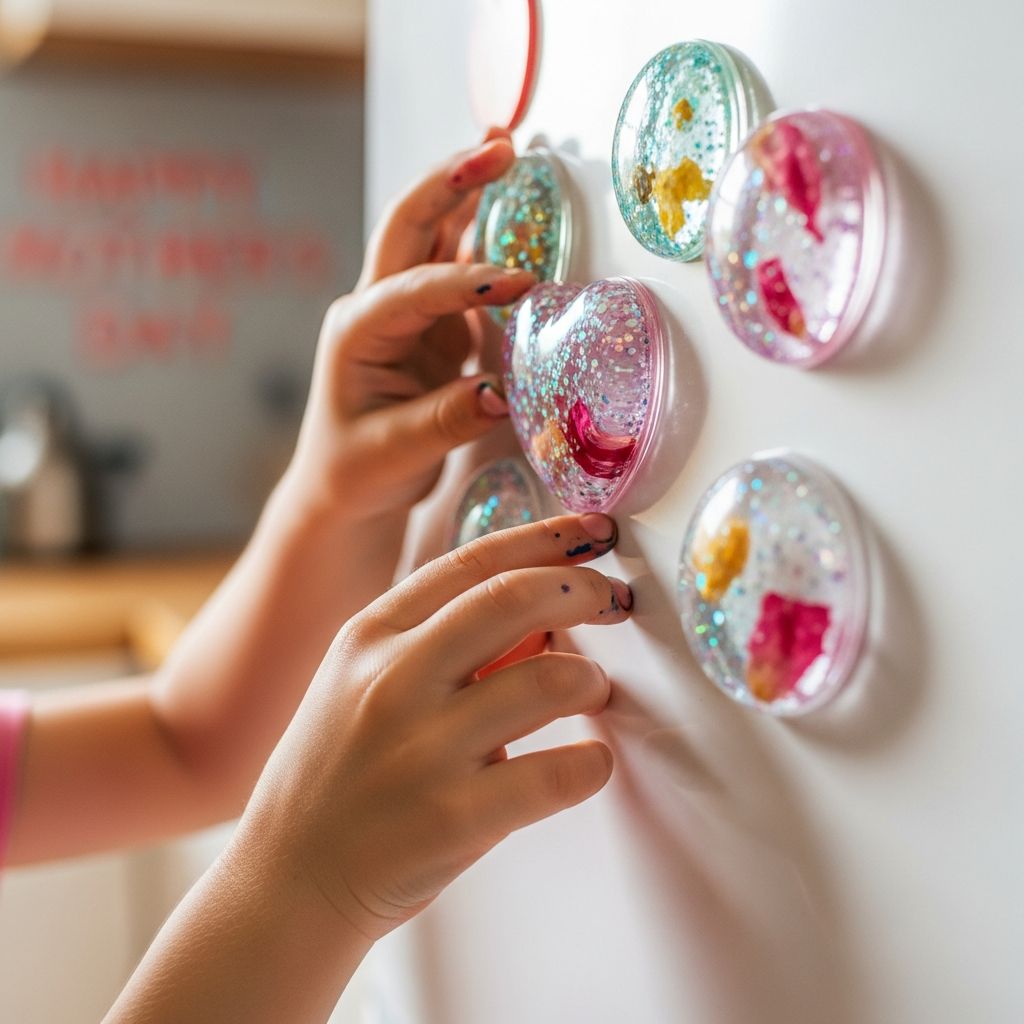
Homemade gifts have a special way of capturing memories, especially when they feature a child’s artwork or handwriting. Bubble magnets made from clear glass gems are a simple, beautiful, and practical Mother’s Day craft that kids can help create from start to finish. These tiny treasures look like little magnifying lenses over colorful art, and every time Mom opens the fridge or files a paper at work, she’ll see a tiny reminder of the love that went into making them.
Why Bubble Magnets Make the Perfect Mother’s Day Gift
Bubble magnets check all the boxes for a meaningful Mother’s Day present: they are personal, useful, easy to customize, and simple enough for kids to help with. The project works well for classrooms, playdates, or an afternoon at home, and it can be adapted for many ages and skill levels.
- Sentimental value: Each magnet can showcase a child’s doodle, a tiny message, or a favorite color combination.
- Practical everyday use: Moms can use the magnets on a fridge, locker, office board, or metal filing cabinet.
- Budget-friendly: Most supplies are inexpensive and easy to find in craft stores or online.
- Quick to make: Once you have the materials, the crafting process is fast and satisfying.
Materials and Tools You’ll Need
Before getting started, gather all your supplies so kids can focus on the fun parts—drawing, cutting, and assembling their mini works of art.
Core Materials
- Clear glass “bubble” gems (flat on one side, rounded on top)
- Strong clear-drying glue or adhesive suitable for glass and paper
- Small round craft magnets (strong enough to hold paper on a fridge)
- Paper for artwork (cardstock, scrapbook paper, or printed photos)
Helpful Tools
- Permanent markers, gel pens, or colored pencils for designs
- Scissors or a small circle punch (sized to the glass gems)
- Pencil for tracing
- Optional: paint pens, glitter pens, stickers, or washi tape for embellishing
- Optional: clear sealant (such as decoupage medium) to protect the paper
| Item | Recommended Size | Notes |
|---|---|---|
| Glass gems | 1.5–2 cm diameter | Larger gems make artwork easier to see for young kids. |
| Magnets | 8–12 mm diameter | Use neodymium or strong ceramic magnets for better hold. |
| Paper thickness | Standard to light cardstock | Thin enough to curve slightly, thick enough not to wrinkle. |
| Glue type | Clear craft adhesive | Choose one that bonds glass, paper, and metal. |
Step-by-Step Instructions for Making Bubble Magnets
The process can be broken down into clear, kid-friendly steps. Adults can handle any cutting or glue that might be tricky or require supervision, while kids design and help assemble the magnets.
Step 1: Create Mini Artwork
Begin by inviting kids to fill a sheet of paper with small drawings, patterns, shapes, or words. Keep each design about the size of the glass gem, but encourage them not to worry about perfect sizing; you can trim later.
- Use bright colors that will show up clearly through the glass.
- Try simple shapes like hearts, flowers, stars, and smiley faces.
- Write short messages such as “Love,” “Mom,” or initials.
For a different look, you can also use scraps of patterned scrapbook paper, old greeting cards, or tiny printed photos. Just make sure whatever you use is light enough in color that it will be visible beneath the gem.
Step 2: Trace Around the Gems
Flip the glass gems so the flat side faces down. Place a gem over a favorite section of artwork and move it around until you like what you see through the glass. Once you’re happy with the placement, trace around the gem lightly with a pencil.
- Kids can hold the gem while an adult traces, or vice versa.
- Leave a little extra space around the line if you’re not using a punch, so you can trim accurately later.
Repeat this until you have traced as many circles as you plan to turn into magnets. Making a set of 4–6 magnets creates a sweet, giftable collection.
Step 3: Cut Out the Circles
Carefully cut along the traced lines to create paper circles that match the size of the glass gems. If you have a circle punch that matches the diameter of the gems, you can use that to speed up the process and keep the edges neat.
- For younger children, an adult should handle the cutting or provide safety scissors.
- If a circle is a little too big, trim tiny slivers from the edge until it fits neatly under the gem.
As you cut, pair each paper circle with its matching gem so designs don’t get mixed up.
Step 4: Glue the Artwork to the Gem
Place a small dot of clear adhesive on the flat side of a glass gem. Gently press the artwork circle onto the glue with the design facing into the gem. Press firmly but carefully, smoothing out any air bubbles or wrinkles.
- Use just enough glue to cover the surface without oozing excessively from the edges.
- If glue does squeeze out, wipe it away with a toothpick or cotton swab before it dries.
Set the gem aside, paper side up, to dry fully according to the instructions on your adhesive. Patience at this stage pays off; the clearer the glue dries, the more your designs will glow.
Step 5: Attach the Magnet
Once the glue securing the artwork is completely dry, it’s time to attach the magnet. Turn the gem over so the paper side is facing up and place a small dab of strong glue in the center.
- Firmly press a magnet into the glue and hold for a few seconds.
- Check that the magnet is centered so the finished piece sits evenly on a metal surface.
Allow the glue to cure as long as recommended for a strong bond. After curing, test each magnet on a metal surface to ensure it is secure and can hold up at least one sheet of paper.
Design Ideas Kids Will Love
Part of the fun of bubble magnets is how customizable they are. Every set can reflect a different mood, color scheme, or interest that will make Mom smile.
Themed Magnet Sets
- Floral garden: Tiny flowers, leaves, and vines in bright pastel colors.
- Family portraits: Mini stick-figure drawings of family members with their names.
- Words of love: Short phrases like “Best Mom,” “Thank you,” or “Hugs.”
- Hobbies and favorites: Coffee cups, books, hearts, or pets Mom adores.
Consider using a limited color palette (for example, pink, gold, and white) if you want a coordinated, chic look for Mom’s office or kitchen.
Creative Finishing Touches
- Add tiny dots of metallic pen around the edges of each circle for a framed effect.
- Use subtle glitter pens on the artwork so it sparkles through the glass without flaking.
- Seal the paper with a light coat of decoupage medium before gluing it to the gem for extra durability.
For older kids, challenge them to design a set that tells a story—each magnet can represent a favorite memory or place shared with Mom.
Safety Tips and Age-Appropriate Adaptations
Because this craft involves small magnets and glass pieces, supervision and thoughtful planning are important, especially with younger children. With a few adjustments, the activity can be safe and enjoyable for many age groups.
Safety Considerations
- Keep small magnets and glass gems away from toddlers and babies who may put them in their mouths.
- Use non-toxic, child-safe glue when kids are handling it directly.
- Cover the work area to protect surfaces from glue drips or marker stains.
Adults should be responsible for any steps that involve sharp scissors, strong industrial adhesives, or handling fragile materials that might chip or break.
Modifications by Age Group
- Preschoolers: Let them color freely on large sections of paper; adults can trace, cut, and glue.
- Early elementary: Kids can draw, trace, and help with gentle gluing under supervision.
- Older children: Encourage them to take more ownership, from planning themes to packaging the final gifts.
When giving the magnets as gifts, remind recipients that they are not toys and should be kept away from very young children and pets.
Presenting the Finished Magnets as a Gift
Presentation can turn a simple handmade item into a keepsake that feels extra special. A little creative packaging shows Mom that thought went into every detail.
Gift Packaging Ideas
- Arrange magnets in a small decorative tin or box lined with tissue paper.
- Attach them to a small metal sheet or cookie tin lid so Mom can see all the designs at once.
- Place a set of magnets on a handmade card decorated by the child.
Adding a note that explains who made the magnets, the theme they chose, or what each picture represents can make the gift even more meaningful.
Pairing Bubble Magnets with Other Gifts
- Combine them with a framed photo of the child or the whole family.
- Include them in a “desk makeover” Mother’s Day basket with pens, notepads, and a cute mug.
- Bundle them with a homemade card and a simple bouquet of flowers.
Even if Mom receives store-bought presents, a small handmade set of magnets adds a heartfelt, personal touch she can treasure long after the holiday.
Variations to Use Bubble Magnets All Year Round
Once you master the basic bubble magnet technique, it can easily be adapted for different holidays, seasons, and recipients beyond Mother’s Day. This makes the project a versatile go-to craft for families and classrooms.
- Seasonal sets: Snowflakes for winter, flowers for spring, suns for summer, and leaves for fall.
- Birthday gifts: Magnets that spell out the birthday person’s name or age.
- Classroom rewards: Teachers can help students create magnets as end-of-year mementos.
- Grandparent gifts: Use grandkids’ artwork or tiny photos for a cherished keepsake.
Because the supply list is consistent, you can keep glass gems and magnets on hand and bring out this craft whenever you need a quick, meaningful gift idea.
Frequently Asked Questions (FAQ)
How long do bubble magnets take to make?
The hands-on crafting time is usually around 20–40 minutes, depending on how many magnets you create and how detailed the artwork is. The longest part of the process is waiting for the glue to dry fully, which can take anywhere from one hour to overnight, depending on the type of adhesive you use.
What kind of glue works best?
A clear, strong craft adhesive that bonds glass, paper, and metal gives the best results. Many crafters prefer glues specifically labeled for mixed materials or glass, as they dry with minimal cloudiness and hold up well over time. If kids are helping with the gluing, choose a non-toxic option and reserve any heavy-duty glue for the adult-only steps.
Can I use photos instead of drawings?
Yes, small photos work beautifully for bubble magnets. Print the images on regular or slightly heavier paper, trim them to size, and attach them just like artwork circles. Close-up photos of faces or hands are especially effective because the glass gem naturally frames and magnifies the focal point.
How do I keep the paper from wrinkling?
Use a thin, even layer of glue so that the paper lies flat against the glass. Press out any air bubbles gently from the center toward the edges and allow the gem to dry undisturbed. Slightly thicker paper, such as light cardstock, tends to wrinkle less than very thin printer paper.
Are these magnets safe for small children?
The finished magnets are not suitable as toys for babies or toddlers because they include small parts that could be a choking hazard. However, young children can still participate in parts of the project—such as drawing the artwork—while adults handle and store the small magnets safely. Always supervise children closely during crafting and keep materials out of reach when not in use.
Can bubble magnets be used on any metal surface?
Most household refrigerators, whiteboards, and metal filing cabinets are magnetic and will work well with the finished magnets. If you’re unsure whether a surface is magnetic, test it with a regular fridge magnet first. Keep in mind that thicker or painted metal may reduce the strength of the hold slightly, so stronger magnets may be needed for those surfaces.
How many magnets make a nice Mother’s Day gift?
A set of 4–6 magnets is usually enough to feel like a thoughtful, complete gift while still being manageable for kids to finish in one sitting. If you’re working with a classroom or a large group, each child can contribute one or two magnets to assemble a larger “class set” for a teacher or caregiver.
Can this project be done last-minute?
Yes, as long as you choose a fast-drying adhesive and allow enough time for it to cure, bubble magnets can be made in an afternoon. To save time, prepare pre-cut circles of patterned paper or card stock, letting kids focus on assembly and decoration instead of drawing from scratch.
Bubble magnets are a small project with big emotional impact. With simple supplies and a bit of creativity, kids can transform their own drawings and messages into sparkling keepsakes that Mom will proudly use and display for years to come.