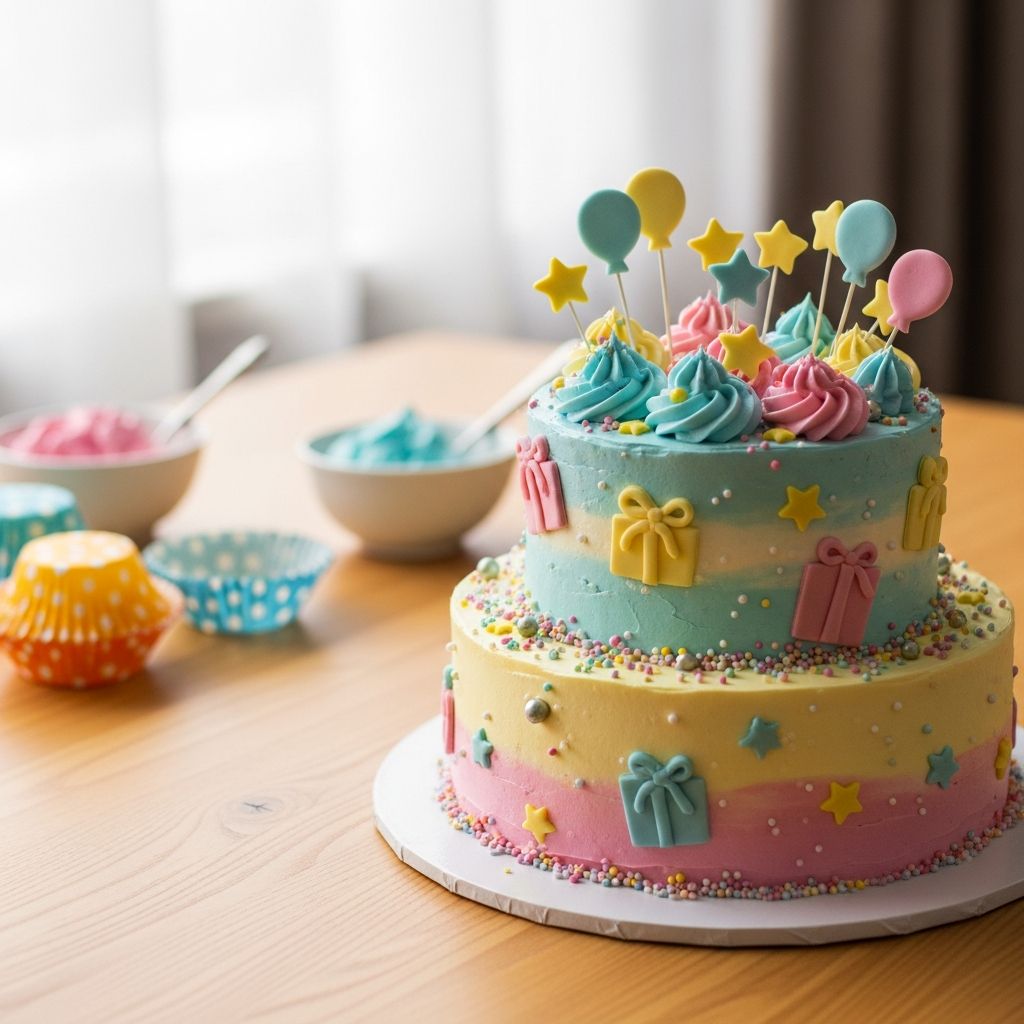
Homemade birthday cakes do not have to look like they came from a professional bakery to feel magical. With a little planning, simple tools, and a playful mindset, any parent can put together a cake that makes kids light up and guests reach for their phones to take pictures. This guide walks through practical, realistic ways to design and decorate DIY birthday cakes that focus on fun instead of perfection.
Start With a Realistic Cake Plan
The key to a successful DIY cake is choosing a plan that fits your time, budget, and energy. Before picking a design, take a few minutes to think about what is manageable for you, not what looks most impressive on social media.
- Decide how many people you are serving so you know what size cake to bake.
- Choose flavors that the birthday child actually loves, even if they seem simple.
- Match your design to your skill level and the time you realistically have on party day.
Questions to Ask Before You Bake
Answering a few questions early will save stress later and guide your choice of design, frosting, and decorations.
- How far in advance can you bake and decorate?
- Will the cake need to travel to another location?
- Do you have refrigerator space for storing a decorated cake?
- Are there any food allergies or dietary preferences to consider?
Simple Cake Foundations That Always Work
You do not need a complicated recipe to make a memorable cake. What matters most is texture, flavor, and how well the cake holds up to frosting and decorations.
- Use a sturdy cake (like basic butter cake, vanilla, or chocolate) that will not crumble easily when stacked or frosted.
- Consider baking in basic shapes: round, square, rectangle, or a simple loaf pan—these are easiest to cut and decorate.
- Level the tops with a long knife or bread knife so the layers sit evenly and look intentional.
| Cake Shape | Best For | Decorating Difficulty |
|---|---|---|
| Rectangle (sheet cake) | Large groups, character scenes, simple designs | Very easy |
| Round (single or double layer) | Classic birthday look, drip cakes, sprinkle cakes | Easy to moderate |
| Square | Gift-box designs, checkerboard patterns, block themes | Moderate |
| Cupcakes | Parties with kids, portion control, mix-and-match themes | Very easy |
Choosing Frosting Without Overcomplicating It
Frosting is where many parents feel overwhelmed, but it can be straightforward if you keep expectations realistic. Smooth bakery-style finishes are not required for a beautiful cake; texture and color can work in your favor.
- Classic buttercream is forgiving and easy to tint with food coloring.
- Whipped cream or cream cheese frostings taste great but need refrigeration and gentle handling.
- Ganache or chocolate glaze can make a cake look polished with minimal effort.
Decorating Strategies for Non-Artists
You do not need drawing skills or advanced piping techniques to decorate a kids’ cake they will adore. Think of the cake as a small stage where simple props and color do most of the work.
- Use store-bought sweets—cookies, candies, marshmallows, chocolate pieces—as ready-made decorations.
- Play with patterns: stripes, polka dots, borders, and clusters are easy to arrange even for beginners.
- Focus on one bold element (a toy topper, a number candle, or a cluster of sprinkles) instead of many tiny details.
Zero-Piping Decoration Ideas
If the idea of piping details or flowers makes you nervous, skip it entirely. There are many ways to decorate that require nothing more than a knife and your hands.
- Cover the top with colorful sprinkles and leave the sides simple.
- Arrange a ring of cookies or macarons around the edge of the cake.
- Place small toys, figurines, or themed decorations on top after wrapping their bases in plastic wrap.
- Use fruit like strawberries, raspberries, or sliced citrus to create a bright, fresh design.
Kid-Friendly Theme Ideas That Are Actually Doable
Themes are what make kids squeal when the cake arrives at the table, but a theme does not need to translate into exact character artwork. Instead, think in colors, shapes, and recognizable elements that suggest the theme in a simple way.
- Let the birthday child pick a color palette and one or two favorite things (like stars, cars, rainbows, or animals).
- Use toys or non-edible toppers that match the theme instead of trying to sculpt everything from icing.
- Keep backgrounds and frosting simple so the themed items stand out.
Example: Space Adventure Cake
A space-themed cake does not need complicated planets or rocket sculptures. You can get the idea across with basic colors and a few decorations.
- Frost the cake in dark blue or purple to suggest the night sky.
- Scatter white and silver sprinkles as “stars.”
- Add toy rockets or astronaut figures on top as the main focal point.
Example: Garden Party Cake
A garden-inspired cake can feel fresh and whimsical using inexpensive decorations from the grocery store.
- Frost the cake in a soft green shade to represent grass or leaves.
- Place strawberries, grapes, or berry clusters as “flowers.”
- Use gummy worms or butterfly-shaped sugar decorations for a playful touch.
Time-Saving Tips for Busy Schedules
Most parents do not have entire days available to focus on baking. The good news is that cake components can be prepared in stages, giving you flexibility around work and family life.
- Bake the cake layers up to two days ahead, wrap them tightly, and store them in the refrigerator.
- Prepare frosting in advance and keep it chilled; bring it to room temperature and re-whip briefly before use.
- Do a simple “crumb coat” (a thin layer of frosting to trap crumbs) the day before the party, then finish decorating on the morning of the event.
Sample Two-Day Cake Timeline
| Time | Task |
|---|---|
| Day 1 – Morning | Bake cake layers, cool completely. |
| Day 1 – Afternoon | Wrap and refrigerate layers; make frosting. |
| Day 1 – Evening | Level layers, stack with filling, add crumb coat. |
| Day 2 – Morning | Apply final coat of frosting and add decorations. |
| Day 2 – Party Time | Bring cake to room temperature, add candles, and serve. |
Using Everyday Kitchen Tools as Decorating Helpers
Specialized decorating tools can be fun, but they are not essential. Many common kitchen items can stand in for more advanced equipment and still yield polished results.
- Use the back of a spoon or a butter knife to create rustic swirls in frosting.
- Wrap cardboard in foil or parchment to make a quick cake board.
- Cut the tip off a plastic food bag to make a simple piping bag for borders or dots.
Easy Texture Techniques
Texture hides imperfections and makes a cake look intentionally handmade. Instead of fighting air bubbles or uneven frosting, turn them into part of the design.
- Press the back of a spoon into the frosting and pull up slightly to create small peaks all over the top.
- Drag a fork lightly around the sides of the cake for simple stripes.
- Tap shredded coconut, chopped nuts, or cookie crumbs against the sides for a “confetti” look.
Making the Cake a Family Activity
Decorating does not have to be a solo project. Inviting kids or other family members to help can turn cake-making into a memorable pre-party tradition.
- Give kids a small bowl of sprinkles or candies and a specific area to decorate.
- Prepare plain cupcakes alongside the main cake and let children personalize their own.
- Assign simple jobs—stirring, pouring, or placing toppers—to younger helpers.
Presentation Tricks That Make Any Cake Look Special
Even a very simple cake can look impressive with smart presentation. Think about the plate, background, and finishing touches just as you would think about the frosting.
- Place the cake on a clean, contrasting plate or stand so the colors pop.
- Wipe smudges and crumbs from the serving plate before presenting.
- Add a paper banner, sparkler candles (if safe and appropriate), or a personalized cake topper for an instant party feel.
Common DIY Cake Mistakes and How to Avoid Them
Even experienced bakers run into challenges, so it helps to know the most common pitfalls ahead of time. Most issues are easy to fix or disguise with a small adjustment.
- Crumb-filled frosting: Apply a thin first coat, chill until firm, then add a second, thicker layer.
- Uneven layers: Stack the flattest layer on top and use frosting to even out gaps along the sides.
- Melting frosting: Keep the cake away from warm ovens, sunny windows, and cars without air conditioning.
SEO-Friendly FAQ: DIY Birthday Cakes
How far in advance can I bake a birthday cake?
Cake layers can usually be baked one to two days before the party, wrapped tightly, and stored in the refrigerator. You can also freeze them for longer storage and thaw them in the fridge overnight before decorating.
Do I need special tools to decorate a homemade cake?
Special tools are helpful but not necessary. A basic kitchen knife, spoon, plastic food bags, and a simple spatula can handle most beginner-friendly designs.
What is the easiest birthday cake design for beginners?
A single-layer or sheet cake covered in one color of frosting, topped with sprinkles and a few themed decorations or toys, is one of the easiest and most reliable designs for beginners.
How do I keep my cake moist and fresh?
Avoid overbaking, let the cake cool fully, and keep it well wrapped when storing. Adding a thin layer of frosting over the entire cake helps lock in moisture until serving time.
Can I decorate a cake the night before the party?
Yes, decorating the night before works well for most buttercream-based cakes. Store the finished cake in a cool place or the refrigerator, then let it sit at room temperature for a short time before serving.
Focusing on Joy Over Perfection
A homemade birthday cake is ultimately about celebration, not flawlessness. When kids look back on their birthdays, they remember the laughter, the candles, and the feeling of being loved far more than the exact smoothness of the frosting.
By choosing simple designs, using accessible tools, and planning a few steps ahead, any parent can create a cake that feels special, looks great in photos, and reflects the personality of the child at the center of the celebration.