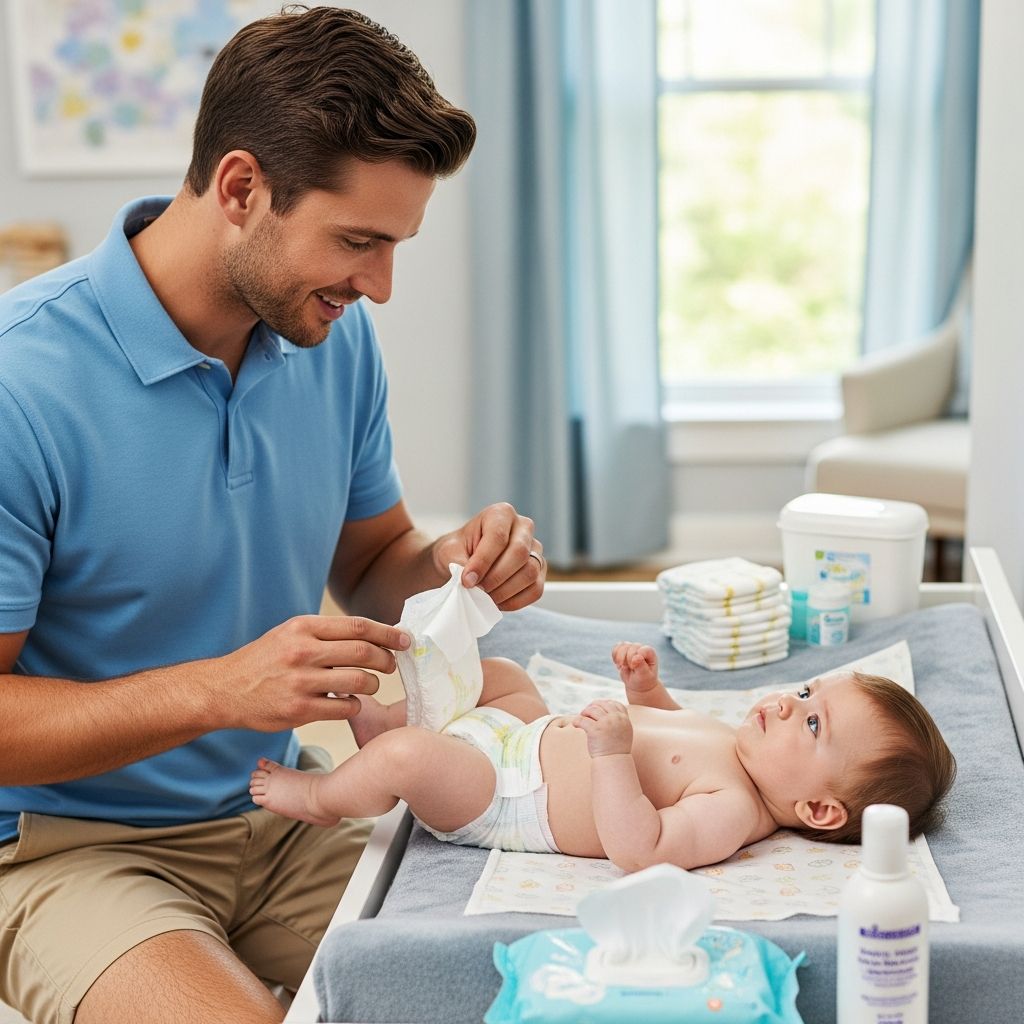
Becoming a dad comes with lots of new skills to learn, and changing diapers is one of the most important everyday jobs you will take on. This guide walks through everything from what supplies to buy to how to handle epic diaper disasters, so you can feel confident and calm at the changing table.
Why Diaper Changing Matters for Dads
Diaper changes are not just about hygiene; they are also powerful bonding moments with your baby. Taking an active role in diaper duty helps your partner, builds your confidence as a caregiver, and teaches your baby that dad is a safe, loving presence from day one.
- Regular diaper changes protect your baby’s skin and reduce the risk of diaper rash.
- Hands-on care helps you learn your baby’s signals, routines, and personality.
- Sharing diaper duty makes parenting feel like a true team effort.
Essential Diaper Changing Supplies for Dads
Before you ever open a diaper, set yourself up with the right gear. Having everything within reach makes changes faster, safer, and far less stressful.
- Diapers: Disposable or cloth, sized correctly for your baby’s current weight.
- Wipes: Fragrance-free, alcohol-free baby wipes or soft cloths with warm water.
- Changing pad: A waterproof pad or changing mat for home and on-the-go.
- Diaper cream: A zinc-oxide or barrier cream to protect against diaper rash.
- Diaper pail or trash bags: For quick, odor-controlled disposal.
- Spare clothes: A clean onesie, socks, and sometimes a backup outfit.
- Toys or distraction: A small rattle or soft toy to keep baby’s hands busy.
Suggested Diaper Station Setup
| Item | Where to Keep It | Why It Helps |
|---|---|---|
| Diapers | Stacked in a small basket beside the pad | Keeps fresh diapers easy to grab with one hand. |
| Wipes | In a pop-top container near baby’s feet | Lets you pull wipes quickly without looking away. |
| Diaper cream | In a corner tray, upright | Easy to spot when you need it, less likely to spill. |
| Trash or pail | Within arm’s reach but out of baby’s reach | Lets you toss dirty diapers without moving away. |
| Spare clothes | Folded on a nearby shelf or drawer | Saves time when blowouts strike unexpectedly. |
Safety Basics Every Dad Should Know
Safety is the top priority whenever you change a diaper. Babies can wriggle, roll, or kick unexpectedly, so your setup and habits matter as much as your technique.
- Never leave your baby unattended on a raised surface, even for a few seconds.
- Keep one hand on your baby if you need to reach for supplies.
- Use the safety strap on a changing table, but do not rely on it alone.
- Keep small objects, creams with caps, and plastic bags out of baby’s reach.
- Wash your hands before and after changes, or use hand sanitizer when traveling.
Step-by-Step Guide: How to Change a Diaper
This step-by-step routine works whether you are changing a wet diaper or dealing with a full blowout. Over time, your hands will learn the motions almost automatically.
Step 1: Prepare the Area
Lay out everything you need before you pick up your baby. Open the clean diaper and set it under or beside the changing pad, open the wipes container, and have the diaper cream uncapped if you expect to use it.
- Place a waterproof pad or covering on the surface you are using.
- Check the room temperature so your baby does not get chilled.
- Have a toy or something interesting for your baby to look at above the changing area.
Step 2: Position Your Baby Safely
Lay your baby on the changing pad or mat on his or her back. Keep one hand near the belly or legs to stabilize your baby if there is any squirming or rolling.
- Unfasten or remove enough clothing to fully expose the diaper.
- Move snaps or zippers away from the diaper area to avoid getting them dirty.
Step 3: Open the Dirty Diaper
Unfasten the diaper tabs but keep the diaper in place for a moment. If your baby has pooped, use the front of the diaper to wipe away as much as you can before folding it under your baby’s bottom.
- For boys, consider briefly covering the penis with a wipe or cloth to reduce the chance of getting sprayed.
- Fold the front of the diaper down and under so the clean outer layer is facing up under your baby.
Step 4: Clean the Diaper Area
Use wipes or a damp cloth to gently clean your baby’s skin. Always wipe from front to back to reduce the spread of bacteria toward the genitals.
- For girls, be sure to wipe between skin folds without wiping from back to front.
- For boys, gently clean around the scrotum and penis, following your doctor’s guidance if circumcised or uncircumcised.
- Use enough wipes to remove all stool, but avoid scrubbing, which can irritate the skin.
Step 5: Remove the Dirty Diaper
Once the area is clean, lift your baby’s legs gently by holding the ankles together and raising them toward the belly. Slide the dirty diaper out from under your baby and set it aside where your baby cannot grab it.
- Roll the dirty diaper inward, trapping wipes inside, and fasten it closed with its own tabs.
- Place the rolled diaper into your diaper pail or trash bag immediately if possible.
Step 6: Slide the Clean Diaper into Place
With your baby’s bottom still lifted slightly, slide the back half of the clean diaper under the hips. The diaper’s back edge should be roughly in line with the baby’s belly button once folded around.
- Make sure the picture or logo (usually the front) is facing up at the front.
- Spread out the diaper wings and smooth any folds or bunching.
Step 7: Apply Diaper Cream (If Needed)
If you notice redness or if your baby is prone to rashes, apply a thin layer of diaper cream or barrier ointment to the clean, dry skin. Focus on areas that usually get irritated, such as where the diaper’s elastic rubs.
- Use clean fingers or a dedicated diaper cream applicator.
- Allow a brief moment of air-drying before sealing the diaper if your baby tolerates it.
Step 8: Fasten and Check the Fit
Bring the front of the diaper up between your baby’s legs and lay it flat against the tummy. Attach the tabs from the back of the diaper to the front, smoothing as you go.
- Check that you can slide two fingers comfortably between the diaper and your baby’s stomach.
- Make sure the leg cuffs are pulled out and not tucked inside, which helps prevent leaks.
- For newborns with a healing umbilical stump, fold the top of the diaper down below the stump.
Step 9: Redress and Clean Up
Once the diaper is secure, redress your baby in a clean onesie or outfit. Move your baby to a safe place, such as a crib or play mat, before you deal with the trash and wash your hands.
- Dispose of the dirty diaper and used wipes in a sealed trash bag or diaper pail.
- Wipe or disinfect the changing pad if there were any leaks or smears.
Special Considerations for Newborns
Newborn diaper changes can look a little different from changes later in infancy. The umbilical stump, frequent poops, and very delicate skin all require extra care and patience.
- Fold the front of the diaper below the umbilical stump to keep it clean and dry.
- Expect frequent changes—sometimes after every feeding—and plan your diaper stash accordingly.
- Use gentle wipes or plain warm water if your newborn’s skin is very sensitive.
Handling Diaper Disasters and Blowouts
Every dad eventually faces a legendary blowout. The key is staying calm and working methodically instead of rushing and spreading the mess farther.
- If clothes are heavily soiled, carefully roll them downward and off to avoid smearing poop up the baby’s back or over the head.
- Have a small plastic bag ready for soiled clothes when you are out of the house.
- After big blowouts, extra wipes and a quick sponge bath may be needed before a fresh diaper.
Preventing and Treating Diaper Rash
Even with great diaper habits, most babies will experience diaper rash at some point. The goal is to reduce how often it appears and how long it lasts when it does.
- Change diapers promptly after bowel movements and regularly after wet diapers.
- Give your baby a few minutes of diaper-free time on a towel each day to let skin breathe.
- Apply a barrier cream to protect irritated areas and ask your pediatrician for guidance if rashes are frequent or severe.
Nighttime and On-the-Go Diaper Tips for Dads
Night changes and public-place changes can feel more stressful, but a little preparation makes them manageable. Think in terms of minimizing disruption for your baby and maximizing speed for yourself.
- Use a soft night light so you can see without fully waking your baby.
- Consider more absorbent nighttime diapers or adding a diaper booster pad for long stretches of sleep.
- Keep a small travel kit stocked with diapers, wipes, a foldable changing mat, and a spare outfit in your car or diaper bag.
Sample Dad-Friendly Diaper Bag Checklist
- 4–6 diapers, depending on how long you will be out.
- Travel-size pack of wipes.
- Portable changing pad.
- Small tube of diaper cream.
- One or two spare outfits and an extra pair of socks.
- Plastic bags for dirty diapers and clothes.
Common Diaper Changing Mistakes to Avoid
Every dad makes a few mistakes at the changing table, but knowing the most common ones can help you skip a lot of frustration. Focus on fit, cleanliness, and safety above all.
- Fastening the diaper too loosely, leading to leaks, or too tightly, leaving red marks.
- Forgetting to tuck the front of the diaper under for boys, which can send pee upward.
- Not wiping thoroughly, especially in skin folds, which can contribute to irritation.
- Walking away from the changing surface, even for a second.
Building Confidence and Making Diaper Time Positive
Like any new skill, diaper changing gets easier with practice. Turning it into a positive routine helps both you and your baby enjoy the process more.
- Talk or sing to your baby while changing to soothe and distract.
- Maintain eye contact and smile, using diaper time as a chance for connection.
- Celebrate your progress as a dad instead of aiming for perfection.
Frequently Asked Questions (FAQs)
How often should I change my baby’s diaper?
Most babies need a change every 2–3 hours during the day and whenever they poop. Newborns in particular may need very frequent changes because they stool more often and have more sensitive skin.
How can I tell if a diaper is too tight?
If you see deep red marks around the waist or thighs, or if you cannot slide two fingers comfortably between the diaper and your baby’s skin, it is probably too tight. Loosen the tabs slightly or move up to the next diaper size if your baby is growing quickly.
Is it okay to use baby powder?
Many parents avoid traditional talc-based powders because they can be irritating if inhaled. If you choose to use any powder, use it sparingly, keep it away from your baby’s face, and talk with your pediatrician about what is safest.
What should I do if my baby screams during diaper changes?
Some babies dislike feeling cold or exposed. Try warming your hands, using a warm wipe, talking gently, and working efficiently. If ongoing crying seems related to pain, rash, or a medical issue, contact your baby’s doctor.
When should I call the doctor about diaper rash?
Call your pediatrician if a rash is very bright red, has blisters, bleeds, does not improve after a couple of days of home care, or if your baby seems unusually uncomfortable. Persistent or severe rashes may need prescription treatments.
Final Thoughts for New Dads
Diaper duty may not be glamorous, but it is one of the simplest and most meaningful ways to care for your baby every single day. With a good setup, a calm mindset, and a little practice, you will go from nervous rookie to confident pro faster than you expect.