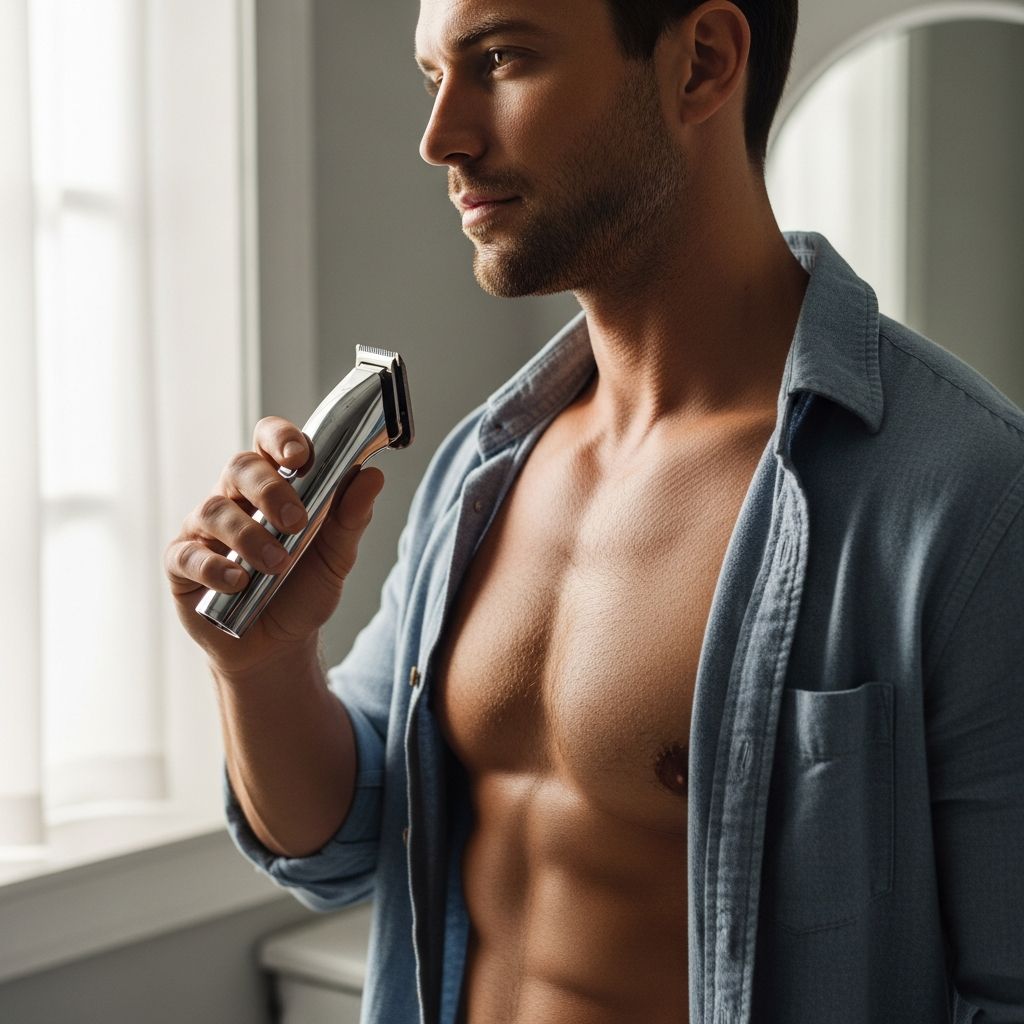
Chest hair grooming is no longer an all-or-nothing decision between full pelt and totally bare. Men today customize their chest hair to match their style, comfort, and lifestyle, from a light trim to a sculpted, smooth torso.
Why Chest Hair Grooming Matters
Chest hair itself is neutral; what really shows is how intentional it looks. A bit of structure can make your torso appear cleaner, highlight muscle definition, and feel more comfortable under clothes.
Thoughtful grooming also helps reduce tugging, sweat buildup, and irritation, especially if you work out regularly or live in a hot climate.
Common Reasons Men Groom Their Chest
- To look neater at the beach or pool.
- To make shirts sit more comfortably without hair pushing through thin fabric.
- To emphasize chest and ab definition.
- To reduce sweat, odor, or matting after exercise.
Choose Your Chest Hair Style
Before switching on a trimmer, decide what you actually want to see in the mirror. There are several popular approaches, and the right one depends on your build, density of hair, and personal taste.
The key is to work with your natural growth pattern instead of fighting it, so the finished look stays low maintenance and grows out evenly.
| Style | Description | Best For | Maintenance Level |
|---|---|---|---|
| Neat trim | Hair shortened evenly across the chest without removing it completely. | Men who like having chest hair but dislike bulk or tangling. | Low to medium (touch-ups every 1–3 weeks). |
| Natural with edges cleaned | Chest hair left mostly natural while tidying neck, shoulders, and stray patches. | Men who want a rugged look that still appears intentional. | Low (quick cleanup every few weeks). |
| Faded chest to stomach | Gradual transition from denser top chest hair to shorter hair near abs. | Men with thicker growth who want more definition around the midsection. | Medium (requires careful trimming and blending). |
| Fully smooth | All hair removed by shaving, waxing, or similar methods. | Men in sports, modeling, or those who simply prefer no hair. | Medium to high (regular upkeep and skincare). |
Essential Tools For Chest Grooming
The tools you choose determine how comfortable the process feels and how natural the result looks. Dedicated body-grooming devices are designed to handle thicker, curlier hair safer and more efficiently than facial trimmers.
Having a basic grooming kit also prevents the common mistake of going in with the wrong device and ending up shorter or patchier than intended.
Core Items To Have On Hand
- Body hair trimmer with adjustable guards for multiple lengths.
- Razor or body shaver if you plan to go very close or fully smooth.
- Comb or small brush to lift hair and check progress.
- Body wash and mild exfoliating cloth or scrub to prep the skin.
- Moisturizer or soothing lotion for post-grooming care.
Why A Dedicated Body Trimmer Helps
Body trimmers are built to cut through dense, curly hair over larger areas without clogging as quickly as facial clippers.
They often have rounded edges and guards designed to reduce nicks on contoured areas like the chest and around the nipples.
Prep Your Skin And Hair First
Good preparation makes trimming smoother, faster, and less irritating. Warm water softens coarse chest hair and opens pores, while a quick exfoliation reduces the risk of ingrown hairs.
Prepping also removes sweat, oils, and deodorant residue that can clog blades and cause dragging or redness.
Pre-Grooming Routine
- Take a warm shower: Use warm (not scalding) water to soften hair and relax the skin.
- Wash the area: Apply a gentle body wash to remove oils, sweat, and product buildup.
- Lightly exfoliate: Use a soft washcloth or mild scrub in circular motions to lift dead skin.
- Dry thoroughly: Pat dry; trimming usually works best on dry hair for even cutting.
- Comb through hair: Detangle and see the natural direction of growth before trimming.
How To Trim Chest Hair Evenly
Trimming (rather than shaving) is the most flexible option because it lets you control length while keeping some natural texture. The goal is an even, tidy surface without harsh lines or accidental bald patches.
Always start with a longer guard and gradually work shorter if needed; you can always remove more hair but you cannot put it back.
Step-By-Step Trimming Guide
- Attach a longer guard: Pick a mid-range setting first; this prevents over-trimming on the first pass.
- Follow hair growth: Run the trimmer in the direction your chest hair naturally lies for a more controlled cut.
- Work in sections: Start at the upper chest near the collarbone and move downward, overlapping passes slightly so you do not miss patches.
- Be careful near nipples: Slow down and use a shorter stroke length, or gently pull the skin flat with your free hand.
- Trim the midsection: Continue down the center of the chest and over the sternum, then out toward the sides of the torso.
- Address the stomach: Decide whether to keep the same length down to the navel or fade shorter as you approach the abs.
- Brush and reassess: After each area, brush off loose hair and check length in the mirror before making additional passes.
- Fine-tune with a shorter guard: If you want a cleaner look, drop one guard length and lightly go over areas that still look bulky.
Tips For A Natural-Looking Result
- Avoid trimming the chest drastically shorter than the stomach to prevent a sharp, unnatural line.
- Do not chase complete symmetry; bodies are slightly asymmetrical, and a subtle difference looks more real.
- Step back occasionally and check how it looks with arms relaxed at your sides, not only with arms raised.
Creating Clean Edges And Shape
Once your main chest area is trimmed, shaping the borders makes the whole torso look more deliberate. Tidying the neck, shoulders, and side areas helps prevent the impression of hair spilling out of shirts.
A simple, flattering approach is to keep hair centered on the chest and reduce or remove it as it moves up the neck and out toward the shoulders.
Areas To Tidy Up
- Upper chest and lower neck: Lightly reduce hair where it would show above a crewneck or polo for a clean collar line.
- Shoulders: Many men prefer shoulders to be trimmed shorter or clean-shaven, especially if shoulder hair is sparse or patchy.
- Side torso: You can taper from fuller hair around the sternum to a shorter length as hair reaches the sides of the ribcage.
Soft Fades vs. Hard Lines
For most men, a gradual fade is more forgiving than a sharp line between hair and no hair. Using an intermediate guard length to bridge areas is the easiest way to avoid a stark border.
If you prefer a bolder, sculpted style, take extra time to keep edges balanced and recheck them in different lighting so both sides align well.
Going Completely Smooth: Shaving Or Waxing
Some men choose a hair-free chest for sports, hygiene preferences, or aesthetic reasons. If you decide to remove hair completely, technique and aftercare matter even more, because bare skin shows irritation easily.
Two common methods are shaving at home or using professional waxing or similar treatments; each has trade-offs in comfort, cost, and regrowth.
Shaving Your Chest
- Trim first: Use a trimmer to bring longer hair down to a short, even stubble so the razor does not clog.
- Shower and exfoliate: Soften remaining hair and clear dead skin before shaving.
- Apply a shaving gel or cream: Use a product designed for body shaving to reduce friction and help the razor glide.
- Use short, light strokes: Shave in the direction of hair growth first, rinsing the blades often.
- Rinse and pat dry: Wash away residue with cool water to calm the skin.
- Apply a soothing moisturizer: Use an alcohol-free lotion or gel to reduce redness and tightness.
Waxing And Other Long-Lasting Options
Professional waxing, sugaring, or similar services remove hair from the root, leading to a smoother finish that typically lasts longer than shaving. Regrowth often feels softer because the hair tapers naturally as it returns.
These methods can be more uncomfortable and may not be ideal for very sensitive skin, so consider a patch test or consultation first.
Aftercare: Keeping Skin Calm And Healthy
Post-grooming care is where many routines fall apart, leading to bumps or itching that could have been avoided. Treat the chest as you would your face after shaving: gently cleanse, hydrate, and avoid heavy friction.
A consistent aftercare routine also makes your next trim or shave easier because the skin stays smoother and less congested.
Post-Grooming Do’s And Don’ts
- Do rinse with cool water to calm the skin and close pores.
- Do apply a lightweight, fragrance-free moisturizer or gel.
- Do wear soft, breathable fabrics (like cotton) right after grooming.
- Don’t hit the gym immediately; heavy sweat and friction can irritate freshly groomed skin.
- Don’t scratch or pick at any small bumps; use a soothing product instead.
- Don’t use harsh colognes or strong alcohol-based products on the area.
Safety Tips And Common Mistakes
Chest grooming is straightforward, but rushing or skipping steps can lead to cuts, razor burn, or awkward patches. Knowing what not to do is just as important as knowing the right technique.
Respect the contours of your chest, especially around the nipples and ribs, where skin is thinner and more curved.
Mistakes To Avoid
- Using a facial razor or worn-out blades on thick body hair, which can tug and cause irritation.
- Starting with the shortest guard and accidentally taking the entire chest too close on the first pass.
- Skipping shower and exfoliation, leading to increased risk of ingrown hairs.
- Pressing too hard with the trimmer instead of letting the blades do the work.
- Ignoring aftercare and then wondering why the area itches or breaks out.
How Often Should You Groom?
Everyone’s hair grows at a different pace, but most men find a rhythm within a few weeks of experimenting. Trimming schedules range from weekly quick touch-ups to monthly full resets.
If your goal is a consistently neat look, shorter, more frequent sessions are usually easier than waiting until everything is overgrown and starting from scratch.
Suggested Maintenance Patterns
- Neat trim style: Every 1–2 weeks for a quick once-over with the same guard length.
- Natural with edges cleaned: Every 3–4 weeks to tidy neck, shoulders, and stray hairs.
- Full smooth chest: Shave every few days or book waxing sessions every 4–6 weeks, depending on regrowth.
Frequently Asked Questions About Chest Hair Grooming
Does trimming chest hair make it grow back thicker?
Trimming or shaving chest hair does not change how fast or how thick it grows; it only alters the bluntness of the cut end. Hair may feel stiffer as it grows back because the tip is flat, but the number of follicles and growth rate remain the same.
Is it better to trim on wet or dry hair?
Many body trimmers work more efficiently on dry hair for even cutting, while shaving close with a razor usually works best on wet, softened hair with a protective gel or cream. Each method benefits from a warm shower beforehand to prep the skin.
How do I avoid ingrown hairs on my chest?
To reduce ingrown hairs, avoid shaving against the grain aggressively, exfoliate gently a couple of times per week, and keep the area moisturized rather than dry and tight. Giving the skin a day or two to rest between close shaves also helps.
Can I use the same trimmer for face and body?
Some devices are advertised as multi-use, but many grooming experts recommend a body-specific trimmer for thicker torso hair and hygiene reasons. If you do share a device, use different guards and clean it thoroughly between areas.
What if my chest hair is patchy?
If your chest hair is naturally uneven, keeping everything a bit shorter usually blends patches better than either letting it grow wild or shaving one area completely bald. Cleaning up the neck and shoulders while maintaining moderate length on the main chest can also make patchiness less noticeable.
Making Chest Grooming Work For You
Chest hair grooming is ultimately about comfort and self-expression, not about chasing a single ideal. The best routine is the one that you can repeat easily and that leaves you feeling confident in a T-shirt, at the gym, or by the pool.
Experiment with different lengths and shapes, pay attention to how your skin responds, and adjust until you find a low-stress system that fits your body and your lifestyle.