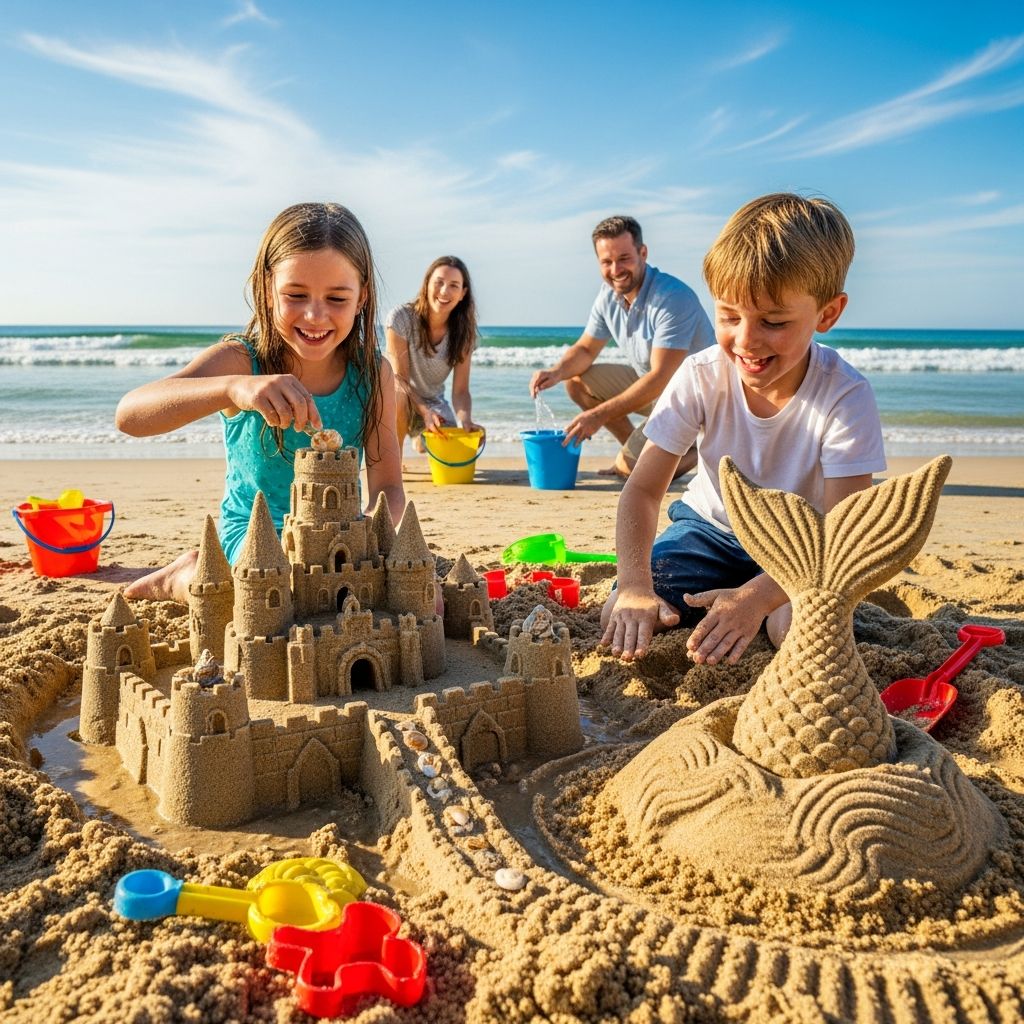
Heading to the beach with children can be one of the simplest and most rewarding family outings when the focus is on play, creativity, and connection. Sand, water, and a few simple tools are all you need to turn an ordinary day on the shore into an unforgettable experience of building sand castles and sculpting imaginative creatures.
This guide walks through age-appropriate ideas, practical tips, and creative inspiration for building sand castles and sand sculptures with kids, so every member of the family—from toddlers to teens—can join in the fun.
Why Sand Play Is Great for Kids
Playing in the sand is more than just a way to pass the time; it supports a child’s physical, cognitive, and emotional development. Digging, scooping, and molding sand strengthen fine and gross motor skills while encouraging problem-solving and experimentation.
Sand castles and sculptures also give children a chance to express creativity in a low-pressure environment, because the creations are temporary and easily reshaped. This makes the beach a natural outdoor classroom where curiosity and imagination thrive.
- Encourages sensory play through touch, temperature, and texture.
- Builds coordination and strength as children dig, carry, and pack sand.
- Teaches basic science concepts like gravity, water absorption, and stability.
- Supports cooperative play and communication when working as a team.
Getting Ready: Beach and Sand Basics
Preparation makes sand play easier and safer, especially with younger children. Start by choosing a spot on the beach with firm, damp sand that is not too close to the waterline; this type of sand holds its shape better and is less likely to crumble quickly.
Look for a flat area with enough space for everyone to build comfortably, and avoid deep holes or excavation that might create hazards for people walking along the beach or disturb wildlife habitats beneath the surface.
Essential Items to Bring
- Beach blanket or mat for resting between building sessions.
- Small buckets and shovels (soft plastic for toddlers, sturdier tools for older kids).
- Spray bottle or small watering can to keep structures damp.
- Sun protection: hats, sunscreen, and protective clothing.
- Plenty of drinking water and snacks to maintain energy.
Recommended Tools for Sand Castles and Sculptures
While it is absolutely possible to build with just your hands, a few simple tools can expand what kids are able to create and keep them engaged longer. Many tools can be improvised from common household items, so there is no need for expensive specialized kits.
Choose tools that match your child’s age and coordination level, and remember that safety and ease of use are more important than complexity.
Simple Tool Ideas
- Basic tools: small buckets, cups, plastic bowls, and spoons.
- Digging tools: child-safe shovels, scoops, and trowels.
- Carving tools: plastic knives, old credit cards, craft sticks, or spatulas.
- Detail tools: straws (for blowing away loose sand), soft brushes, and small paintbrushes.
- Decoration supplies: shells, stones, seaweed, driftwood, and beach-safe natural items.
| Age Group | Best Tools | Suggested Projects |
|---|---|---|
| Toddlers (1–3 years) | Soft buckets, large shovels, chunky molds, hands and feet | Simple mounds, footprints, handprints, filling and dumping containers |
| Preschoolers (3–5 years) | Small buckets, cups, basic molds, wide plastic spades | Basic towers, simple castles, animal shapes, decorated piles |
| Early school age (6–9 years) | Shovels, carving knives, spatulas, detail brushes | Multi-tower castles, forts, tunnels, animals and fantasy creatures |
| Older kids and teens (10+ years) | Sturdier shovels, sculpting tools, straws, rulers, and small trowels | Complex castles, detailed sculptures, scenes with multiple characters |
How to Build a Strong Sand Castle
Building a sturdy sand castle starts with understanding the relationship between sand and water. The strongest structures come from sand that is evenly mixed with water so that the grains stick together like tiny building blocks, rather than from simply flipping a bucket of loosely packed wet sand.
Help children see castle-building as a process: preparing the base, layering and packing sand, and then adding details. This teaches patience and planning as well as creativity.
Step-by-Step Sand Castle Method
- Choose damp sand: Walk closer to the waterline until the sand feels cool and firm, but avoid areas where waves are currently reaching.
- Create a base mound: Scoop sand from a wide area rather than digging deep holes. Pile it into a big, low mound where you plan to build.
- Add water generously: Pour buckets of water over the mound and use your hands or feet to mash and mix, making sure all layers are damp.
- Pack and press: Have children stomp, press, or pat the sand down firmly to create a compact base that will support towers and walls.
- Build towers: Use bottomless buckets or regular sand molds, filling them with very wet sand and pressing down as you go. Flip or lift carefully, then tap the sides to release.
- Connect with walls: Add packed sand between towers to form walls, and smooth or carve them to achieve the desired shape.
- Add details: Use smaller tools to carve windows, doors, stairs, and battlements. Keep a small container of water handy to re-wet areas that begin to dry.
Simple Engineering Lessons for Kids
- Explain that sand and water form tiny “bridges” that help the sand hold its shape.
- Invite kids to compare what happens when they try to build with dry, damp, and extremely wet sand.
- Talk about balance and weight when building tall towers or narrow bridges.
Sand Sculptures: Beyond Castles
Once kids are familiar with basic sand castles, they often enjoy branching out into free-form sculptures. Animals, fantasy creatures, vehicles, and even miniature cities are all fun options that invite storytelling and role-play.
Sand sculptures allow children who are less interested in traditional castles to engage in the same sensory and creative experience but with themes that better match their interests.
Fun Sand Sculpture Ideas
- Sea creatures: turtles, dolphins, fish, octopuses, and starfish.
- Fantasy figures: dragons, mermaids, dinosaurs, or imaginary monsters.
- Everyday objects: cars, boats, treasure chests, or giant sand cupcakes.
- Family faces: simple sand portraits with shells for eyes and pebbles for smiles.
- Scenes: a small village, a zoo, or a beach-themed story setting.
Basic Sculpting Technique
- Start with a large, tightly packed mound of damp sand.
- Roughly shape the mound with hands and shovels to block out the overall form.
- Gradually remove small amounts of sand to refine details, working from top to bottom.
- Use a spray bottle or small cup of water to keep critical areas moist and stable.
- Finish with fine tools (sticks, straws, brushes) for textures like scales, fur, or brick lines.
Age-Appropriate Ideas and Tips
Children of different ages approach sand play in very different ways. Matching activities to developmental stages keeps frustration low and helps kids feel proud of what they make.
Use the suggestions below as flexible guidelines, and be ready to adapt based on your child’s personality and interest level.
Toddlers (1–3 Years)
- Focus on simple actions like scooping, pouring, patting, and stomping.
- Let them destroy and rebuild; knocking things down is part of the fun.
- Offer large, easy-to-grip tools and avoid anything sharp or breakable.
- Create basic shapes for them (like mounds or towers) and invite them to decorate with shells.
Preschoolers (3–5 Years)
- Encourage simple castles with a few towers and a surrounding wall.
- Invite storytelling: ask who lives in the castle or what the animals are doing.
- Introduce basic patterns using shells, rocks, and sticks.
- Model easy techniques like pressing sand into molds and gently lifting them.
School-Age Kids (6–9 Years)
- Teach step-by-step methods for strong foundations and multi-tower castles.
- Introduce carving tools for doors, windows, staircases, and bridges.
- Encourage experimentation: tunnels, moats, arches, and small sculptures.
- Suggest team projects so siblings or friends can divide tasks and contribute different ideas.
Older Kids and Teens (10+ Years)
- Challenge them to design more complex structures or themed sculptures.
- Provide reference photos for inspiration, such as castles, animals, or famous landmarks.
- Invite them to plan a layout on paper first, then build it in the sand.
- Let them take the lead in helping younger siblings or friends build and decorate.
Beach Safety and Sand Etiquette With Kids
Fun at the beach goes hand in hand with safety and respect for the environment. Modeling safe behavior helps children learn lifelong habits for outdoor play and protects other beach visitors and wildlife.
Take a moment before building to set some ground rules that balance freedom and safety.
Key Safety Guidelines
- Always supervise children near water, regardless of their swimming ability.
- Avoid digging deep, vertical holes that could collapse or trap someone.
- Fill large holes when you are done to prevent injuries to people walking after dark.
- Watch for tides and waves that may quickly reach your building area.
- Use sunscreen, hats, and breaks in the shade to prevent sunburn and overheating.
Respecting Wildlife and the Environment
- Do not disturb marked nesting areas or dunes where birds or turtles may lay eggs.
- Use natural decorations (shells, stones, driftwood) that you plan to leave behind or return.
- Avoid litter, and carry out everything you brought with you.
- Talk with kids about how their sand structures will eventually wash back into the sea as part of the natural cycle.
Making It Educational and Creative
Sand play offers endless opportunities for gentle, playful learning without turning the beach trip into a formal lesson. A few open-ended questions can prompt kids to think about size, shape, number, and cause and effect while they build.
Encourage kids to observe, experiment, and explain what they notice, turning every sand castle into a miniature science and art project.
Simple Learning Extensions
- Math skills: counting towers, comparing heights, and estimating how many buckets of sand are needed.
- Science skills: observing how sand changes when dry, damp, or saturated with water.
- Language skills: naming creations, inventing stories, and describing textures and shapes.
- Art skills: exploring symmetry, patterns, and contrast using natural materials.
Photo Memories and Reflection
Because sand creations are temporary, taking photos can give kids a sense of accomplishment and something to look back on later. Let them pose with their castles and sculptures or photograph favorite details like windows, shells, or faces they have made.
Later at home, those photos can inspire drawings, stories, or even plans for the next beach trip’s building projects.
Fun Variations for Different Locations
Beach-style sand play does not have to be limited to the ocean. Many of the same ideas can be adapted for lakeshores, rivers, or even playground sandboxes, adjusting tools and expectations based on the type of sand available.
Wherever you go, the basic principles remain the same: damp, well-packed sand; simple tools; creativity; and a focus on enjoying the process rather than achieving perfection.
- Lakes and rivers: Often have coarser sand, which is great for sturdy bases but may require extra water for fine detail.
- Playground sandboxes: Ideal for younger children who need a contained space; bring your own water and a towel to clean up afterward.
- Backyard sand areas: Allow for repeated projects; kids can test new techniques over time and see improvement.
Frequently Asked Questions (FAQs)
How wet should the sand be for building castles?
The best sand for building is evenly damp, not just wet on the surface. When you squeeze it in your hand, it should hold its shape without dripping. If it crumbles, add more water; if it slumps, mix in more dry sand until it feels firm but moldable.
What if my child keeps knocking everything down?
Many young children enjoy the sensation of knocking castles down as much as building them. Instead of resisting this, set up a routine where an adult or older child builds a small structure specifically for knocking down, or invite the child to stomp on a finished creation as a fun “ending” ritual before moving on.
Are there any tools I should avoid bringing?
Avoid sharp metal tools, glass containers, or heavy objects that could hurt children’s hands or feet. Stick with light, child-safe plastic tools and smooth natural items like shells and small stones, checking for sharp edges before handing them to kids.
How can I help a perfectionist child enjoy sand play?
Remind them that sand creations are meant to be temporary and that every attempt teaches something new. You can also take step-by-step photos of the building process so they can appreciate the effort and progress, not just the final result.
What if the tide washes away our creations?
Use it as an opportunity to talk about nature and change. Watching the waves gradually reshape or erase a castle can be a memorable way to discuss cycles, impermanence, and how the beach is constantly transforming.
Building sand castles and sand sculptures with kids turns a simple day at the beach into a rich mix of play, learning, and shared memories. With a little planning, age-appropriate tools, and an emphasis on creativity rather than perfection, every family can enjoy free fun at the shore that children will remember for years to come.