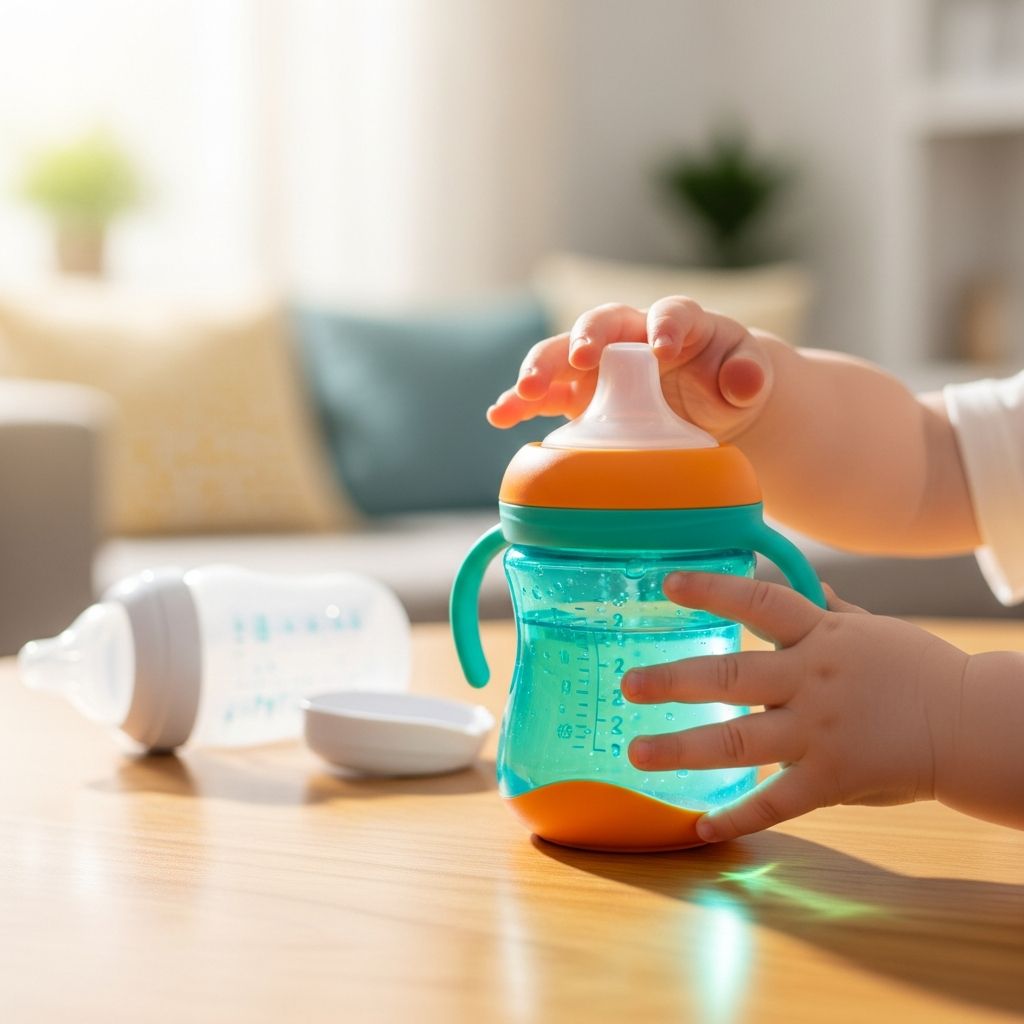
Moving from a bottle to a cup is one of those milestones that feels small from the outside, but huge when you are the parent watching your baby become more independent. This guide walks you through how to introduce sippy cups, pick the right style, troubleshoot resistance, and eventually transition toward open cups, all with realistic, gentle steps.
Why the Bottle-to-Cup Transition Matters
The way your child moves from bottles to cups can influence oral development, eating habits, and even sleep routines. While there is no one “perfect” method, knowing the benefits of transitioning and the potential downsides of prolonged bottle use can help you make informed choices.
- Supports healthy teeth and jaw development: Learning to sip rather than constantly suck encourages muscles used for chewing and speech, and may reduce the risk of dental problems related to long-term bottle use.
- Encourages self-feeding skills: Handling a cup builds coordination, independence, and confidence during meals.
- Helps prevent over-reliance on milk: Toddlers who linger on bottles may drink excessive milk or sweet drinks, leaving less appetite for solid foods.
Understanding Readiness: Signs Your Child May Be Ready
Age recommendations can be helpful, but your child’s developmental cues are more important than the number on the calendar. Instead of looking only at months, watch for everyday signs of readiness.
- Sits with support and shows head control: Your child should sit fairly steadily in a high chair or on your lap without slumping forward.
- Reaches for your cup or mug: Many babies show curiosity by grabbing your glass at meals and trying to bring it to their mouths.
- Handles toys with two hands: Holding, lifting, and banging toys together is a good indicator of basic hand-to-mouth coordination.
- Shows interest in solid foods: If your baby is starting purees or soft finger foods, it is often a good time to explore cup skills alongside feeding.
Most babies begin experimenting with cups sometime in the second half of their first year, while many toddlers complete the transition away from bottles during the second year of life. Always check with your child’s healthcare provider if you are unsure about timing for your family.
Types of Cups and How to Choose One
The cup aisle can be overwhelming: spouts, straws, trainers, and open cups all promise to be spill-proof and magical. Each style has its pros and cons, and the best cup is usually the one that matches your child’s stage and temperament.
Common Cup Styles Explained
- Soft-spout cups: Often made of flexible silicone, these feel familiar to babies who are used to bottle nipples and may be helpful for very first introductions.
- Hard-spout cups: More durable but with a different mouth feel. Some parents like these for toddlers who chew through soft spouts.
- Straw cups: Encourage lip closure and tongue movements similar to those used for speech and can be a great option for older babies and toddlers.
- 360-style or rim cups: Designed to let children drink from the entire rim while still offering some spill protection, they can be a helpful bridge toward open cups.
- Small open cups: These are just tiny, easy-to-grip cups without lids. They require more hands-on help at first but teach true sipping skills.
Quick Comparison of Cup Options
| Type of cup | Best for | Key advantages | Potential downsides |
|---|---|---|---|
| Soft-spout sippy | Early transitioners, bottle-attached babies | Familiar feel, gentle on gums, usually leak-resistant | May encourage prolonged sucking if used for too long |
| Hard-spout sippy | Older babies and toddlers | Durable, often easy to clean | Rigid spout can promote biting; some designs require strong suction |
| Straw cup | Toddlers and strong suckers | Supports oral motor skills, useful for water on the go | Straws and valves can be tricky to wash thoroughly |
| 360 / rim-style | Younger toddlers learning to sip at the rim | More natural drinking motion, limited spills | Some children struggle to activate the seal at first |
| Small open cup | Supervised practice at meals | Teaches true sipping and pacing of liquid | Messier, requires close supervision and patience |
When choosing, prioritize a design that is easy to clean, fits your child’s hands, and does not require excessive sucking effort. Many families experiment with two or three types before finding a favorite, and that trial-and-error is completely normal.
Step-by-Step: A Gentle Transition Plan
There are many valid paths from bottle to cup. The plan below offers a gradual, low-pressure approach that can be adjusted for your child’s age, temperament, and feeding history.
Step 1: Introduce the Cup as a Toy
Before expecting your baby to drink much from a cup, allow time to simply explore it. Let them mouth the spout or rim, bang it on the tray, or pass it from hand to hand. This first stage is about curiosity, not consumption.
- Offer the empty or barely filled cup during calm parts of the day, such as after a nap.
- Demonstrate by taking a sip yourself and smiling so your child connects the object with drinking.
- Keep expectations low; a few successful sips count as a win.
Step 2: Start With Small Amounts of Water or Milk
Once your baby is comfortable holding the cup, begin offering small amounts of liquid. Many parents start with water between meals so there is less pressure and less mess if it spills, then later offer breast milk or formula in the cup for more meaningful practice.
- Begin with one cup session per day, such as at a mid-day meal or snack.
- Fill the cup with a small volume so spills are manageable and your child does not get overwhelmed.
- Hold the cup with your child at first, tilting it gently until they get the feel of it.
Step 3: Replace One Bottle Feeding at a Time
After a week or two of casual practice, you can begin to swap out one bottle for a cup. Some families prefer to start with a mid-morning or mid-afternoon feeding, avoiding times when their child is most tired or clingy.
- Offer the usual milk in a cup instead of a bottle for that specific feeding.
- Provide extra comfort through cuddling or a favorite song to ease the change.
- Stick with this new routine for several days before changing another feeding.
Step 4: Gradually Phase Out Remaining Bottles
Once your child accepts one or two cup feedings, you can slowly retire additional bottles. Many parents keep the first-thing-in-the-morning or bedtime bottle the longest because of the emotional comfort it provides, then address those last once the child is confident with cups during the day.
- Keep offering solid foods and snacks so your child’s overall intake stays steady even if milk volume dips for a while.
- Remind yourself that short-term changes in milk consumption are usually temporary as children adjust.
- When you feel ready, remove the final bottle and remain consistent so your child understands that cups are the new normal.
What to Put in the Cup (and What to Limit)
What goes in the cup matters just as much as the cup itself. It is tempting to fill it with sweet drinks to encourage interest, but simple choices usually support better habits and dental health.
- Water: An ideal everyday drink between meals, especially as your child moves into toddlerhood.
- Breast milk or formula: Helpful when first introducing the cup, since familiar flavors can motivate reluctant babies.
- Cow’s milk (for older toddlers, if recommended): Often served at meals after the first year, depending on your child’s needs and your pediatrician’s guidance.
- Limit sugary drinks: Juice, flavored milk, and other sweet beverages can contribute to dental problems and poor appetite for nutritious foods if sipped all day.
Try to avoid letting your child walk around constantly sipping on milk or sweet drinks. Offering beverages at meals and set snack times helps protect teeth and teaches a healthy rhythm of eating and drinking.
Common Challenges and Practical Solutions
Even with the best plan, many children push back against change. Resistance does not mean you are doing anything wrong; it simply reflects how attached your child may be to their familiar routine.
“My Baby Refuses the Cup”
- Try a different style: Some children prefer straws over spouts, or vice versa. A new texture can make a big difference.
- Adjust the flow: If the liquid comes out too slowly, your child may give up; if it gushes, they may cough and resist. Look for a moderate, easy flow.
- Pair the cup with something positive: Read a short book, use a favorite placemat, or sit together at the table to make cup time feel cozy and social.
“My Toddler Only Wants Bottles at Bedtime”
- Gradually reduce the amount in the bedtime bottle over several nights while increasing cuddles, stories, or songs.
- Offer a small cup of water after teeth brushing if your child asks for a drink, and keep bottles out of the sleep space.
- Expect some protest, but stay calm and consistent so your toddler learns that comfort now comes from connection, not from a bottle.
“All They Do Is Play and Spill”
- Use very small amounts of liquid during practice sessions so spills are minor and easy to clean.
- Offer open cup practice only when you can sit right next to your child, and rely on more spill-resistant styles when you are distracted or on the go.
- Remember that experimentation is part of learning; pouring, tipping, and shaking teach cause and effect as well as cup skills.
Staying Mindful of Oral and Feeding Development
Sippy cups are tools, not destinations. The long-term goal is to help your child drink from regular cups comfortably, not to keep them on spouts or straws indefinitely.
- Rotate cup types so your child practices different mouth movements instead of relying on one intense sucking pattern.
- Offer chances to practice with a small open cup at mealtimes, even if only for a few sips under your supervision.
- Watch for prolonged, constant sipping on any drink, especially sweet ones, and gently shift toward drinking at defined times instead of all day.
If you ever have concerns about speech clarity, chewing, or drooling, share them with your pediatrician or a feeding or speech specialist. These professionals can help you fine-tune cup choices and feeding routines for your child’s specific needs.
Practical Tips to Make Transitions Easier
A few thoughtful strategies can smooth the bottle-to-cup journey and reduce power struggles for everyone.
- Choose calm moments: Introduce new cups when your child is rested and not overly hungry or upset.
- Model often: Let your child see you and siblings sipping from cups at the table so cups feel like a normal part of family life.
- Keep routines predictable: Use roughly the same sequence for meals and snacks so your child knows when to expect food and drinks.
- Avoid battles: If frustration is rising for either of you, pause and try again later, rather than forcing the issue.
- Celebrate small wins: A few extra sips, less spilling, or tolerating a new cup on the tray are all steps in the right direction.
Frequently Asked Questions
At what age should my child be off bottles?
Many health professionals encourage families to begin offering cups during the second half of the first year and to work toward phasing out bottles sometime in the second year of life. The exact timeline depends on your child’s development, feeding history, and any medical considerations, so it is always wise to check with your pediatrician about what makes sense for your family.
Should I switch directly to an open cup instead of using sippy cups?
Some families skip traditional sippy cups entirely and focus on straw cups and small open cups from the start, especially when they can supervise closely at meals. Others find that more spill-resistant cups are practical for car rides, daycare, or situations where messes are harder to manage. You can mix and match depending on the setting while still moving steadily toward confident open cup drinking.
How long will the transition take?
For some babies, accepting a cup happens within a few days; for others, it unfolds slowly over several weeks or months. Progress often comes in bursts, and it is normal to see setbacks during illness, growth spurts, or big life changes. Focusing on gentle consistency over perfection tends to matter more than the exact pace.
What if my child drinks less milk after switching to cups?
A brief drop in milk intake is common as children experiment with new drinking skills and shift toward more solid foods. Offer nutritious meals and snacks, continue to present milk at appropriate times, and track diapers and energy levels. If you are worried about hydration or growth, consult your child’s healthcare provider for personalized guidance.
Is it okay to use juice in the cup to encourage interest?
While flavored drinks can tempt a reluctant child to try a cup, relying on sweet beverages can create habits that are hard to undo and may increase the risk of dental and nutrition issues. It is usually better to keep juice limited, focus on water and milk, and use playfulness, modeling, and patience to build cup skills instead of using sugar as the main motivator.
Putting It All Together
Helping your child transition from bottle to cup is less about finding the perfect product and more about offering steady, supportive practice over time. By paying attention to your child’s cues, choosing cup styles that match their abilities, and keeping routines calm and flexible, you can make this milestone feel manageable and even fun. Spills, protests, and detours are part of the process, but with patience and consistency, your child will gain the skills and confidence to drink from a cup just like the rest of the family.