Why Bottle Cap Bookmarks Are a Great Family Craft
Handmade gifts carry a special kind of warmth that store-bought items often can’t match. When children are involved in making something for a loved one, the result is more than just an object—it’s a memory, a moment of connection, and a small piece of their personality given as a gift. Bottle cap bookmarks are a perfect example of this kind of project. They’re simple enough for young hands to manage, yet creative enough to feel truly unique.
These bookmarks are especially well-suited for occasions like Mother’s Day, birthdays, or teacher appreciation. They’re small, practical, and can be customized to match the recipient’s tastes. Whether it’s a favorite color, a beloved book character, or a meaningful photo, the design possibilities are nearly endless. Plus, they’re made from everyday materials, many of which can be found around the house or recycled from other projects.
What Makes These Bookmarks Special
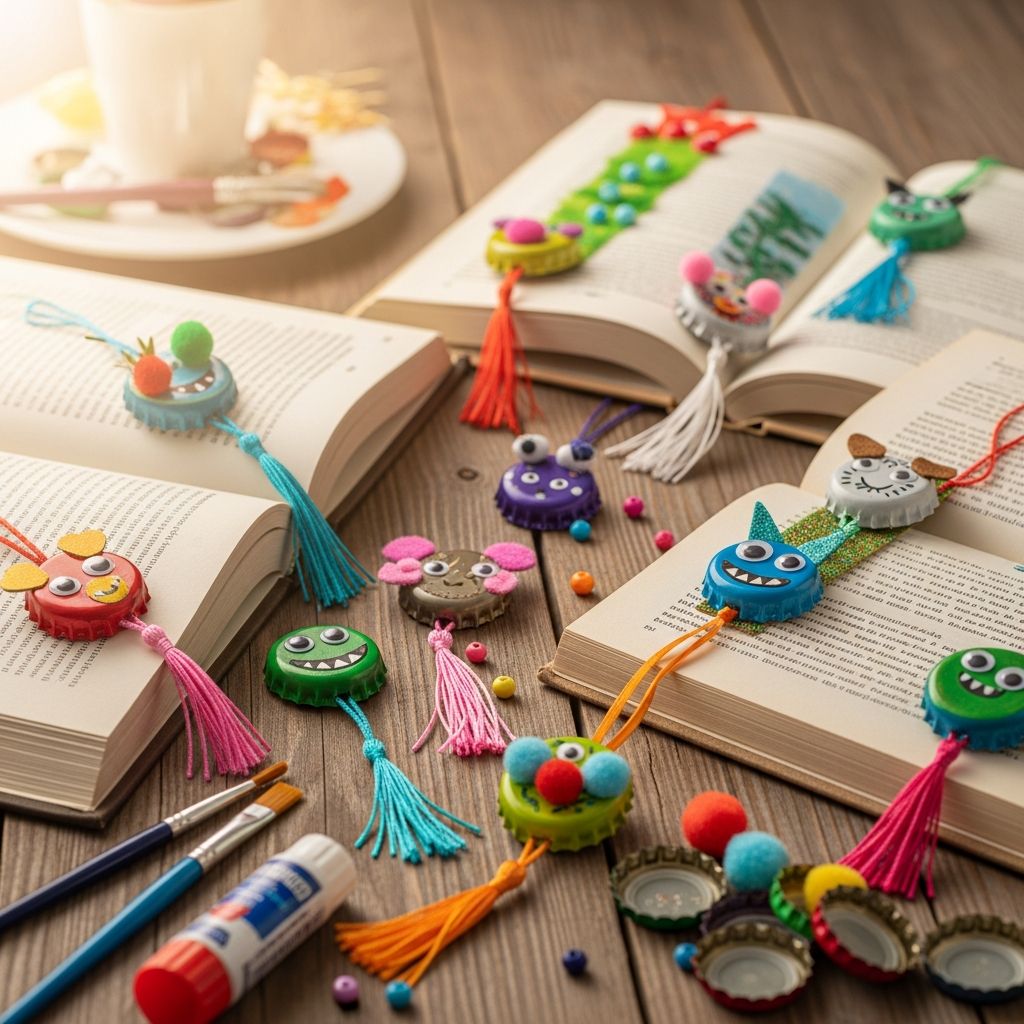
Unlike mass-produced bookmarks, handmade ones have character. A bottle cap bookmark combines durability with charm. The metal cap protects the design inside, while the paper clip or clip-style attachment keeps it securely in place on the page. This makes them ideal for avid readers who go through books quickly and need something that won’t fall out or get damaged easily.
For children, the process of making these bookmarks is just as valuable as the final product. They practice fine motor skills, learn about planning and design, and experience the joy of giving something they’ve created themselves. For parents, it’s a low-cost, low-mess activity that can be done at home with minimal preparation.
Gathering Your Materials
One of the best things about this craft is that most of the supplies are either already on hand or easy to obtain. Here’s what you’ll typically need:
- Empty metal bottle caps (soda, beer, or other drink caps)
- Decorative paper or cardstock
- Scissors or a circle punch
- Strong craft glue or a clear drying adhesive (like Mod Podge, E6000, or a similar product)
- Small paper clips or binder clips
- Optional: clear sealant (like Diamond Glaze, resin, or a thick layer of Mod Podge)
- Optional: small magnets, jump rings, or other attachments if making variations
When choosing bottle caps, metal ones work best because they’re sturdy and have a nice rim that helps hold the design in place. Plastic caps can be used, but they may not hold up as well over time. If you’re using caps from beverages, make sure they’re thoroughly cleaned and dried before starting.
Choosing the Right Paper and Design
The inside of the bottle cap is where the creativity really shines. This is the part that will be visible when the bookmark is in use, so it’s worth spending a little time thinking about the design.
Thicker paper, like cardstock or scrapbook paper, works better than thin printer paper because it’s less likely to wrinkle or tear when glued into the cap. If you’re working with younger children, pre-cutting a few circles in different colors and patterns can make the activity faster and more focused on the fun parts—choosing and placing the design.
Design ideas can include:
- Favorite colors or patterns
- Small photos (printed on photo paper or laminated)
- Hand-drawn drawings or doodles
- Stickers or printed images from books, movies, or hobbies
- Initials or names for a personalized touch
For a Mother’s Day gift, children might draw a heart, a flower, or a simple portrait of Mom. For a teacher, a small apple, book, or school-themed image can be a thoughtful addition. The key is to keep the design small enough to fit comfortably inside the cap, with a little space around the edges so it doesn’t get cut off.
Step-by-Step Guide to Making the Bookmark
Once your materials are ready, the actual construction is straightforward. Here’s a clear, family-friendly process that works well for most age groups.
1. Prepare the Bottle Caps
Start by cleaning the bottle caps with warm, soapy water and letting them dry completely. This removes any residue and makes the glue adhere better. If the caps have sharp edges, you can gently smooth them with fine sandpaper or file, especially if very young children will be handling them.
2. Cut or Punch the Design Circles
Use scissors or a circle punch to cut out circles that fit just inside the rim of the bottle cap. A 1-inch punch is often a good size, but you can adjust based on the caps you’re using. If you don’t have a punch, trace around a small cup or lid and cut carefully with scissors.
Let children choose their own designs and help them cut if needed. For younger kids, you might want to pre-cut a variety of options so they can focus on selection rather than cutting.
3. Attach the Design to the Cap
Apply a thin, even layer of strong craft glue to the inside of the bottle cap. Press the paper circle into place, smoothing out any air bubbles or wrinkles. If you’re using a clear sealant like Diamond Glaze or Mod Podge, you can apply it over the top of the paper after it’s glued in, which will protect the design and give it a glossy, professional look.
Let the glue dry completely before moving on. Depending on the adhesive, this could take anywhere from 15 minutes to several hours. If you’re in a hurry, you can work on multiple caps at once and let them dry while you prepare the next step.
4. Add the Clip or Attachment
Once the design is secure and dry, it’s time to attach the clip. A small paper clip or binder clip works well as a simple, functional attachment. Bend the clip slightly so it can sit flat against the back of the cap, then glue it in place with a strong adhesive.
For a more polished look, you can use a small metal clip or even a mini binder clip. If you’re making a variation like a charm or magnet, you can attach a jump ring or small magnet to the back instead. Just make sure the attachment is strong enough to hold the weight of the cap and won’t come loose with regular use.
5. Final Touches and Drying
After the clip is attached, let the bookmark dry completely. This is especially important if you’ve used a lot of glue or a thick sealant. A fully cured bookmark will be more durable and less likely to come apart when used in a book.
Once dry, you can add a final protective layer if desired. A second coat of clear sealant over the entire front of the cap will help protect the design from moisture and wear, making the bookmark last longer.
Customizing for Different Occasions
One of the strengths of this craft is how easily it can be adapted for different people and events. Here are a few ideas to inspire your own variations:
- Mother’s Day: Use soft colors, hearts, flowers, or family photos. Add a small note like “Best Mom Ever” or “Love You, Mom” on the design.
- Teacher Appreciation: Choose school-themed designs, apples, books, or stars. Include the child’s name and grade for a personal touch.
- Birthday Gifts: Match the design to the recipient’s favorite color, hobby, or character. For older kids or adults, a more sophisticated pattern or photo can make a thoughtful gift.
- Everyday Use: Make a set for family members to use at home. Each person can have their own style, making it easy to keep track of who’s reading what.
Practical Tips for Success
To make the most of this craft, keep these practical tips in mind:
- Work on a protected surface, like a plastic tray or newspaper, to avoid glue stains.
- Use a small brush or toothpick to apply glue precisely, especially in tight spaces like the inside of the cap.
- If glue gets on the rim of the cap, wipe it off gently with a damp cloth before it dries.
- Let children take the lead on design choices, even if the result isn’t “perfect.” The goal is creativity and fun, not a flawless product.
- Make several at once to save time and materials. A batch of bookmarks can be made in one session and given as a set.
Why This Craft Supports Learning and Development
Beyond being a fun activity, making bottle cap bookmarks supports several areas of child development:
- Fine Motor Skills: Cutting paper, handling small caps, and applying glue all help strengthen hand muscles and improve coordination.
- Decision-Making: Choosing colors, patterns, and designs encourages children to think about preferences and make choices.
- Patience and Focus: Waiting for glue to dry and following step-by-step instructions builds attention span and self-regulation.
- Emotional Expression: Creating a gift for someone special allows children to express love, appreciation, and thoughtfulness in a concrete way.
For parents and caregivers, this kind of craft offers a chance to slow down, connect, and share a meaningful experience. It’s a simple way to say, “I see you, I appreciate you, and I made this just for you.”
Storage and Gifting Ideas
Once the bookmarks are finished, they can be stored in a small box, pouch, or envelope until they’re ready to be given. For a more polished presentation, consider:
- Placing each bookmark in a small cellophane bag with a ribbon.
- Attaching a handwritten note explaining who made it and why.
- Putting a set of bookmarks in a decorative tin or box labeled with the recipient’s name.
- Pairing the bookmark with a small book or gift card for an extra-special touch.
Frequently Asked Questions
Can I use plastic bottle caps instead of metal?
Yes, but metal caps are generally more durable and easier to work with. Plastic caps may not hold the design as securely and can be more prone to cracking or warping over time.
What kind of glue works best?
A strong craft glue like E6000, Tacky Glue, or a clear-drying adhesive works well. For sealing the design, a thick, glossy product like Diamond Glaze or Mod Podge can add both protection and shine.
How do I keep the paper from wrinkling inside the cap?
Use thicker paper like cardstock, apply glue evenly, and press the paper down gently but firmly. If using a sealant, apply it in thin layers and let each one dry before adding more.
Can young children do this craft safely?
Yes, with supervision. Use child-safe glue, avoid very sharp tools, and help with any steps that require precision. For very young kids, pre-cutting materials and letting them focus on design and gluing can make the activity safer and more enjoyable.
How long do these bookmarks last?
With a good sealant and careful handling, bottle cap bookmarks can last for months or even years. They’re especially durable when used in paperback or hardcover books that aren’t exposed to extreme moisture or rough handling.
Final Thoughts on a Simple, Meaningful Craft
Bottle cap bookmarks are more than just a clever reuse of everyday items. They’re a way to turn ordinary moments into something special. Whether it’s a child’s first handmade gift, a family craft night project, or a small token of appreciation, these bookmarks carry a quiet kind of magic.
They remind us that creativity doesn’t require expensive supplies or complicated techniques. Sometimes, all it takes is a bottle cap, a piece of paper, and a little time spent together. In a world that often feels fast and digital, these small, tangible creations offer a welcome pause—a chance to slow down, make something with our hands, and give something that truly matters.
References
- Arts and Crafts for Children: Developmental Benefits — American Academy of Pediatrics. 2023. https://www.aap.org/en/publications/periodicals/pediatrics/arts-and-crafts-for-children/
- Recycling and Reuse: Creative Uses for Common Household Items — U.S. Environmental Protection Agency. 2024. https://www.epa.gov/recycle/recycling-basics
- Handmade Gifts and Emotional Well-Being — Journal of Consumer Psychology. 2022. https://www.sciencedirect.com/science/article/abs/pii/S1057740822000123