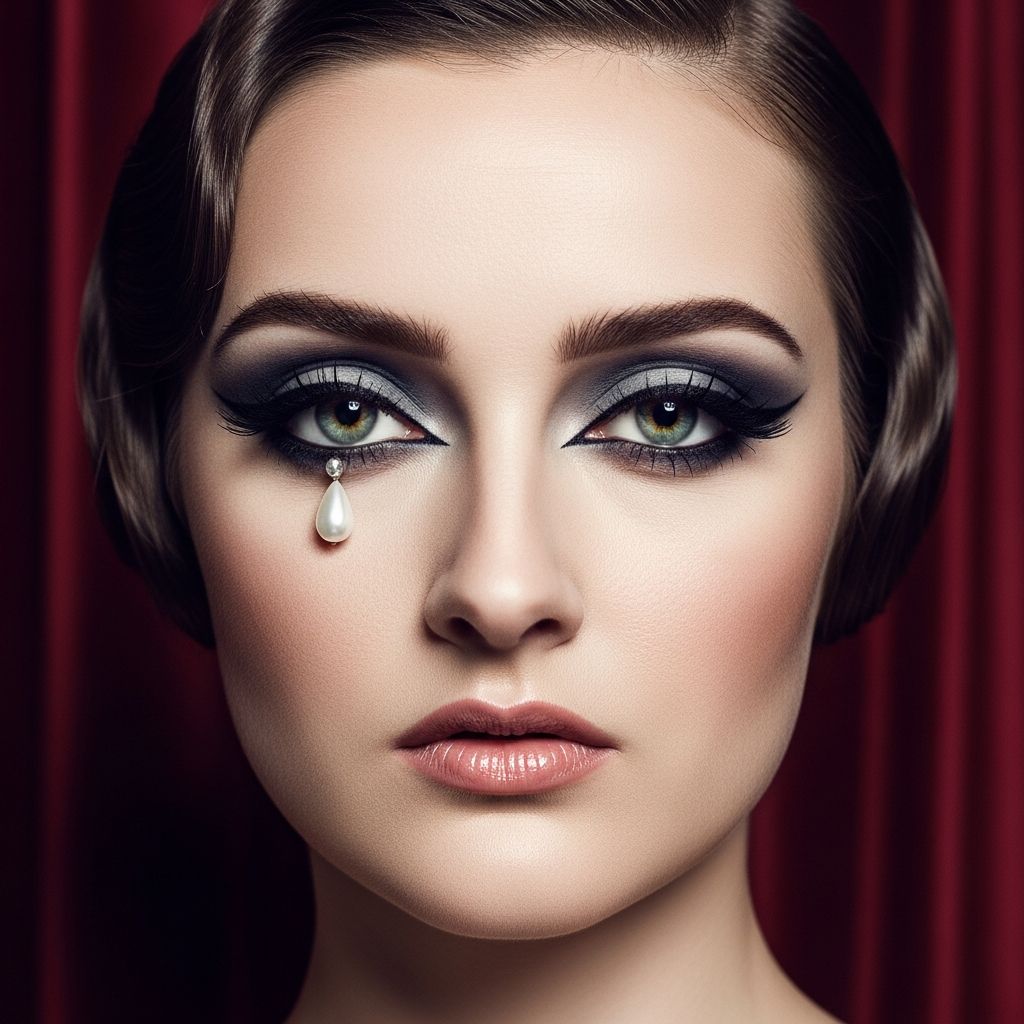
Few beauty icons are as unforgettable as Bette Davis, whose eyes became a shorthand for intensity, attitude, and unapologetic presence. This article shows you how to borrow that spirit and translate it into a modern look that feels bold, wearable, and entirely your own.
Why Dramatic Eyes Still Matter
In an age of filters and fast trends, dramatic eye makeup remains powerful because it draws attention to real expression rather than digital perfection. A strong eye look frames every emotion you show, from amusement to annoyance, in a way that feels honest and vivid. When you exaggerate your eyes deliberately, you invite people to look closer at what you are saying, not just how you look.
Re-creating an iconic eye style is not about turning yourself into a movie star copy; it is about choosing drama on your own terms. Think of Bette Davis–inspired eyes as a mood rather than a costume: slightly moody, fiercely intelligent, and absolutely uninterested in blending into the background.
Signature Elements of Iconic Eyes
Before reaching for brushes, it helps to understand what made classic eyes so memorable. Old Hollywood looks often balanced exaggerated features with purposeful restraint in other areas of the face. The goal was not prettiness in the soft, sweet sense, but presence in the sharp, commanding sense.
When translating that into modern makeup, focus on a few key ideas instead of obsessing over exact historical accuracy. These ideas include strong contrast, purposeful shape, and a slightly imperfect, lived-in finish that suggests a life fully felt rather than a face airbrushed into flatness.
Core Characteristics to Aim For
- High contrast: Dark lashes and liner against lighter skin or lid space to make the whites of the eyes pop.
- Defined shape: A visible crease and some shadow around the socket to add depth and intensity.
- Slight smudge: A hint of softness along the lower lash line to keep the look expressive instead of rigid.
- Framed by brows: Brows that clearly outline the eye area, even if they are not thick or trendy.
Prepping Your Canvas: Skin and Eye Area
Even the most carefully executed eye look will fall flat if the skin around your eyes is dry, irritated, or heavily creased from products that do not sit well. Start with skincare that supports, rather than fights, your makeup. A hydrated undereye and smooth lid make pigment blend better and last longer.
Use a lightweight eye cream or serum and give it a few minutes to sink in fully before applying any makeup. If you have oily lids, follow with a thin layer of eye primer; if your lids are dry, a small amount of concealer set with translucent powder can be enough.
Prep Checklist
- Gently cleanse your face to remove leftover mascara or liner.
- Apply eye cream to the orbital bone, not the lash line, to avoid irritation.
- Use primer or a long-wear cream shadow as a base to prevent creasing.
- Lightly set oily areas with translucent powder before adding color.
Choosing Your Color Palette
Classic Hollywood eye looks often relied on grayscale tones because black-and-white film rewarded contrast rather than color. Today, you have the freedom to echo that drama using browns, charcoals, plums, or muted jewel tones that flatter your skin tone and eye color. The point is to build depth and shadow, not necessarily to use pure black everywhere.
For most people, a mix of neutral matte shades with one deeper accent is enough. If you want to nod to vintage glamour without looking theatrical, skip shimmer on the brow bone and inner corner and keep your glow focused on the center of the lid or the skin instead.
| Eye Color | Soft Smoky Base | Deep Accent Shade |
|---|---|---|
| Brown | Cool taupe or soft charcoal | Matte black or deep espresso brown |
| Blue | Greige or light mushroom | Slate gray or deep navy |
| Green / Hazel | Muted khaki or stone | Plum, aubergine, or dark forest |
| Dark Brown / Black | Warm camel or cocoa | Ink black or rich chocolate |
Step-by-Step: Modern Bette Davis–Inspired Eyes
Think of this routine as a flexible framework. You can adjust intensity, swap colors, or skip steps depending on whether you are heading to a casual dinner or a formal event. The essence is depth around the eye, clear structure, and lashes that feel a bit extra.
Step 1: Establish the Shape
Start with a medium-matte shade that is slightly deeper than your skin tone. Use a fluffy brush to sweep it through the crease in a windshield-wiper motion, focusing on the natural hollow of your eye socket. Bring the color slightly above the crease if you have hooded lids so that it remains visible when your eyes are open.
With the same shade, lightly run color along the lower lash line from the outer third toward the middle. This quietly enlarges the eye and sets the stage for more intensity without making things muddy right away.
Step 2: Deepen the Socket
Switch to a smaller blending brush and pick up your deeper accent shade. Apply it more precisely into the crease and outer corner, forming a softly shaded “C” shape around the outer third of the eye. Concentrate most of the pigment near the lash line and let it fade upward to avoid harsh edges.
If you want extra drama, gently bring the darker shade toward the inner socket, close to the bridge of the nose, which adds that brooding, hollowed-out mood associated with classic film stars. Use a clean brush to blur the upper edges so the color looks diffused rather than drawn on.
Step 3: Define the Upper Lash Line
Choose a pencil, gel, or cake liner in black, charcoal, or deep brown. Starting from the middle of the lash line, work outward in small strokes, keeping the line thicker at the outer corner than the inner. Focus on pressing pigment between the lashes (tightlining) to make them appear denser from root to tip.
You can extend the line slightly upward at the corner for a subtle lift, but avoid a sharp, graphic wing if you are aiming for a softer, vintage-leaning finish. If your hand slips, smudge the mistake with a small brush or cotton swab instead of erasing everything; a little blur only adds to the sultry effect.
Step 4: Smudge the Lower Lash Line
Take a tiny amount of your accent shade or liner on a smudge brush and run it just beneath the lower lashes, concentrating on the outer half. Keep this line soft and slightly smoky, avoiding thick, harsh stripes that can pull the eye downward or make you look tired when you are not going for full melodrama.
If your eyes are small, stop the color just before the inner third and leave that area bright. Those with larger or more prominent eyes can take the shading a bit further inward for a moodier look; the key is to stop before the inner corner so you preserve some openness.
Step 5: Highlight Strategically
Use a matte or satin shade close to your skin tone to clean up under the brow and soften any harsh transitions. A subtle, low-shine highlight across the center of the lid can add dimension without modern glitteriness. Keep obvious shimmer away from creases if you are concerned about texture.
For a more lived-in, cinematic feel, skip the sparkly inner-corner trend and rely instead on contrast: a brightened waterline, curled lashes, and a properly blended crease will make your eyes stand out more naturally than a harsh pop of metallic in the tear duct.
Step 6: Lashes With Attitude
Curl your lashes thoroughly, then apply two to three coats of volumizing mascara, focusing extra product at the roots. If some clumping occurs, consider whether it adds to the mood; slightly thick, imperfect lashes can look more like old film stills and less like a sponsored mascara ad—often a good thing for this style.
If you enjoy false lashes, choose styles that are fuller at the center and outer corner, but avoid lashes that are extremely long at the outermost ends if you have downturned or deep-set eyes. Half-lashes or individual clusters can provide tailored fullness without overwhelming the lid space you worked so hard to shape.
Balancing the Rest of Your Face
Once the eyes take center stage, the rest of the face should support, not compete. You do not have to be minimal, but you should be deliberate. Strong eyes pair beautifully with either a polished red lip or a more muted, lived-in mouth depending on your comfort level.
If you choose a bold lip, keep blush soft and well-blended, leaning toward neutral rose or muted peach. With a more understated lip, you can add a whisper of contour or a sculpted cheek to echo the shadows around your eyes and create a cohesive, cinematic feel from forehead to chin.
Face-Balancing Ideas
- Pair intense eyes with a satin or matte base rather than heavy, shiny highlighter.
- Choose lip colors that either contrast (deep red, wine) or harmonize (rosewood, mauve) with your eye intensity.
- Keep brows defined but not overpowering; they should frame the eyes, not steal the scene.
Personalizing the Look for Age and Lifestyle
Dramatic eyes are not reserved for the very young or those with hours to spend blending. What changes with age and lifestyle is the level of precision and placement. Mature eyes often look best when the deepest shades sit slightly above the natural crease, and when the lower lash line is defined with shadow instead of heavy pencil.
If your schedule is busy or your patience low, streamline the routine by relying on one long-wear cream shadow, a dark pencil, and mascara. You can sketch out depth in a few minutes, smudge with a fingertip, and still communicate that magnetic, intent gaze associated with classic screen heroines.
Common Mistakes and Simple Fixes
Even practiced makeup lovers occasionally take dramatic eyes too far or in the wrong direction. Fortunately, most issues can be corrected with blending, strategic cleanup, or small timing changes in your routine. Learning to troubleshoot quickly turns eye makeup into a creative tool instead of a source of stress.
- Problem: Eyes look smaller instead of larger.
Fix: Keep the darkest color near the outer third and consider adding a nude or off-white pencil to the lower waterline. - Problem: Shadow looks patchy or muddy.
Fix: Use less product at a time, build slowly, and always blend a medium transition shade between your lid color and brow bone. - Problem: Liner transfers to the crease.
Fix: Set creamy liner with matching eyeshadow and allow your products to dry fully before opening your eyes wide. - Problem: Look appears too harsh in daylight.
Fix: Use a clean brush dipped in face powder to soften edges, then tap a small amount of concealer at the outer corner to lift and brighten.
Building Confidence Behind Bold Eyes
The most crucial ingredient in any dramatic eye look is not the perfect brush or the exact mascara formula—it is the willingness to be seen. Bold eyes announce that you are comfortable taking up visual space, even on days when you do not feel entirely confident inside. In that sense, this style is less about vanity and more about self-definition.
Approach the process as play rather than a test you must pass. Some days, your lines will wobble or your blending will be uneven; the world will keep spinning. Over time, the ritual of sitting down, looking yourself in the eye, and applying makeup with intention can become a quiet practice of self-respect, echoing the fearless attitude that made classic icons unforgettable.
FAQs: Dramatic Eyes in Real Life
Is this look appropriate for daytime?
Yes, as long as you adjust intensity. For daytime, use softer browns or grays, keep liner close to the lash line, and apply only one coat of mascara. At night, deepen the crease, smudge the lower lash line more fully, and layer extra mascara or add false lashes.
What if my eyes are very sensitive?
Look for fragrance-free, ophthalmologist-tested products and avoid lining the inner rim with harsh pencils. Focus on eyeshadow and mascara placed just outside the waterline instead of tightlining, and remove all makeup gently with an oil or balm cleanser to reduce irritation.
Can I wear glasses with such a bold eye?
Absolutely. In fact, strong eyes can balance thicker frames beautifully. Emphasize the upper lash line and crease so your work remains visible behind the lenses, and consider slightly brightening the inner corner and lower waterline to avoid looking closed-in.
How do I make this style work on hooded or deep-set eyes?
Place your darkest shadows slightly above the natural fold so they are visible when your eyes are open. Focus more on lifting the outer corners with careful shading and mascara, and keep the inner third of the lid a bit lighter to add dimension and prevent the eye from looking sunken.
Do I have to pair this with a red lip?
No. While a red lip adds undeniable drama, a rose, berry, or nude shade can make the look more approachable and easier to wear frequently. Choose whatever lip color makes you feel like the most expressive, fully present version of yourself.
Owning Your Version of Iconic Eyes
Reimagining legendary eyes for modern life is not about exact duplication; it is about capturing a feeling of dramatic honesty. When you treat your makeup routine as a way to project personality rather than hide flaws, every swipe of liner or shadow becomes a small act of creative choice.
Whether you only adopt a slightly smokier lash line for everyday or go full cinematic for special occasions, the goal remains the same: to let your eyes tell the story you want them to tell, with all the attitude, humor, and defiance that made classic stars—and now, you—impossible to ignore.