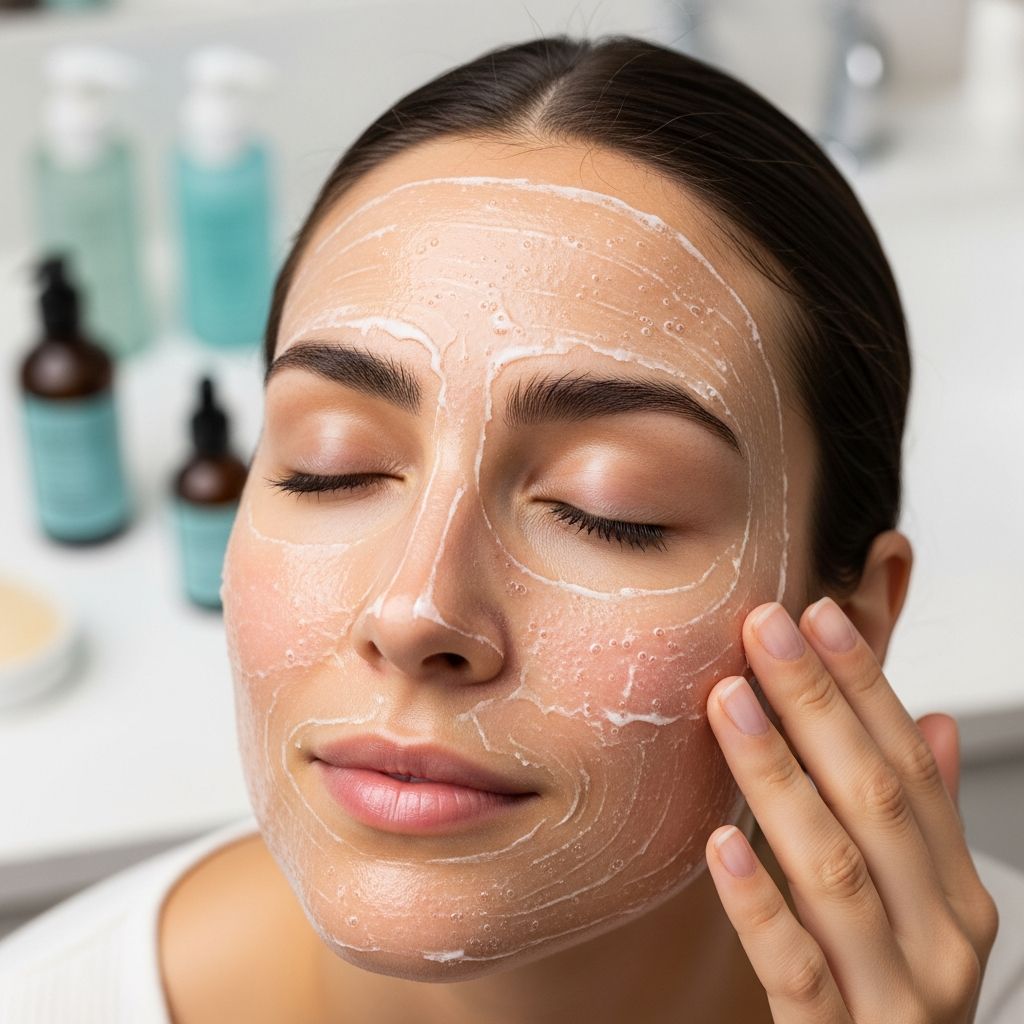
At-home face peels promise smoother, brighter, more even-toned skin without the cost or downtime of an in-office treatment. But putting acids on your face is not a casual decision, and understanding how these peels work is the first step to deciding whether they are right for you.
What Exactly Is an At-Home Face Peel?
An at-home face peel is a skincare treatment that uses exfoliating acids to loosen and remove dead skin cells from the outermost layers of the skin. Unlike professional peels, which may penetrate more deeply and require medical supervision, at-home versions are formulated in lower strengths so consumers can use them more safely at home.
Most peels come in liquid, gel, serum, or pad form and are left on the skin for a specific amount of time before being rinsed or neutralized. The goal is controlled exfoliation: enough to encourage fresh, healthier-looking skin, but not so much that the skin barrier is badly damaged.
- They are typically used to address dullness, uneven texture, fine lines, and mild discoloration.
- The concentration and type of acid determine how strong and how targeted the peel will be.
- Used correctly, they can complement a regular skincare routine rather than replace it.
How Chemical Peels Work on Your Skin
Healthy skin constantly renews itself, but that turnover slows with age, sun exposure, and environmental stress. Chemical peels boost exfoliation by dissolving the bonds that hold dead, dull cells to the surface, revealing smoother skin underneath. This process can also signal the deeper layers of the skin to produce more collagen over time.
Different types of acids act at slightly different depths and have varying side benefits. That is why some peels are better suited to acne, while others work better for pigmentation or early signs of aging.
| Acid Type | Family | Best For | Typical Sensitivity Level |
|---|---|---|---|
| Glycolic acid | AHA (from sugarcane) | Dullness, fine lines, uneven texture | Moderate to higher; can be irritating on sensitive skin |
| Lactic acid | AHA (from milk or fermented sources) | Mild exfoliation, early signs of aging, gentle brightening | Milder; often better tolerated by dry or sensitive skin |
| Mandelic acid | AHA (from bitter almonds) | Texture, mild acne, pigmentation on reactive skin | Generally gentler due to larger molecule size |
| Salicylic acid | BHA | Acne, clogged pores, blackheads, oil control | Often well tolerated by oily skin; can be drying if overused |
| Polyhydroxy acids (PHAs) | Newer acid class | Very gentle exfoliation, sensitive or compromised skin | Lowest irritation potential among common peel acids |
Potential Benefits of At-Home Face Peels
When used correctly and consistently, at-home peels can noticeably improve skin tone and texture over time. Results are typically more gradual than in-office procedures but often sufficient for everyday concerns such as dullness and minor discoloration.
Instead of relying only on scrubs, which can sometimes scratch or inflame the skin, chemical peels offer a more even, predictable form of exfoliation. This makes them particularly appealing to people who want visible changes but are not ready for clinical-strength treatments.
- Smoother texture: Makeup tends to sit better on exfoliated skin, and rough patches can appear softer after a series of gentle peels.
- Brighter tone: Removing built-up dead cells can reduce the look of sallowness and give the skin a more luminous appearance.
- Reduced appearance of fine lines: Light resurfacing can soften the look of early lines, especially around the eyes and mouth, though it will not erase deeper wrinkles.
- Mild acne support: Peels with salicylic or mandelic acid can help keep pores clear and reduce the frequency of breakouts for some skin types.
- Improved product absorption: Without a thick layer of dead cells, serums and moisturizers often absorb more evenly and feel more effective.
What At-Home Peels Cannot Do
It is important to keep expectations realistic. At-home peels use lower acid concentrations than professional treatments, which means they act more superficially. This makes them safer for self-use but also limits how dramatic the results can be.
Deep wrinkles, severe acne scars, significant sun damage, and pronounced melasma usually require stronger procedures and professional guidance. At-home products may soften the edges of these issues but are unlikely to transform them on their own.
- They cannot provide the same depth of resurfacing as a medical-grade peel or laser treatment.
- They will not tighten very lax skin or replace injectables, radiofrequency, or surgery.
- They are not a substitute for daily sunscreen, antioxidants, and long-term sun protection habits.
Are They Worth the Money?
Whether an at-home peel is “worth it” depends on your goals, budget, and personality. People who enjoy consistent routines and understand that results take time are often satisfied with gentle over-the-counter options. Those expecting a one-time miracle are usually disappointed.
Compared with professional treatments, at-home peels can be far more affordable, especially when used over months. However, if your concerns are advanced or very specific, repeatedly buying mild products may cost more in the long run than a few targeted visits with a dermatologist or licensed aesthetic professional.
- They tend to offer good value for mild texture issues, minor hyperpigmentation, and general brightness.
- They are less cost-effective if you expect them to treat deep wrinkles or significant acne scarring.
- They are only truly worthwhile if you are willing to follow directions, introduce them slowly, and protect your skin from the sun.
Who Is a Good Candidate?
At-home peels are not one-size-fits-all. Some people’s skin responds beautifully to gentle, regular exfoliation, while others react with redness, stinging, or breakouts. Knowing your skin type and history is crucial before trying any peel.
As a general rule, the more sensitive or reactive your skin is, the more cautious you should be with at-home chemical exfoliation. Certain diagnoses and medications also require extra care or complete avoidance of peels.
Typically Good Candidates
- People with mild dullness or uneven texture who do not have a history of severe sensitivity.
- Individuals with oily or combination skin looking to manage clogged pores using salicylic or similar ingredients.
- Those already comfortable with basic skincare (cleanser, moisturizer, sunscreen) who want to add an exfoliating step.
People Who Should Be Extra Cautious or Avoid Peels
- Anyone with very sensitive, reactive, or rosacea-prone skin, unless guided by a professional.
- People using prescription retinoids, certain acne medications, or other strong actives that already increase cell turnover.
- Those with a history of keloid scarring, frequent cold sores around the mouth, or very dark marks after minor injuries.
- Individuals who cannot or will not commit to daily broad-spectrum sunscreen, as peels can increase sun sensitivity.
How to Choose the Right At-Home Peel
Choosing a peel should begin with your primary concern, then your skin type, and only then with marketing claims. Labels like “glow” or “radiance” are vague; the ingredient list and instructions tell you much more about how a peel will behave on your skin.
When in doubt, select a gentler product and see how your skin responds over several weeks before trying anything stronger. Patience usually leads to better results and fewer problems.
- For dullness and fine lines: Look for low to moderate strength glycolic or lactic acid formulas, ideally in leave-on or rinse-off peels used once or twice a week.
- For mild acne and clogged pores: Consider peels containing salicylic acid or combinations of BHA with gentle AHAs.
- For uneven tone or dark spots: Mandelic acid or lactic acid peels may be helpful, especially when combined with brightening ingredients like niacinamide.
- For sensitive or compromised skin: Choose polyhydroxy acid or very low-strength AHA blends marketed specifically for sensitive skin.
- For beginners: Start with once-weekly use and avoid multi-acid, high-percentage products until you know how your skin reacts.
Step-by-Step: How to Use an At-Home Face Peel Safely
Following a clear process can reduce the chances of irritation and help you evaluate whether the peel is doing anything positive for your skin. Always read the specific instructions for your product, as timing and neutralization steps vary.
- Patch test first. Apply a small amount of product to a discreet area (such as behind the ear or along the jawline) and wait 24 hours to check for redness, swelling, or burning.
- Prepare your skin. On peel day, cleanse gently with a mild, non-exfoliating cleanser and pat dry. Avoid scrubs, retinoids, and other acids for at least 24 hours before and after.
- Apply a thin, even layer. Use clean fingers or a cotton pad, avoiding the eye area, nostrils, and lips. Do not pile on extra product “for better results.”
- Respect the time limit. Leave the peel on only as long as the instructions state, especially in the first few uses. If you feel intense burning, rinse off immediately.
- Rinse or neutralize as directed. Some peels require water to remove; others include neutralizing solutions. Follow the brand’s instructions carefully.
- Moisturize generously. Apply a simple, soothing moisturizer without strong actives. This helps support the skin barrier after exfoliation.
- Protect with sunscreen. The next morning, use a broad-spectrum sunscreen and limit direct sun exposure. This is non-negotiable if you want to maintain results and avoid damage.
Common Mistakes to Avoid
Most problems with at-home peels come from using too much, too often, or mixing them with other strong products. Learning what not to do is just as important as knowing how to apply them.
- Over-exfoliating: Layering multiple acids, scrubs, and retinoids in the same routine can strip the barrier and leave skin red, tight, and flaky.
- Ignoring instructions: Leaving a peel on longer than recommended rarely improves results but often increases irritation.
- Skipping sunscreen: Exfoliated skin is more vulnerable to UV damage, which can lead to more pigmentation and premature aging.
- Using them on broken or inflamed skin: Peels should not be applied over open blemishes, cuts, or active rashes.
- Chasing a visible “peel”: Flaking is not the only sign a product is working; some effective peels produce little or no visible shedding.
At-Home vs. Professional Peels
At-home and professional peels sit on the same spectrum but at very different strength levels. While they share similar mechanisms, the experience, downtime, and potential results vary greatly.
| Aspect | At-Home Face Peels | Professional Chemical Peels |
|---|---|---|
| Strength | Lower acid concentration; designed for consumer safety | Higher concentration; can reach deeper skin layers |
| Results | Gradual improvement with consistent use | More dramatic change, sometimes after a single session |
| Downtime | Typically little to no visible peeling or social downtime | May involve several days of redness, flaking, or shedding |
| Cost | Lower per treatment; cost adds up over time | Higher per session; fewer treatments may be needed |
| Safety Monitoring | Self-administered at home; relies on user following directions | Supervised by trained professional who can adjust strength and timing |
| Best For | Mild texture issues, dullness, minor hyperpigmentation | More significant sun damage, deeper wrinkles, pronounced scarring |