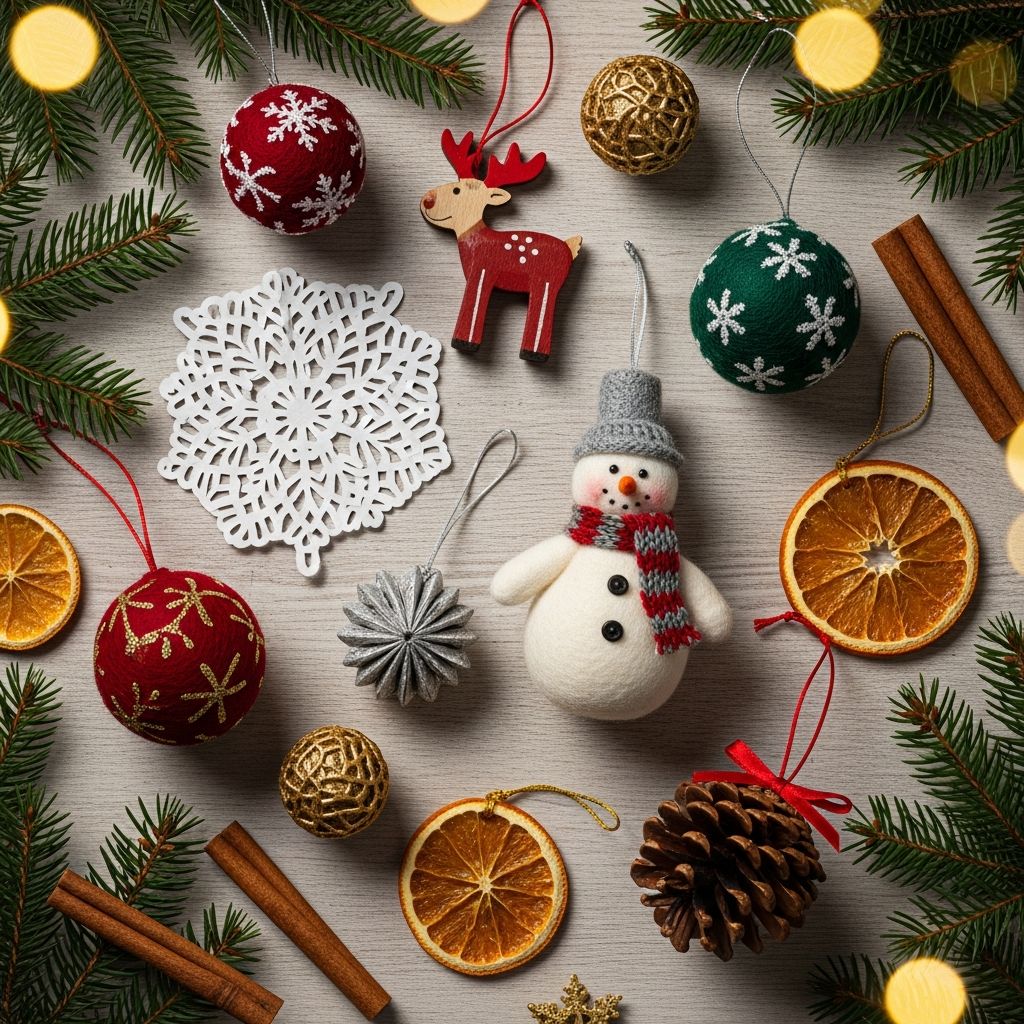
Handmade Christmas ornaments turn a decorated tree into a living scrapbook of your family’s memories. Instead of buying another box of mass-produced baubles, you can create pieces that capture your stories, your style, and your traditions year after year.
This guide shares fresh, original ideas for designing, crafting, and displaying homemade ornaments, using simple materials and approachable techniques suitable for beginners and families.
Why Handmade Ornaments Matter
Store-bought ornaments can be lovely, but handmade ornaments carry something extra: a record of who made them, what season of life they were in, and what your family was celebrating at the time. Every small imperfection becomes part of the charm and the story.
When you build a collection of homemade pieces, your Christmas tree shifts from generic decor to a personal gallery where each branch holds a tiny moment in time.
Planning Your Ornament Crafting Session
A little planning makes ornament crafting less stressful and more fun. Think through your goals and choose a few focused projects instead of trying to make everything at once. This also helps you avoid overspending at the craft store.
Use the checklist below to simplify preparation for a crafting afternoon or weekend.
Quick Planning Checklist
- Decide on a style theme (rustic, colorful, minimalist, nostalgic, etc.).
- Pick 2–4 ornament ideas that use overlapping materials.
- Gather supplies and tools in one container before you start.
- Set up a protected workspace with paper or a plastic tablecloth.
- Plan for drying time if using paint, glue, or sealants.
Essential Supplies for DIY Ornaments
You can make impressive ornaments using basic, inexpensive materials. Many can be found at dollar stores, thrift shops, or already in your home, making these projects budget-friendly and accessible.
Consider the table below as a handy reference when shopping or raiding your craft stash.
| Material | Typical Uses | Who It Suits Best |
|---|---|---|
| Cardboard & cardstock | Simple shapes, layered designs, templates, kid-friendly cutouts. | Families with young children and beginners. |
| Felt & fabric scraps | Soft ornaments, sewn or glued shapes, stuffed decorations. | Sewers, quilters, and tactile crafters. |
| Yarn & twine | Wrapped forms, tassels, pom-poms, rustic hangers. | Anyone who enjoys cozy, textured decor. |
| Wood slices & craft sticks | Painted designs, rustic signs, geometric trees or stars. | Fans of farmhouse and natural styles. |
| Clear plastic or glass balls | Fillable ornaments, photo keepsakes, glitter or confetti designs. | Crafters who like customizable, polished looks. |
| Buttons, beads & sequins | Accents, centers of flowers, borders, sparkling details. | Detail-oriented makers and older kids. |
Family-Friendly Ornament Ideas
Projects that kids can help with become some of the most treasured ornaments on the tree. Aim for ideas that tolerate crooked cuts and extra glue, so the process stays joyful instead of stressful.
Below are adaptable concepts you can use with children of different ages, adjusting tools and expectations as needed.
1. Storybook Character Silhouettes
Turn your family’s favorite books into ornaments by creating character-inspired silhouettes or symbols. You don’t need advanced drawing skills; simple shapes and colors can represent beloved stories.
- Trace simple outlines (a hat, an animal shape, a wand) onto sturdy paper or thin cardboard.
- Let kids paint or color them, then add glitter accents or stickers.
- Punch a hole at the top and tie with ribbon or yarn to hang.
2. Handprint & Footprint Keepsakes
Small hands and feet grow quickly, so capturing their size in ornament form creates sentimental pieces that become more meaningful each year. Use non-toxic paint and thick paper or fabric for durability.
- Paint a child’s hand or foot lightly, press onto cardstock, then let it dry.
- Cut around the print, mount it on a contrasting backing, and label it with name and year.
- Laminating or sealing with clear tape extends the life of the ornament.
3. Collage Memory Circles
Use leftover wrapping paper, old holiday cards, or magazine clippings to create colorful collage ornaments. This is an excellent way to teach kids about reusing materials creatively.
- Cut circles from cardboard and spread a thin layer of glue on one side.
- Layer small paper pieces in overlapping patterns, trimming the edges when dry.
- Add a second layer on the back or write a short memory from the year.
Elegant Ornaments for Grown-Up Trees
If you prefer a more refined tree, handmade ornaments can still feel polished and sophisticated. Focus on a tight color palette, consistent materials, and clean shapes for a cohesive look.
The following ideas work well when you want your handmade decor to resemble boutique ornaments while still being personal.
4. Monochrome Yarn Spheres
Minimalist yarn-wrapped spheres offer texture without visual clutter. Choose one or two complementary colors to keep them modern and coordinated with your existing decor.
- Wrap plain baubles or lightweight balls with a single color of yarn, aligning fibers neatly.
- Secure the ends with clear-drying glue and finish with a matching loop for hanging.
- Add a tiny metal charm or bead where the hanger meets the ornament for subtle detail.
5. Pressed Greenery Frames
Pressed leaves, herbs, or small flowers can be showcased inside simple frames or clear ornaments. The result feels delicate and natural, especially for fans of botanical decor.
- Press small evergreen tips, ferns, or seasonal blooms between book pages for several days.
- Sandwich the pressed pieces between two shapes of thin plastic or acetate.
- Seal the edges with decorative tape or a narrow ribbon and attach a hanger.
6. Metallic Initial Tags
Letter ornaments add a custom touch while remaining simple to make. Choose a single metallic finish, such as gold or pewter, to tie your whole collection together.
- Cut or purchase wooden or cardboard letters and coat them with metallic paint.
- Outline each letter with a thin line of glitter glue or tiny adhesive gems.
- Use narrow velvet ribbon or metallic cord as the hanging loop.
Ornaments That Capture Memories
Beyond being pretty, ornaments can record milestones from each year: a new home, a big trip, a new family member, or even a favorite hobby. Building a tradition around memory ornaments helps your tree tell a clear, evolving story.
Try one or more of these approaches to preserve your family’s highlights in miniature form.
7. Mini Time-Capsule Globes
Think of these as yearly snapshots sealed inside clear ornaments. Each globe can hold items that symbolize what mattered most that year.
- Fill a clear ornament with tiny notes, ticket stubs, or confetti in your chosen color scheme.
- Add a slim piece of paper listing the year and one meaningful memory.
- Close securely and label the outside with a small tag or paint pen.
8. Photo Strip Ornaments
Turn small prints into sweet ornaments without requiring special equipment. These pieces are especially meaningful for grandparents or far-away relatives.
- Print miniature photos and mount them on a strip of cardstock in a vertical row.
- Decorate the border with washi tape or thin ribbon.
- Attach a loop at the top and a small charm or bead at the bottom for balance.
9. Firsts & Milestones Series
Dedicate one ornament each year to a single major event: a first day of school, a new pet, or a big achievement. Over time, you’ll build a chronological set your family can revisit while decorating.
- Choose a consistent shape, like a circle or star, to repeat each year.
- Write a brief title and date on the back using a paint pen or permanent marker.
- Store them together and hang them in order on the tree for a built-in timeline.
Eco-Conscious Ornament Ideas
Handmade decorations are a natural fit for sustainable living when you focus on reusable, recyclable, and biodegradable materials. You can reduce waste and still achieve a festive, beautiful tree.
These ideas make good use of what you already have while teaching children the value of resourcefulness.
10. Upcycled Fabric Stars
Old shirts, tablecloths, or outgrown pajamas can enjoy a second life as soft ornaments. Mixing prints from different eras gives your tree a patchwork, collected-over-time feel.
- Cut two identical star shapes from fabric scraps and place them right sides together.
- Sew or glue around the edges, leaving a small opening for stuffing.
- Turn right side out, fill lightly with scrap fabric or batting, and close the opening.
11. Paper Tube Snowflakes
Recycled cardboard tubes can become intricate snowflake shapes with just a bit of cutting and arranging. Painted in white or metallic tones, they look far more elaborate than their humble origins.
- Flatten tubes and cut them into narrow rings of equal width.
- Arrange the rings into symmetrical snowflake designs and glue at the contact points.
- Once dry, paint and sprinkle a light layer of glitter for a frosted effect.
12. Natural Element Charms
Simple elements from nature make beautiful ornaments with a warm, organic feel. Pinecones, twigs, and dried citrus slices require little processing to look special.
- Dry slices of citrus in a low oven, then thread them onto twine with wooden beads.
- Bundle small twigs into mini stars or trees and secure with string.
- Tie a simple bow around pinecones and add a loop to hang.
Displaying and Storing Your Ornaments
How you display and store your ornaments affects how long they last and how impressive they look each season. Thoughtful placement and gentle packing preserve your hard work for years to come.
A few simple rules can prevent breakage, fading, and tangled hangers.
Display Tips
- Hang heavier ornaments closer to the trunk on sturdy branches.
- Group similar colors or materials in clusters for visual impact.
- Reserve eye-level spots for the most meaningful or detailed pieces.
Storage Tips
- Wrap fragile ornaments individually in tissue or fabric before boxing.
- Label each box by theme or year so you can rotate collections.
- Keep ornaments in a cool, dry place to prevent warping and discoloration.
Frequently Asked Questions About Handmade Christmas Ornaments
How can beginners avoid crafts that feel too complicated?
Start with projects that involve only cutting, gluing, and simple painting, rather than sewing or power tools. Limiting your color palette and material list also reduces decision fatigue and keeps everything cohesive.
What is the best way to involve very young children safely?
Provide pre-cut shapes, non-toxic glue, large stickers, and markers, and let small children handle the decorating portion only. Avoid tiny beads, hot glue, and glass ornaments until they are older and can follow safety instructions.
How do I keep handmade ornaments from looking cluttered on the tree?
Choose a guiding theme—such as three main colors or a shared material like wood or fabric—and repeat it across most ornaments. Mixing in a few plain store-bought pieces can give the eye resting spots and help highlight your handcrafted work.
Can handmade ornaments be given as gifts?
Yes, they make thoughtful, personal gifts, especially when they include initials, dates, or shared memories. Present them in small boxes or tied to the top of wrapped presents so they become both decor and keepsake.
How far in advance should I start making ornaments?
Beginning in early autumn or late summer gives you time to experiment without pressure, but even a single focused weekend can produce a full set. The key is to batch similar steps, such as painting or cutting, so you can move quickly between projects.
Whether you choose kid-made collages, refined monochrome designs, or eco-friendly creations, handmade Christmas ornaments offer a way to turn a seasonal decoration into a lasting family tradition. Over the years, each new ornament will mark where you have been and who you have become together.